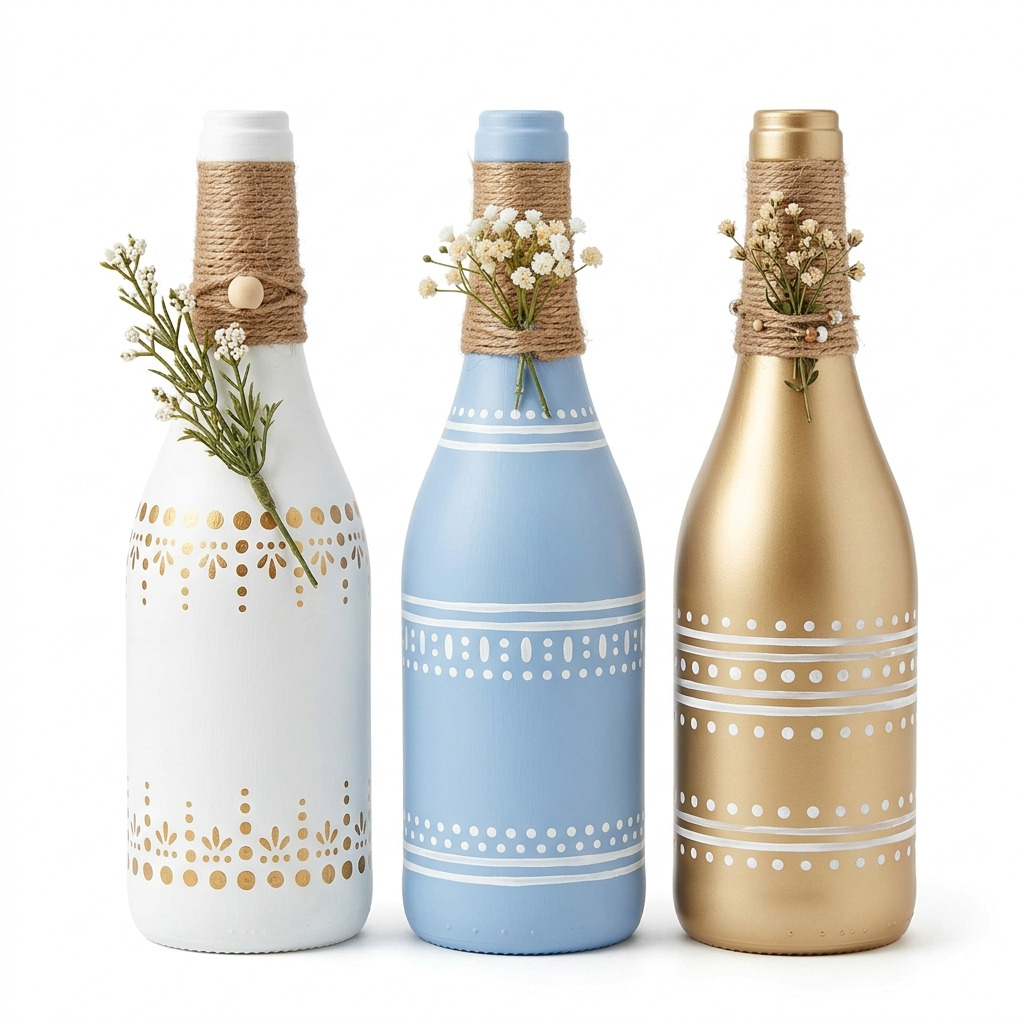
I’ve always had a love for thriftiness and creativity, and that’s how this project came to life! Last winter, I found myself drowning in a collection of empty glass bottles — wine bottles, soda bottles, you name it. I hated the thought of just tossing them in the recycling, so I decided to turn them into something beautiful. Now, I have these elegant home decor pieces that not only brighten up my living space but are also great conversation starters.
Each bottle has its unique charm, and you can style them in various ways, whether filled with fresh flowers or standing alone as a statement piece. The best part? This project is super easy, and I’ll guide you through every step of the way!
[Descriptive image caption of the finished project]
What You'll Need
Materials:
- Empty Glass Bottles: 3 bottles, approximately 10-12 inches in height (wine bottles, soda bottles work great)
- Acrylic Paint: 1 bottle of matte or satin finish paint in your chosen color (I love white, pastel blue, or metallic gold)
- Paintbrushes: 1 round brush (size 6) and 1 flat brush (1 inch) for painting
- Paint Sealant: Clear acrylic spray sealer (choose either a matte or glossy finish for your preferred look)
- Embellishments:
- Twine or Jute String: About 10 feet for wrapping around the neck of the bottles
- Artificial Flowers: 2-3 stems, depending on your bottle size, to add a floral touch
- Decorative Beads or Rhinestones: Optional, but they add extra sparkle or detail
- Hot Glue Sticks: 5 sticks to secure embellishments
- Craft Glue: Multi-surface craft glue, to attach beads and small embellishments
Tools:
- Hot Glue Gun: A standard size is all you need
- Scissors: Sharp scissors for cutting twine and string
- Ruler: A 12-inch ruler for measuring lengths
- Crafting Knife: For any delicate cutting (this is optional)
- Paint Palette: To mix your paint easily
- Workspace Protection: A craft mat or some old newspaper to protect your surfaces
- Safety Equipment: Wear gloves if you’re handling sharp edges or paint!
How to Make It, Step by Step
Preparing the Bottles
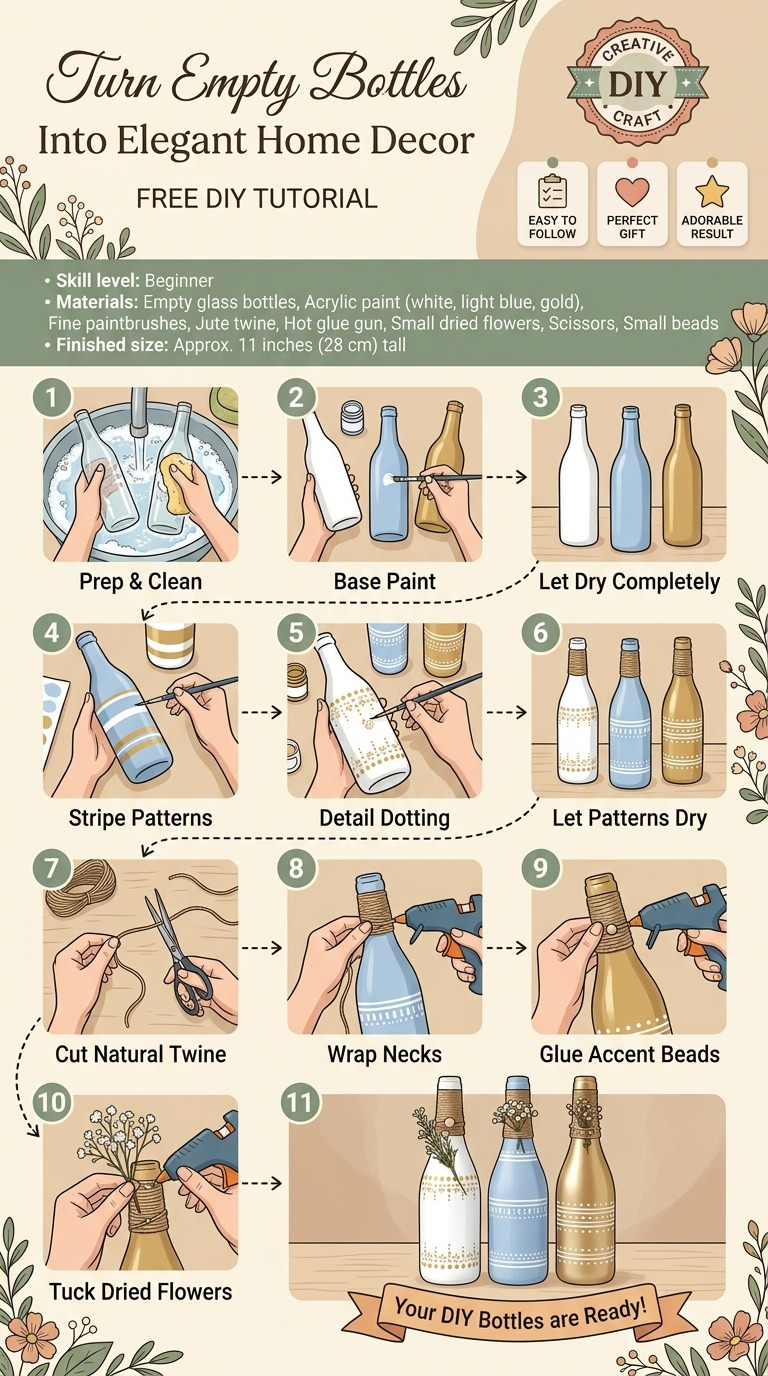
Step 1: Clean Bottles
First things first, make sure your bottles are clean. Remove any labels and sticky residue. I like to soak them in warm, soapy water, scrub well, rinse, and let them dry completely. This step is crucial for good paint adhesion!
Step 2: Paint Base Layer
Now that your bottles are clean, grab your flat brush and dip it into the acrylic paint. Apply a smooth, even layer across the outside of each bottle. Don’t worry if it isn't perfect — we’re going for elegance, not absolute perfection! Let the paint dry for about 30 minutes.
Tip: If you notice drips when painting, just smooth them out with your brush before the paint dries.
Painting the Bottles
Step 3: Second Coat
Once the first coat is dry, it’s time for a second coat! This will give your bottles better coverage and make them look polished. Again, let this coat dry for another 30 minutes.
Step 4: Optional Design
Feel free to let your creativity shine! If you'd like, use a contrasting color of acrylic paint and your round brush to create fun designs like stripes or dots. Allow this layer to dry for about 15 minutes. It’s all about what feels good to you!
Sealing the Paint
Step 5: Apply Sealant
When your paint is completely dry (at least 1 hour later), you can seal it. Take your clear acrylic spray sealant and find a well-ventilated area for this step. Hold the can about 12 inches away from each bottle and spray a light, even coat. Let it dry, following the sealant’s instructions, which usually takes around 30 to 60 minutes.
Adding Embellishments
Step 6: Wrap Twine
Next, cut a length of twine or jute string about 2 feet long. Wrap it around the neck of the bottle several times for added texture and charm. Secure the twine with a hot glue dot to keep it in place.
Step 7: Attach Flowers
Now, take your artificial flowers and cut the stems down to your desired length (I usually like around 6-8 inches). Use hot glue to secure them to the bottle, either above or below the twine, depending on how you’d like them to look. Get creative here!
Step 8: Extras
If you’re using decorative beads or rhinestones, which I definitely recommend for that extra flair, adhere them with craft glue to the chosen areas of the bottle. Let the glue dry for at least 30 minutes before moving the bottle around.
Assembly & Finishing
Well done! All parts are already combined through the previous steps, so just double-check that your embellishments are securely attached. If you’re planning to use these bottles as vases, pop flowers in and see how it all looks together!
Common Mistakes to Avoid
- Skipping the Cleaning Step: Without cleaning the bottles properly, the paint may peel off. Make sure to remove all labels and residue before you start painting.
- Rushing the Glue: If you don’t allow the glue to dry, your flowers or twine will fall off. Be patient and let each layer dry adequately.
- Too Thick of a Paint Layer: If you apply the paint too thickly, it could run or create an uneven finish. Thin layers are best for a smooth look.
- Not Allowing Enough Dry Time: Skipping dry times might lead to smudging or streaking. Always wait for the suggested time before proceeding to the next step.
- Using the Wrong Sealant: If you don’t use a spray sealant, your paint may not be protected. Make sure it’s a product meant for acrylic paint!
Make It Your Own: Variations and Ideas
- Change the Color Palette: Try bold colors like deep red or emerald green for a dramatic look. Your space will feel fresh and exciting with new hues!
- Incorporate Natural Twine with Color: Consider dyeing your twine for a personal touch. This could enhance the boho or rustic vibe of your decor.
- Go Seasonal: Decorate for the seasons by changing the flowers or colors! Use faux autumn leaves in the fall, bright blossoms in spring, or festive ornaments for the holidays.
- Raise the Bar: Make taller arrangements by stacking multiple bottles on top of each other. Secure them carefully for a tiered effect that draws the eye.
Remember, this is your project now, and you can customize it however you like!
Before You Go
Pin this for the next rainy afternoon: Save this post to your Pinterest so you can easily come back to these steps, measurements, and drying times when you're ready to create your chic bottle decor.
Come back and tell me how it went: Don’t hesitate to reach out with any questions or comments — I want to hear how your project turned out! Even if it didn’t go as planned, I’m here to help.
Show off what you made: I can't wait to see your elegant bottles transformed into decor magic!
Happy crafting!