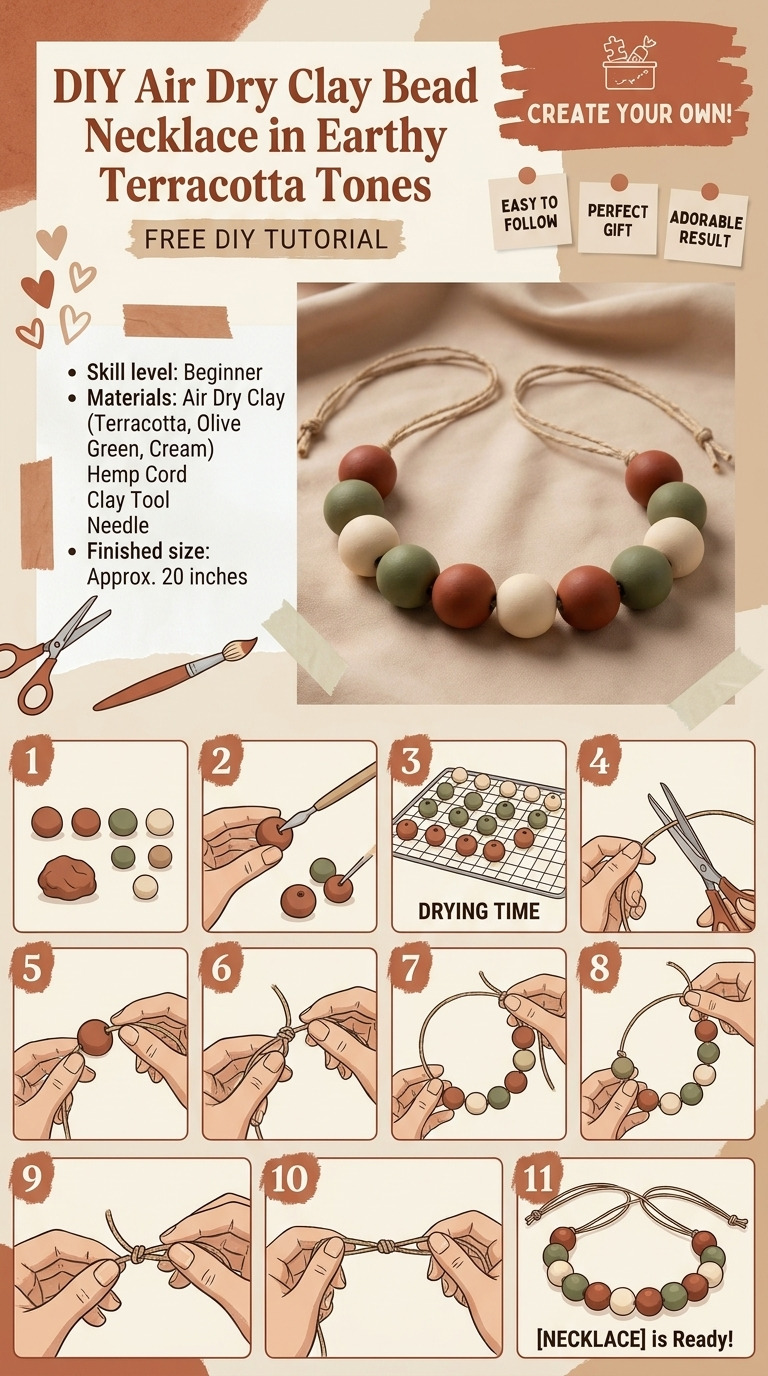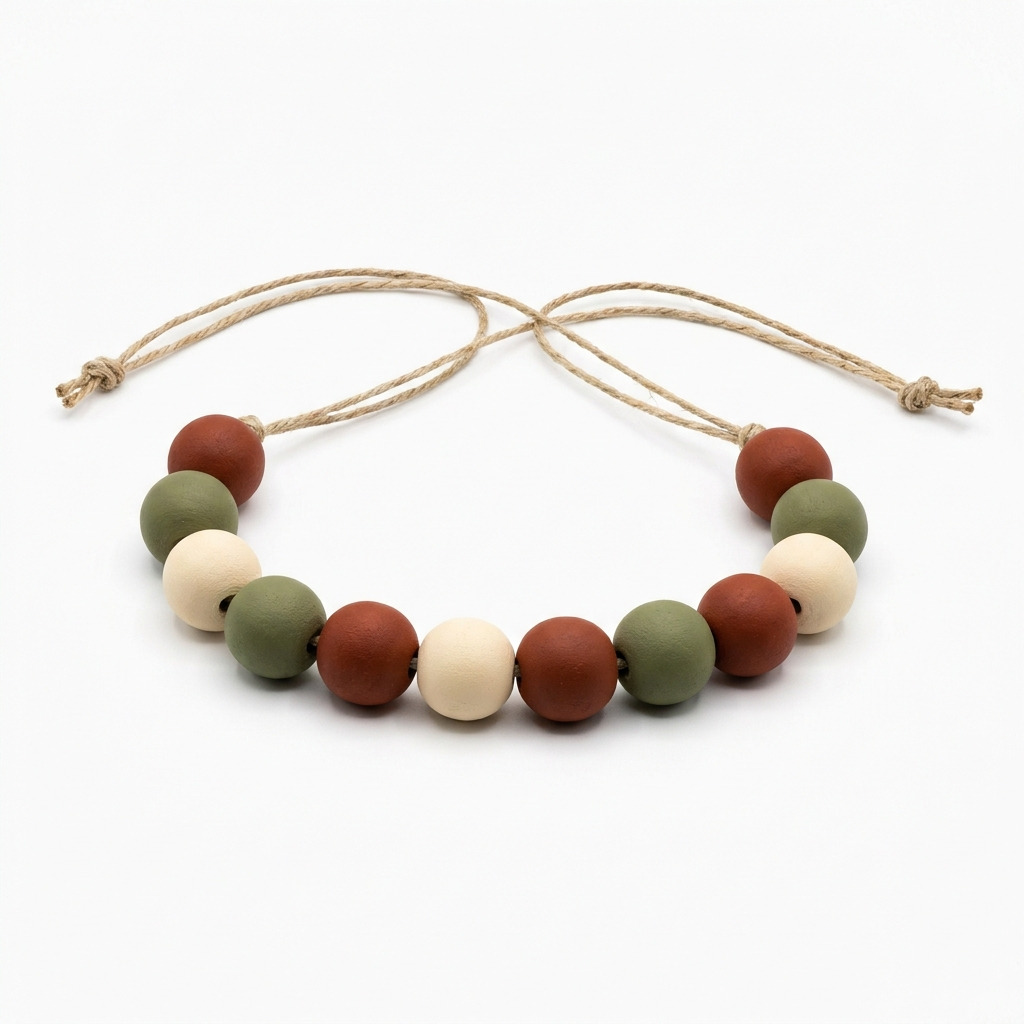
I have always loved the look of handmade jewelry, but I didn't want to break the bank to get that unique style. One winter afternoon, I found myself surrounded by a pile of air dry clay I had bought ages ago, just waiting for the right project. The idea struck me to create a necklace with chunky, earthy terracotta beads that would be a stunning addition to any outfit. After a little creativity and some patience, I ended up with a beautiful, one-of-a-kind necklace that reflects the cozy, natural tones of the earth itself.
This project is an easy and satisfying way to create something lovely with your own hands. Whether you're dressing up for a night out or looking for something casual to wear every day, this necklace adds that perfect touch. I promise you, even if you’ve never made jewelry before, I’ll walk you through every step of the process!
[Descriptive image caption of the finished project]
What You'll Need
Materials:
- Air dry clay: 1 pack (approximately 1 lb) in terracotta color, needed to make the beads.
- Acrylic paint: 2 oz bottle each in burnt sienna, olive green, and cream, for adding color to the beads.
- Bead cord: 1 spool, 0.5 mm thick, in natural hemp color (approximately 30 inches), to string the beads together.
- Clear acrylic sealer spray: 4 oz, to protect and finish the painted beads.
- Sandpaper: 220 grit, for smoothing out the beads.
- Paintbrush: 1 flat, 1/2 inch wide, for applying paint to the beads.
- Oven mitts or gloves: these are great for handling baked beads, in case you choose to bake the clay for quicker drying (not necessary but an option).
- Optional materials: additional beads or charms for embellishment; waxed linen thread adds a different texture if you prefer.
Tools:
- Roller or a smooth, flat surface: for rolling out the clay.
- Craft knife: for cutting the clay as needed.
- Drilling tool or small dowel: for making the holes in the beads (around 1/8 inch diameter).
- Ruler or measuring tape: to measure lengths accurately.
- Non-stick craft mat: to work on without sticking to surfaces.
- Safety equipment: None required!
How to Make It, Step by Step
Step 1: Knead the Clay
Start by taking a portion of the air dry clay—about 4 oz—and knead it for 3-4 minutes with your hands. This helps soften it and makes it easier to work with. You want the clay to feel smooth and pliable, like dough.
Step 2: Roll the Clay into Beads
Now, tear off small pieces of the kneaded clay and roll them into balls about 0.5 inches in diameter. Aim for around 12 balls if you're making a single-strand necklace. You can check if they’re even by comparing them – a little size variation adds character!
Step 3: Make Holes in the Beads
Take your dowel or skewer and gently poke a hole through the center of each bead. Be cautious here—too much pressure can crack the clay. Make sure the hole is roughly 1/8 inch wide to fit your bead cord later.
Step 4: Smooth the Surface
Use the 220 grit sandpaper to gently smooth any rough edges or imperfections. The beads should feel nice to the touch without any sharp bits sticking out. If you notice uneven spots, sand them down until smooth.
Step 5: Let the Clay Dry
Place the beads on a drying rack or sheet of parchment paper and let them dry completely for 24 hours. Remember to turn them every few hours so they dry evenly; otherwise, you might get some weird shapes!
Step 6: Paint the Beads
Once your beads are fully dry, it’s time to add color! Use your paintbrush to paint half the beads in burnt sienna, a third in olive green, and use cream paint for highlights. Be careful not to overload your brush—aim for even, thin coats for a nice finish. Allow the paint to dry for about 20 minutes.
Step 7: Seal the Beads
In a well-ventilated area, spray the dried painted beads with a clear acrylic sealer. This step adds protection and a slight sheen to your beads—let this dry for at least an hour.
Step 8: Cut the Bead Cord
Cut your bead cord to approximately 30 inches in length. This gives you enough length to tie knots at each end and adjust the necklace to your desired fit.
Step 9: String the Beads
Now for the fun part! Start stringing your beads onto the cord in your chosen pattern—be creative! Leave about 4 inches of cord at each end for tying. I like to alternate the colors for a visually interesting look.
Step 10: Tie the Necklace
Once all the beads are on, tie a secure knot at each end of the cord. Double knot for extra security—this is essential if you plan on wearing the necklace regularly. Trim any excess cord if it feels too long.
Common Mistakes to Avoid
- Getting clay too dry. If the clay starts to dry out while you're working with it, it will be hard to mold. Keep a small bowl of water nearby to keep your fingers damp.
- Making holes too small. If your holes aren’t wide enough for the cord, you’ll have to re-do them. Make sure to check the fit with the cord before the beads dry completely.
- Skipping the drying time. If you don’t let the clay dry completely, it may crack or lose shape when you paint it. Give it a full 24 hours.
- Applying thick paint. Avoid heavy paint layers; they can lead to chipping. Thin layers are key here!
Make It Your Own: Variations and Ideas
- Different bead sizes: Try making some larger beads (up to 1 inch) for a bolder look.
- Use different colors: Consider using bright colors for a funky vibe, or pastels for a soft look.
- Experiment with finishes: Use metallic or glossy paints for a modern, chic touch.
- Add charms: Attach some fun charms to your necklace to personalize it more.
- Adjust the length: Make shorter or longer necklaces depending on your style preference.
I encourage you to get creative and make this project truly your own!
Before You Go
Pin this for the next rainy afternoon: I hope you save this post so you can easily find the materials and steps for your next crafting session when you're ready to dive in!
Come back and tell me how it went: I love hearing about your crafting adventures, so don’t hesitate to ask questions or share your results—even if they didn’t go as planned!
Show off what you made: I would be thrilled to see your finished necklaces! Happy crafting, my friend!