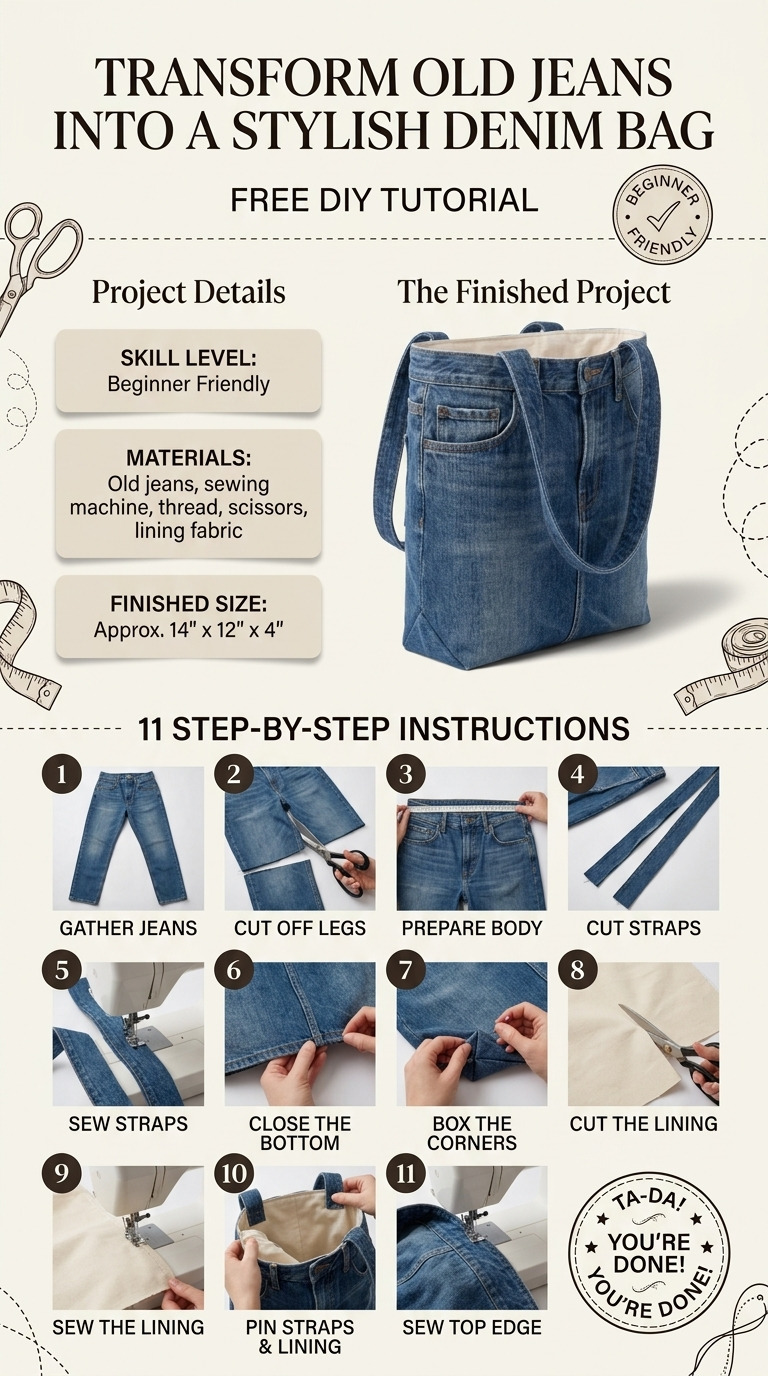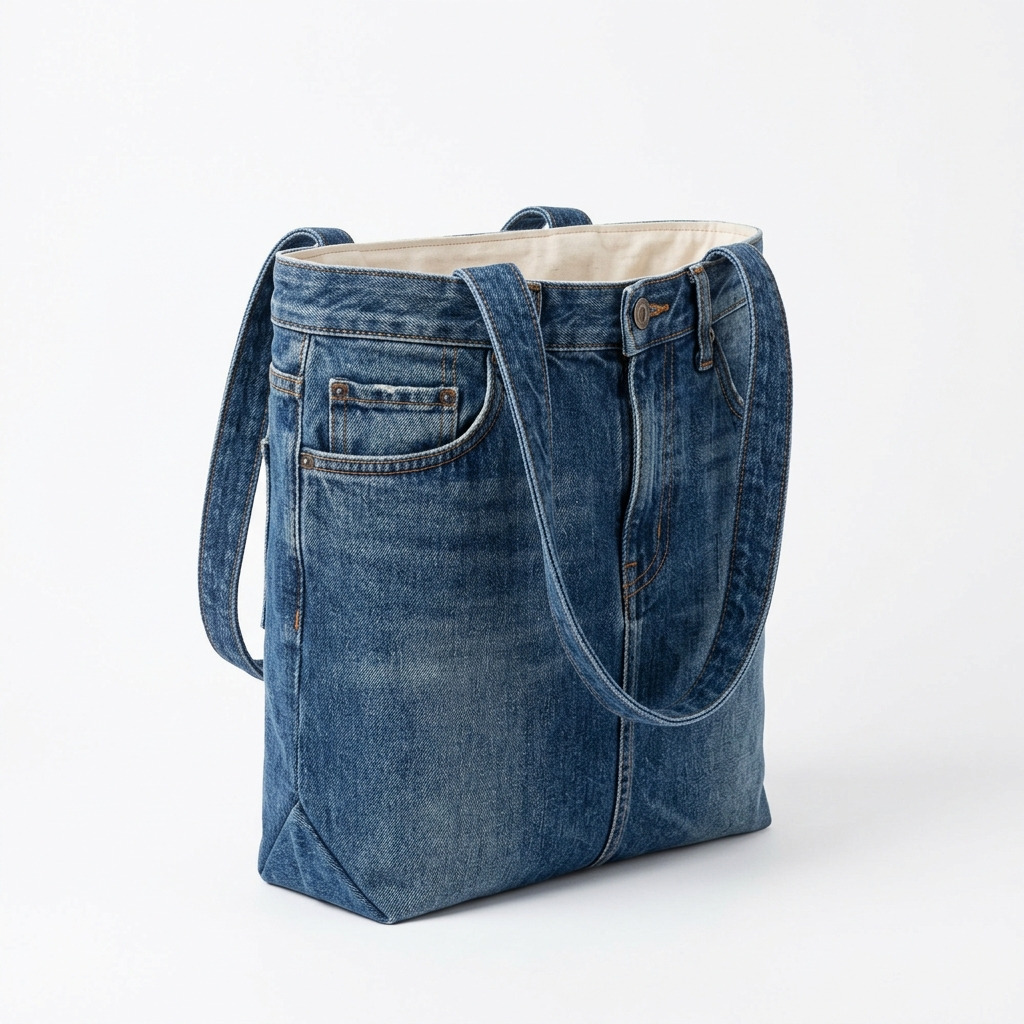
I think we all have that one pair of jeans in the back of our closets that just don’t fit anymore or have seen better days. I had a beloved pair that I couldn’t bear to throw away but also couldn’t bring myself to wear. So, I decided to transform them into a bag! It’s a fun and creative way to repurpose something I loved, and the best part is that it’s completely functional. My denim bag has become a daily go-to for groceries, books, or even as a beach tote. Trust me, you’re really going to love this project—especially because it’s super easy. I’ll guide you through every step!
Here’s your chance to turn those old jeans into something stylish and practical. Let’s dive into this fun project!
[Descriptive image caption of the finished project]
What You'll Need
Materials:
- Old denim jeans: 1 pair (preferably in a medium to dark wash; these will be the main body of your bag)
- Fabric lining: 1/2 yard of cotton fabric (pick a color or pattern that you love)
- Interfacing: 1/2 yard of fusible interfacing (this adds structure to your bag)
- Sewing thread: 1 spool of all-purpose polyester thread (choose a color that matches your denim)
Tools:
- Sewing machine: (or needle and thread if you're hand sewing)
- Fabric scissors: 1 pair (fabric scissors make cuts cleaner)
- Fabric pins: 10-15 (to hold your fabric in place)
- Iron: for pressing
- Ironing board: (any clean flat surface will work)
- Ruler: at least 12 inches long (for measuring)
- Chalk or fabric marker: (to mark cuts on your fabric)
Optional:
- Embellishments: like fabric patches, studs, or embroidery floss (to personalize your bag)
How to Make It, Step by Step
Step 1: Prepare the Denim
Begin by cutting the legs off the jeans. You'll want to cut about 8 inches from the crotch seam, so you have a good amount of fabric to work with. This will form the body of your bag. Once cut, turn the jeans inside out. This will be the inner side of your bag, which gives it a neat finish outside.
Step 2: Create the Bag Body
With your denim still inside out, align the back seam (if your jeans have one) to a side, making a tube-like shape. Use fabric pins to hold the side seams together, ensuring everything lines up neatly. Sew along each side seam with a 1/2-inch seam allowance. Remember: backstitch at both the start and the end for added durability. You'll want to repeat this step for both sides.
Step 3: Prepare the Lining
Take your lined fabric pieces and pin them together with the right sides facing in. It’s like giving your bag a cozy inner lining! Sew along the sides and bottom of your lining, also leaving the top open. Just like before, use a 1/2-inch seam allowance. Don’t forget to leave about a 1-inch seam allowance at the bottom for the next steps!
Step 4: Attach the Interfacing
Now, let’s add some structure! Take the interfacing and fuse it to the wrong side of each lining piece, following the instructions on the interfacing package. This step is crucial for making sure your lining has a nice shape and won’t sag.
Step 5: Create the Bag Bottom
Time to give your bag a nice shape! For the denim bag body, pinch one corner of the bag to create a triangle. Measure out about 2 inches from the point of the corner and mark it with chalk. Sew straight across this triangle to create a flat bottom for your bag. Tip: Repeat this for the other corner. You should see your bag starting to take shape!
Step 6: Repeat for the Lining
Do the exact same pinching and sewing for the lining. Important: Keep the bag unzipped for easy turning later on.
Step 7: Combine Denim and Lining
Now let’s bring the denim bag and lining together! Insert the lining into the denim bag, with the right sides facing each other. Align the top edges of both and pin them together securely. Sew all around the top edge using a 1/2-inch seam allowance.
Step 8: Turn the Bag
Here comes the fun part! Carefully pull the bag through the opening you left in the lining, turning the denim right side out. Tuck the lining neatly inside the bag and smooth out any wrinkles you may see.
Step 9: Finish the Bag
Last but not least, we need to finish that lining opening! Fold the edges in where you left the opening and sew it closed. For a polished look, do a topstitch around the top edge of the bag, about 1/4 inch from the top.
Common Mistakes to Avoid
- Rushing the glue. Getting impatient with the interfacing can lead to a lumpy lining. Wait for it to cool completely before handling.
- Not backstitching. If you skip this step, your seams might unravel. Always remember to backstitch at the beginning and end of sewing.
- Ignoring seam allowances. Too small a seam allowance can cause your bag to fall apart. Stick to the 1/2-inch rule, and all will go smoothly.
- Neglecting to iron. I once skipped this step and had a wrinkly bag. Iron your fabric as you go for the best results!
Make It Your Own: Variations and Ideas
- Play with Colors: Use bright fabric for the lining to make the inside a fun surprise.
- Add Personal Touches: Consider adding patches or fabric paint to your bag as a unique twist.
- Adjust the Size: Want a smaller bag? Just cut shorter sections from your jeans!
- Add Handles: For a bit of flair, add fabric straps or use an old belt as a handle.
- Seasonal Versions: Try using denim in different washes for seasonal variations. Light denim for spring and dark for fall, maybe!
This project is all about creativity—let your style shine through. You’ve got this, and I can’t wait to see what you come up with!
Before You Go
Pin this for the next rainy afternoon: Save this post for when you’re ready to dive into your denim bag project. You'll want to refer back for measurements and those little tips I shared!
Come back and tell me how it went: Seriously, no question is too basic! Whether you nailed it or had a few hiccups, I’d love to hear your story.
Show off what you made: I can’t wait to see your finished bags! Feel free to share your creations after making your own stylish denim bag. Happy crafting!