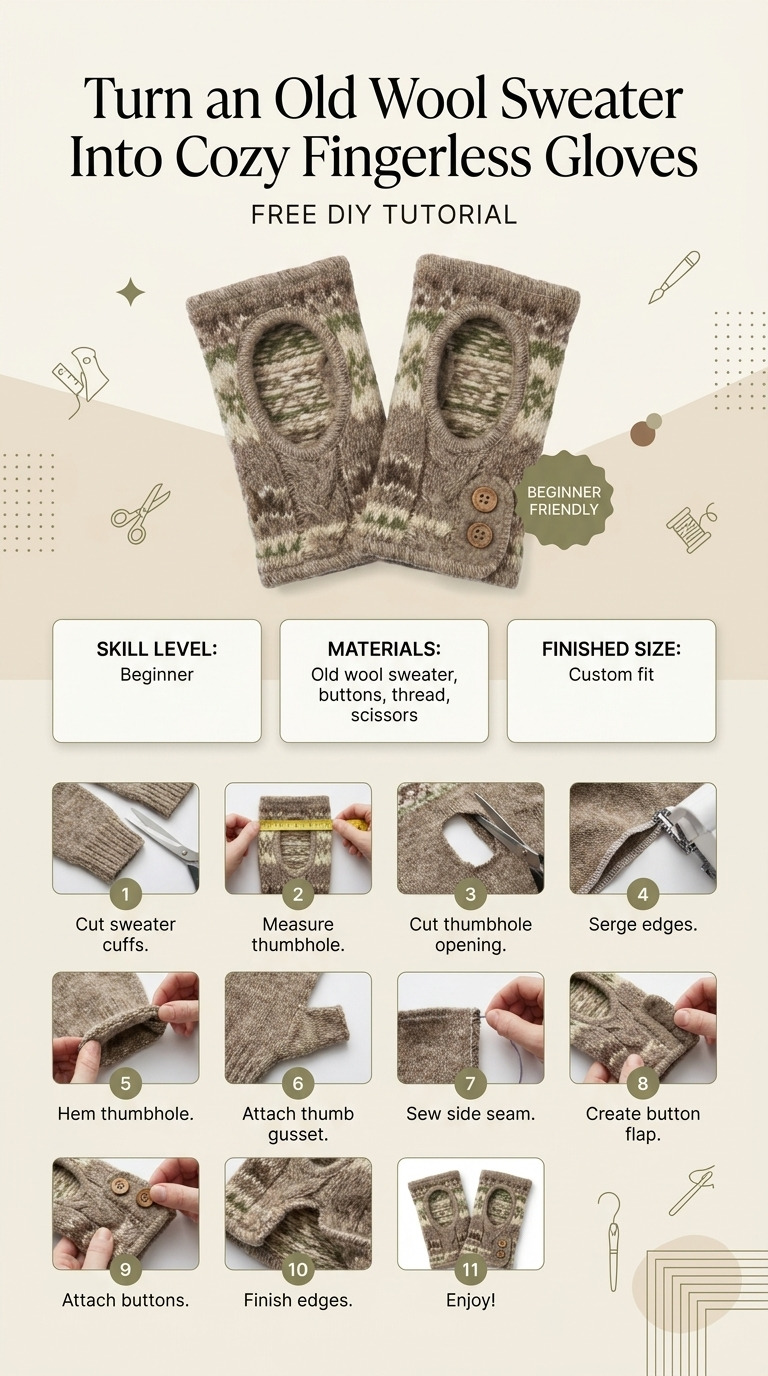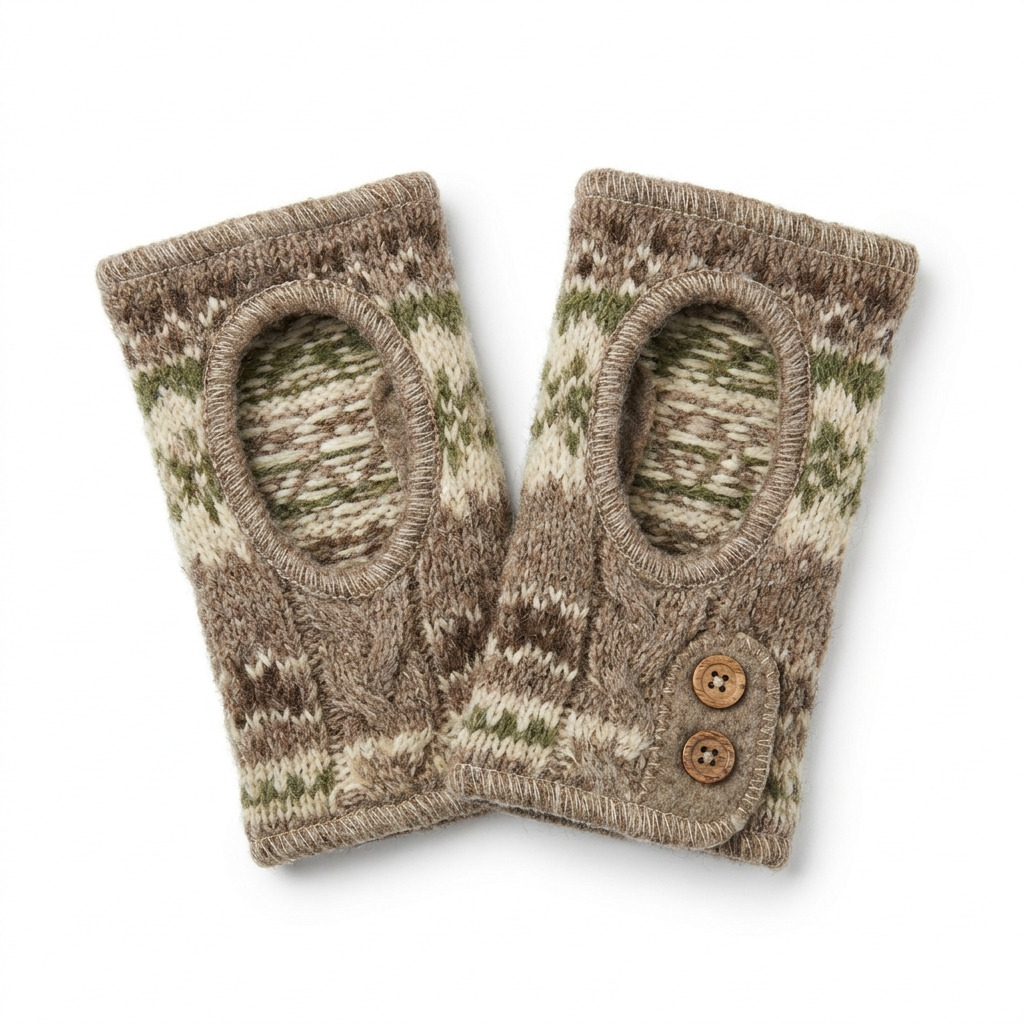
I remember the cold winter days when I needed warmth but didn’t want to give up the freedom to text or sip my coffee. That’s when I had the bright idea to turn an old wool sweater into cozy fingerless gloves! I rummaged through my closet and found a lovely pastel sweater that I hadn’t worn in ages. It had started to pill a bit, but with a little creativity, it transformed into the perfect solution to my problem. Now, these gloves live by my front door, ready for quick wear whenever the temperature drops.
This project is super simple and requires no special skills. I'll walk you through it step by step, so you can create your own adorable and warm fingerless gloves in no time!
[Descriptive image caption of the finished project]
What You'll Need
Materials:
- Old wool sweater: 1 medium-sized sweater in a solid color or pattern (Choose something that feels soft!)
- Scissors: sharp fabric scissors for cutting
- Sewing machine (or needle and thread): for stitching with thread in a coordinating color
- Measuring tape: to measure glove dimensions
- Pins: to hold fabric pieces together while sewing
- Fabric chalk or marker: for marking measurements
- Optional: Embellishments like buttons or fabric patches for decor (These can make your gloves really special!)
Tools:
- Cutting mat: to protect your work surface (You can use a thick cardboard if you don’t have a cutting mat)
- Sewing machine (or needle): for sewing the gloves (A simple needle works great if you don’t have a machine)
- Straight pins: for securing fabric pieces
- Safety equipment: Optional thimbles can be used when hand sewing, especially if you're new to it.
How to Make It, Step by Step
Step 1: Measure and Mark
First, get your measuring tape and measure out an 8-inch by 4-inch rectangle on your sweater fabric. Mark the corners and sides with your fabric chalk or marker. Remember, you’ll need four rectangles in total, two for each glove. Take your time and make sure your lines are straight!
Step 2: Cut the Fabric
Now, grab those sharp scissors and carefully cut out the four rectangles from the sweater. Make sure to follow your marks closely, and aim for smooth, even edges. If you rush this step, your gloves could end up looking a bit wonky, so it’s worth being patient here!
Step 3: Create the Finger Openings
Take each rectangle and find the top. Measure 1 inch down from the top and mark a line in the center. From that mark, measure 1.5 inches to the left and right to create an oval shape for your fingers. Cut along this oval mark, leaving about a ¼ inch seam allowance around the edge. Don't stress if your shape isn’t perfect; these gloves are meant to have a handmade charm!
Step 4: Assemble the Gloves
Now comes the fun part! Take two rectangles for one glove and place them together, making sure the right sides are facing each other (the side that will be on the outside). Use the straight pins to secure the edges, but leave the finger openings unpinned. This will help keep everything snug while you sew.
Step 5: Sewing
If using a sewing machine, set it up and sew along the edges of the gloves with a straight stitch. Keep a ¼ inch seam allowance. Also, be careful around the finger openings—avoid sewing over them. If you’re hand stitching, just take your time and sew the edges together. Repeat this step for the second glove.
Step 6: Turn the Gloves Inside Out
Once you’ve sewn both gloves, it’s time to turn them inside out! Find the finger opening and gently pull the glove through, so the seams are on the inside and the right side of the fabric is showing. You should be quite pleased with how they are starting to look!
Step 7: Finishing the Edges
To keep the edges from fraying, you can take a few extra steps. If you feel comfortable, use a zigzag stitch along the raw edges. Alternatively, you could fold the edges in a small hem and sew them down. But if you love a rustic look, feel free to leave them as-is!
Step 8: Embellishing (Optional)
Now it’s time to let your personality shine! If you want to add buttons or fabric patches, grab your needle and thread. Sew these embellishments onto the gloves wherever you like. It’s a fun way to customize them!
Common Mistakes to Avoid
- Not measuring correctly. Always double-check your measurements before cutting. If you cut too small, your gloves could be too tight!
- Rushing the sewing. Take your time while sewing the edges. Hasty sewing can lead to uneven seams or skipped spots.
- Skipping the seam allowance. Be sure to leave enough material when you cut. Not enough seam could mean tight gloves that are hard to wear.
- Not testing the fit. Before you sew everything together, try holding the fabric against your hands to ensure you have enough room for movement.
Make It Your Own: Variations and Ideas
- Change up the size: Adjust the measurements for a snugger fit by cutting each rectangle to 7 inches long.
- Mix and match colors: Use two different colors of sweaters for a unique look! The thumb area could be a different shade for fun.
- Add fingerless tips: You could cut the gloves shorter to make wrist warmers instead!
- Seasonal themes: Use holiday-themed sweaters for festive gloves.
- Layered looks: Consider sewing two different weights of fabric together for extra warmth.
I hope you feel inspired to try this cozy DIY project! You really can’t mess it up, and any variations you make will only add to your personalized touch.
Before You Go
Pin this for the next rainy afternoon: Save this easy tutorial so you can find the measurements and steps when you're ready to dive into crafting your fingerless gloves.
Come back and tell me how it went: I’d love to hear about your experience with this project—no question is too small! If something didn’t go as planned, I want to know all about it.
Show off what you made: Once you’re done, don’t be shy! I’d be thrilled to see how your cozy fingerless gloves turned out. Enjoy crafting!