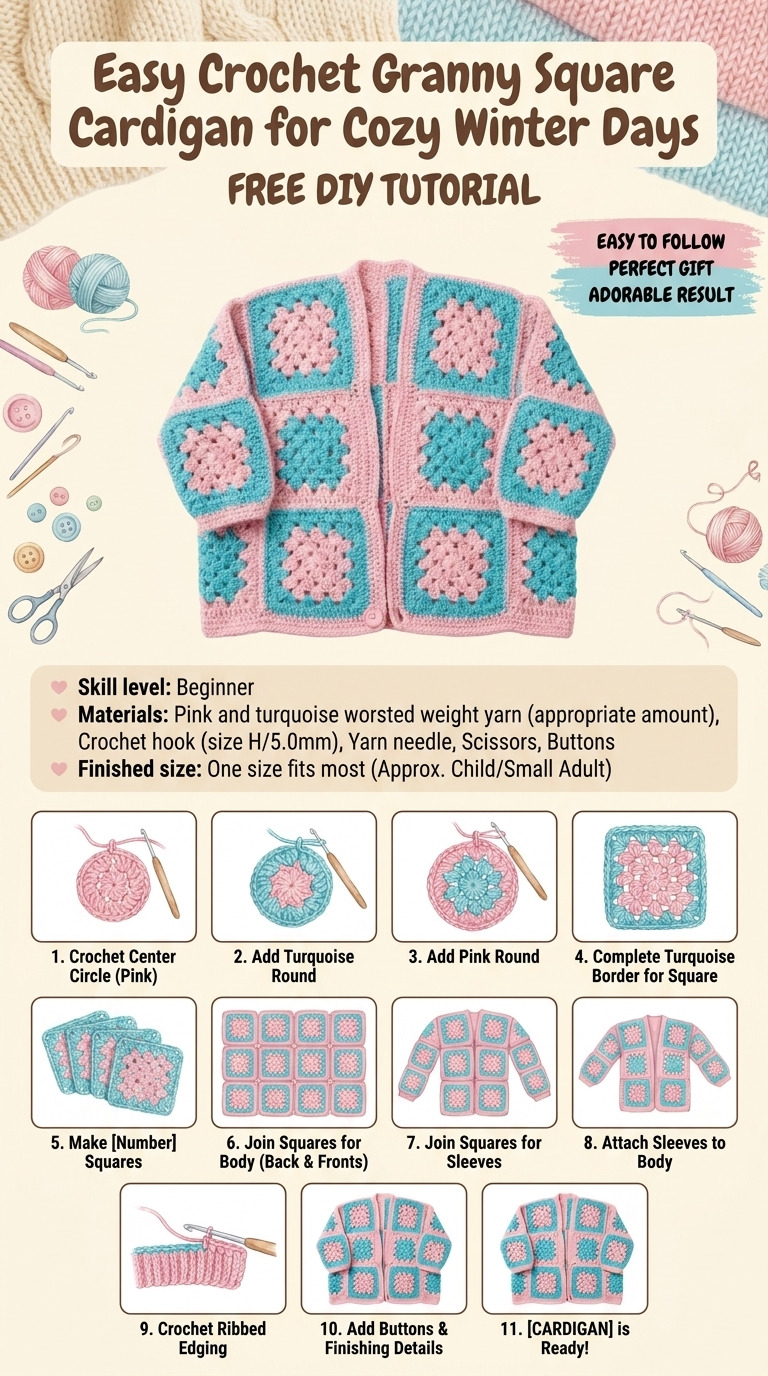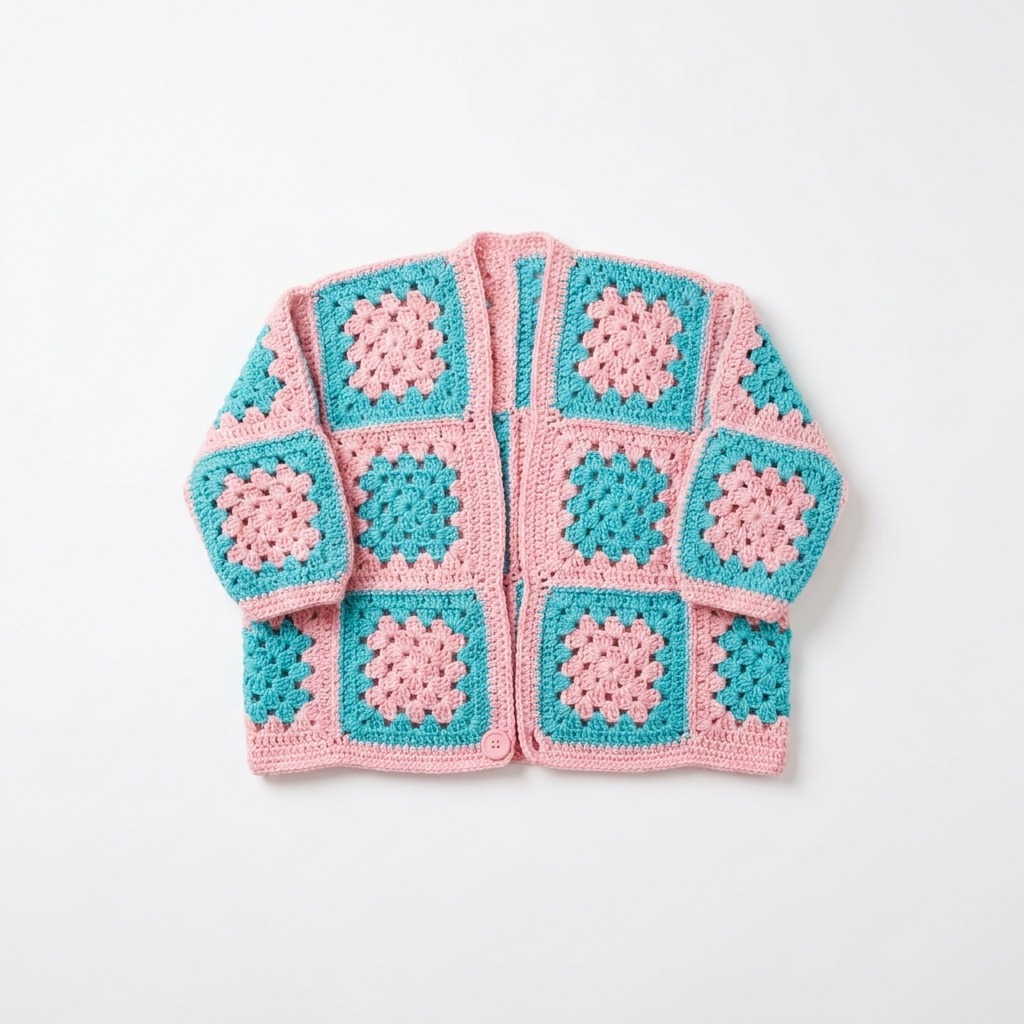
I remember the first time I snuggled up in a cozy cardigan on a chilly winter afternoon. There’s something just so comforting about wrapping up in soft yarn while sipping a cup of tea. A while back, I started thinking about how nice it would be to create my own cardigan that had both warmth and style. Then I stumbled upon the beautiful pattern of granny squares! They’re so simple to crochet and allow you to play with colors. You can bet I jumped at the chance to make my very own granny square cardigan, and let me tell you, it turned out to be one of my favorite projects.
This cardigan is not just warm; it's also versatile, perfect for layering over a turtleneck or wearing as a light wrap. It lives in my closet, just waiting for me to pull it out on those brisk days. The best part? You can make it too! I promise this is an easy project that anyone can do, and I’m here to walk you through every step.
[Descriptive image caption of the finished project]
What You'll Need
Materials:
- Yarn:
- Main color (MC): 5 skeins of worsted weight yarn (about 210 yards per skein; I love using a color like “Soft Pink”)
- Contrast color (CC): 3 skeins of worsted weight yarn (something bright like “Aquatic” looks lovely)
- Crochet hook: Size H (5.0 mm) — this is a great all-purpose size for worsted weight yarn.
- Scissors: 1 pair — any sharp scissors will work.
- Yarn needle: 1 — this helps to weave in your ends neatly.
- Stitch markers: 4 — to help you keep track of your rows.
- Optional embellishments: 1 button (for closure) or decorative patches — these can add a personal touch!
Tools:
- Measuring tape: For checking sizes and ensuring a good fit.
How to Make It, Step by Step
Step 1: Make Granny Squares
- Start with your main color (MC) yarn. Create a slip knot and chain 4. Join the chain to form a ring — this is where your granny square magic begins!
- For Round 1: Chain 3 (this counts as your first double crochet), then work 2 double crochets into the center ring. Now, chain 2 and work 3 double crochets into the ring. You’ll repeat this from to two more times. What you should see is a total of 4 clusters of 3 double crochets. Finish off with a chain 2, and join with a slip stitch to the top of your chain 3. – Tip: Make sure your ring is tight enough so it won’t come loose but not so tight that it’s hard to work into.
- For Round 2: Slip stitch to the next chain-2 space. Now, chain 3, and into that same space, crochet 2 double crochets, then chain 2, followed by 3 more double crochets. You’ll repeat this in every chain-2 space all the way around, joining with a slip stitch when you’re done. In this round, you now have 8 clusters of 3 double crochets.
- Round 3: Just like before, start repeating similar steps; you’ll increase the number of clusters in each chain-2 space so that your square keeps growing.
- Keep going until your square is about 6 inches x 6 inches. Don’t hesitate to change colors to your contrast color (CC) every other round. You’ll need a total of 12 granny squares (that’s 6 in MC and 6 in CC).
Step 2: Join Granny Squares
- Lay out your 12 squares in a 3×4 grid. This will be the layout of your cardigan.
- Grab your yarn needle and matching yarn. Use a whip stitch to join two squares together. You'll want to ensure you’re forming the side panels of your cardigan here, with the middle column of squares being your back panel.
- When all of your granny squares are connected, use the yarn needle to weave in any loose ends.
Step 3: Create Armholes
- Now, find the places where you want your armholes to go — generally, this will be about 9 inches down from the top of the first granny square in the top row.
- Fold the piece in half. Using your yarn needle and matching yarn, sew together the squares in the designated area. Leave an opening of about 8 inches wide for your armhole — this will allow you to move comfortably.
- Join the two sides of the armhole through the adjacent square on each side.
Step 4: Add Edging
- With your main color (MC), hold tight! You’re going to single crochet all around the entire cardigan. Put 2 single crochets in each corner. This will help create a smooth curve around the edges.
- Once you reach the end, fasten off the yarn and don’t forget to weave in any loose ends.
Step 5: Button Closure (optional)
- If you’d like to add a button closure, measure about 2 inches from the bottom of one side where you want your button to go.
- Secure your button with matching yarn and sew it into place. For the opposite side, create a small loop using chain stitches that can fit snugly around the button.
Common Mistakes to Avoid
- Over-tightening your stitches. It can be tempting to pull yarn too tightly, but it’ll make your squares difficult to work with. If the stitches feel too tight, gently loosen them.
- Not counting stitches. I’ve made this mistake before and ended up with uneven squares. Always count your clusters; they should be uniform.
- Joining squares incorrectly. Be sure to whip stitch the right sides of the granny squares together for a smooth finish. If they look mismatched, it’s easy to pull them apart and redo.
- Skipping the last slip stitch. When you finish a round, ensure you always join with a slip stitch; otherwise, it can mess up the shape of the square.
- Forgetting to leave enough space for armholes. Measure twice! Make sure you allow enough room for your arms to fit comfortably.
Make It Your Own: Variations and Ideas
- Color variations: Feel free to experiment with different color combinations. Maybe swap pastels for vibrant brights or earthy tones — the possibilities are endless!
- Size adjustments: For larger or smaller sizes, adjust the number of granny squares you make; go for 16 squares for a cozier fit or stick with fewer for a lightweight wrap.
- Add a liner: If you want extra warmth, consider sewing a fleece fabric lining into the inside.
- Explore embellishments: Sew in some fun patches or decorative elements to let your personality shine through the cardigan.
- Add pockets: If you want it to be extra cozy, you can crochet pockets in your favorite contrasting color.
You’ve got this! I can’t wait to see how your own granny square cardigan turns out.
Closing
Pin this for the next rainy afternoon: Save this post so you have the measurements and steps right at your fingertips when you’re ready to dive into your own cozy crochet project!
Come back and tell me how it went: I’d love to hear your questions or stories about your own crafting experience. No question is too silly, and I’d love to know if your project went sideways.
Show off what you made: I invite you to share your own finished cardigan! It’s always a joy to see what others create. Happy crocheting!