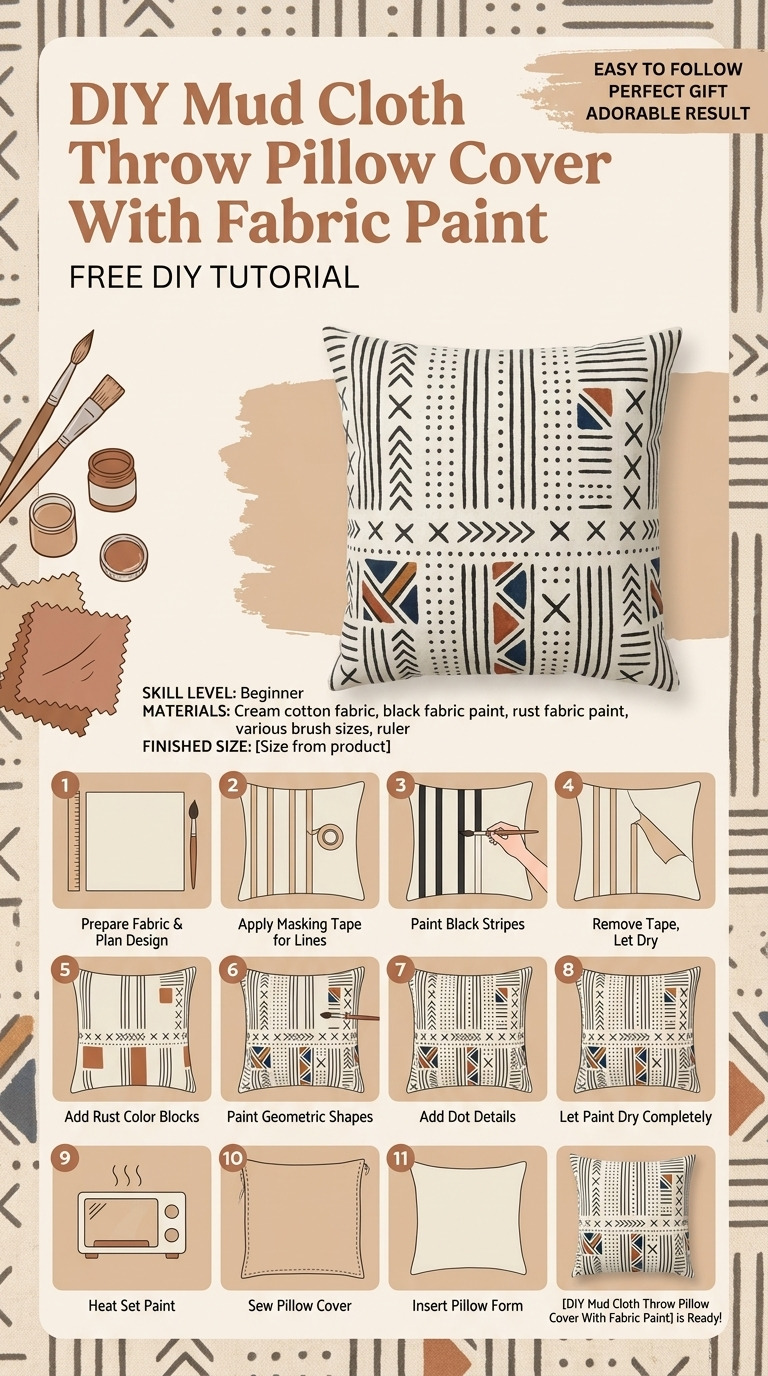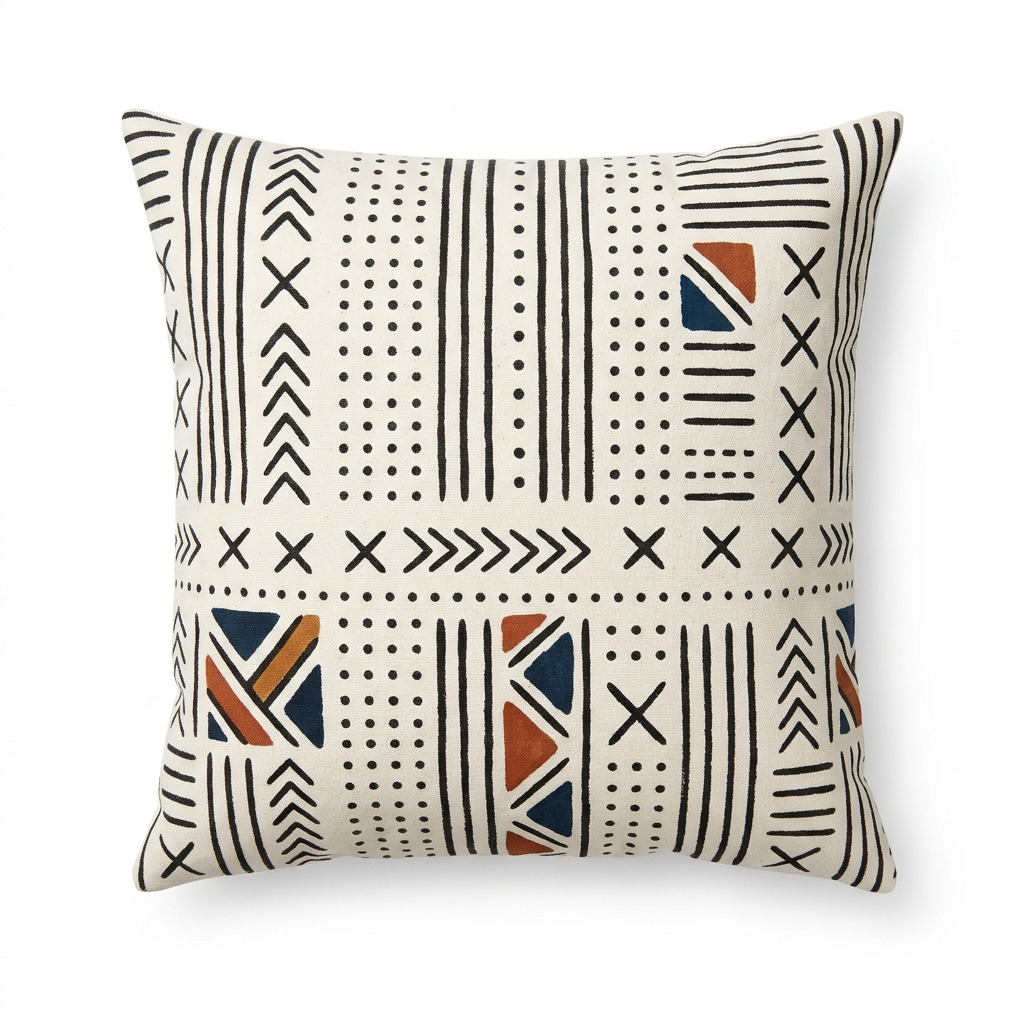
Last winter, I found myself with a blanket of gray outside, but all of my home decor felt just as drab. I needed something vibrant and fresh to liven up my living space. That’s when I stumbled upon gorgeous mud cloth patterns that inspired me deeply, and I thought, “Why not create my own throw pillow cover?” It seemed like a fun way to add some bohemian flair to my couch, not to mention a project I could tackle without breaking the bank.
Fast forward a bit, and I now have this stunning, textured pillow cover that not only catches the eye but also showcases my creativity. Displaying charmed imperfections and unique designs, it adds warmth to my living room. Plus, making it was a joy! Trust me, this is a straightforward project that even if you’re a complete newbie, I’ll walk you through every step.
[Descriptive image caption of the finished project]
What You'll Need
Materials:
- Cotton canvas fabric: 21 inches x 21 inches (1 yard) – This is the base of your pillow cover. Natural white or unbleached fabric works best for a classic look.
- Fabric paint: Black fabric paint, 1 bottle (8 oz) – Black gives a beautiful contrast and is essential for that mud cloth effect.
- Optional: Additional colors like rust or dark blue can add a fun pop if you want to get adventurous with your design!
- Paint brushes:
- 1 large flat brush (1 inch) – Perfect for large areas and the base layer.
- 1 medium round brush (½ inch) – Great for making patterns.
- 1 small detail brush (¼ inch) – Ideal for intricate designs or tiny dots.
Tools:
- Pillow insert: 18 inches x 18 inches (1 standard throw pillow insert) – This is what you’ll stuff your cover with.
- Fabric scissors – A must for cutting your fabric nicely.
- Fabric measuring tape – Ensures precise measurements, which are vital for a well-fitting cover.
- Pencil or fabric chalk for marking – Essential for sketching out your designs.
- Baking paper or cardboard – Using these protects your work surface from paint spills.
- Hot glue gun (optional) – Handy if you prefer not to sew the final seams.
- Sewing machine (or needle and thread for hand sewing) – Your method of choice for stitching the pillow cover.
- Ruler (12 inches) – For measuring.
- Cutting mat – Helpful for cutting fabric safely and accurately.
- Iron and ironing board – Crucial for prepping and finishing your fabric nicely.
- Safety gear: None required, though gloves are helpful to avoid paint stains!
How to Make It, Step by Step
Step 1: Set Up Your Workspace
Make sure to set up in a well-ventilated area. Cover your workspace with baking paper or cardboard to prevent any paint mishaps. A clean surface makes all the difference!
Step 2: Pre-Treat Your Fabric
Pre-wash the cotton canvas fabric to eliminate any chemicals from manufacturing that might interfere with painting. After washing, iron the fabric so it’s smooth and ready for your artistic touch.
Step 3: Cut Your Fabric
Cut the fabric into a 21 inches x 21 inches square. This will ensure you have enough fabric to sew the pillow cover while accounting for seams. Double-check your measurements — trust me, it’s worth it to get it right!
Step 4: Design Planning
Take your pencil or fabric chalk and lightly sketch out your mud cloth design on the fabric. Think about geometric shapes, lines, or dots. Give yourself about 1-2 inches between motifs to keep things clean and spaced nicely.
Step 5: Painting the Base Layer
Grab the large flat brush and apply a base layer of black fabric paint to the designated background areas of your design. Use smooth, even strokes for the best coverage. Tip: I found that swirling the brush rather than just straight strokes gives a more textured look!
- Drying time: Let this base layer dry for about 1 hour or until it feels touch dry.
Step 6: Adding Patterns
Once the base is dry, switch to the medium round brush and start layering on your mud cloth motifs. Don’t hesitate to use the small detail brush for precision work on your geometric patterns or tiny dots.
- Drying time: Allow each painted layer to dry for about 30 minutes before applying additional layers or colors. This way, you avoid smudging.
Step 7: Set the Paint
To make sure your designs stick, place a sheet of baking paper over the painted areas and press it with a hot iron for about 30 seconds. This heat-setting step ensures your artwork is durable and won't crack.
Step 8: Sewing the Pillow Cover
Fold the fabric with the right sides facing each other, aligning the edges carefully. Sew along three sides (two 18-inch widths and one length) with a ½ inch seam allowance, leaving one side open to insert the pillow.
Tip: If you’re new to sewing, go slowly! You can always unravel and redo if you make a mistake.
Step 9: Turn the Cover Right Side Out
Once you’ve sewn, gently pull the fabric through the opening to turn the cover right side out. Use a poking tool or your fingers to push out the corners for a cleaner finish.
Step 10: Insert the Pillow
Slide the 18-inch pillow insert into the cover. Take your time to make sure the corners are filled evenly — you want it to look plush and lovely!
Step 11: Closing the Pillow Cover
Fold the raw edges of the open seam inward and pin them in place. Here’s where decisions come in: you can either sew this closed or use a hot glue gun for a quick, no-sew option to seal it off.
Common Mistakes to Avoid
- Rushing the glue. If you’re using the glue gun to seal the final seam, be patient and let it cool completely to ensure it holds. Skipping this step can lead to it popping open.
- Not allowing paint to dry fully. This mistake can cause smudging when you go to set the paint or sew the fabric. Always be sure everything is dry!
- Ignoring the fabric paint’s instructions. Each type of fabric paint has its own guidelines. Not following them might lead to cracking or peeling of your designs.
- Using low-quality fabric. Make sure your fabric is durable! It should withstand regular cleaning without falling apart or fading.
Make It Your Own: Variations and Ideas
- Try Different Color Palettes. Go bold with bright colors or stick to earthy tones for a more neutral approach – the options are endless!
- Experiment with Stencils. Create sharp, clean designs that mimic traditional mud cloth patterns easily by using stencils instead of free-hand painting.
- Add Texture with Other Materials. If you have some fabric scraps lying around, you could sew on pieces, creating a mixed media effect!
- Personalize Your Pillow. Consider adding initials or meaningful symbols to make the pillow truly yours.
This project is all about your creativity! So go ahead and let your inspiration lead the way.
Before You Go
Pin this for the next rainy afternoon: Save this project to your Pinterest so you can easily find the measurements and tips when you're ready to create your stunning DIY mud cloth pillow cover!
Come back and tell me how it went: Don’t hesitate to reach out with any questions or share your very own lovely pillow creation! Every question is welcome here, even the "basic" ones.
Show off what you made: I absolutely love seeing the unique pieces you create! Enjoy your crafting, and let your creativity shine!