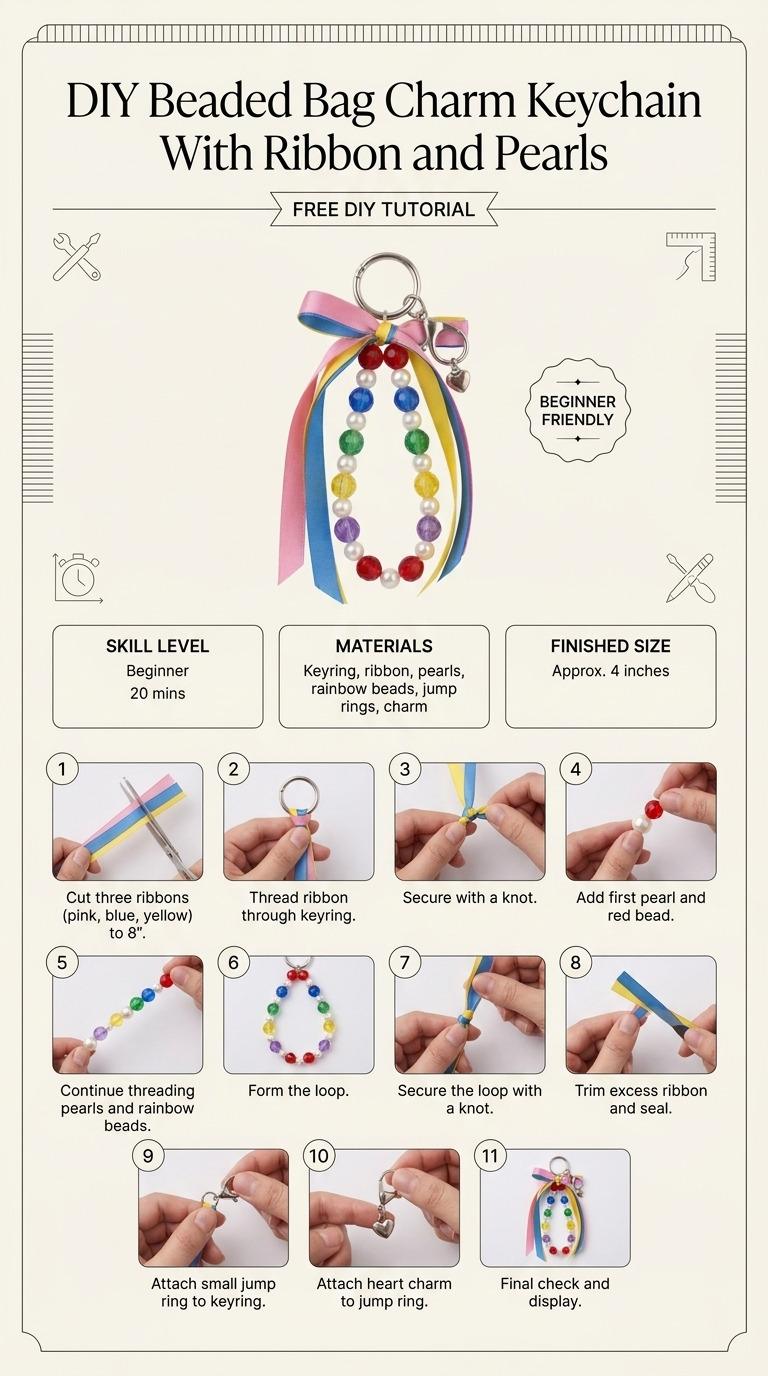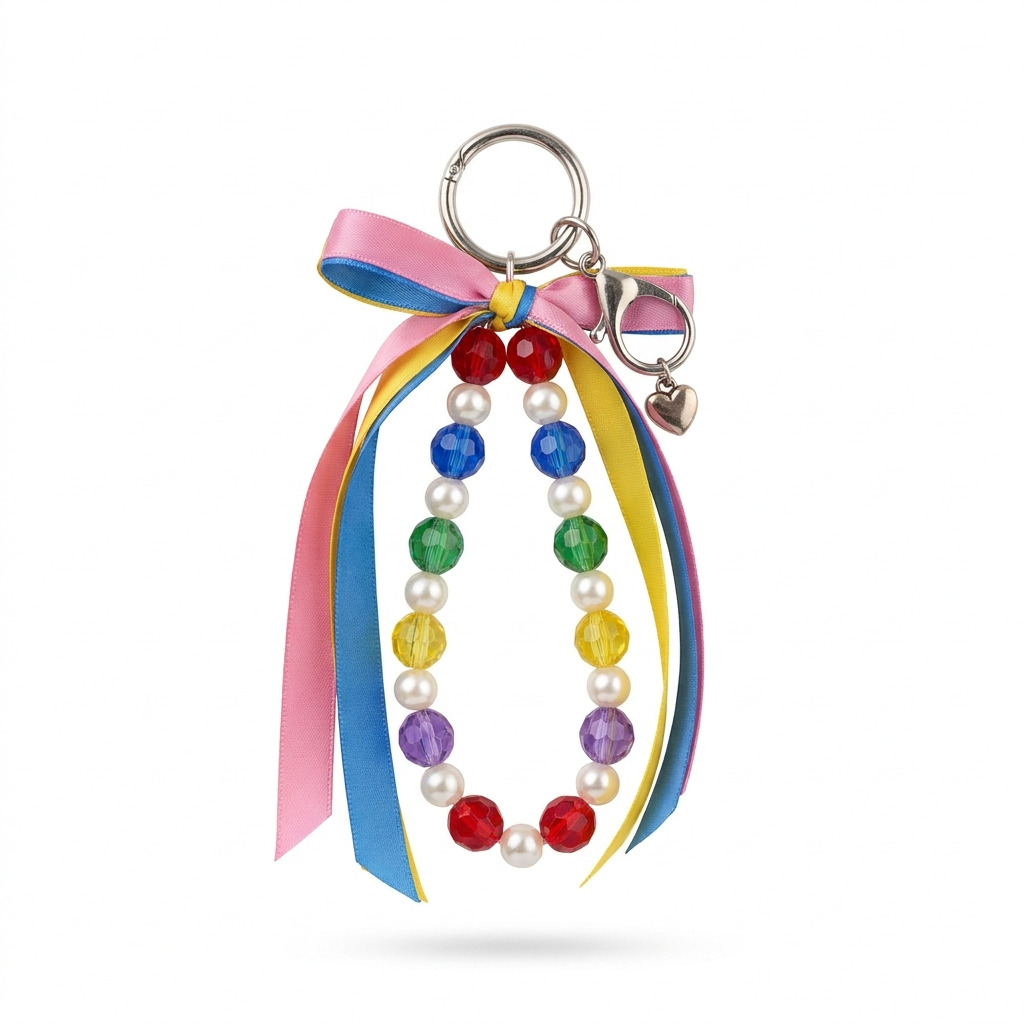
I’ve always loved adding little charming touches to my bags and keys, and last winter, I thought, why not make my own? I wanted something colorful and elegant, so I sat down and got creative with beads, pearls, and a bit of ribbon. The result? A DIY beaded bag charm keychain that not only looks fabulous but also adds that personal flair to my everyday accessories. It dangles cheerfully from my favorite tote, catching the light and turning heads everywhere I go.
This project is super easy, even if you've never done any beading before. I’ll walk you through every step, ensuring that by the end, you have a gorgeous charm to show off. Let’s jump right in!
[Descriptive image caption of the finished project]
What You'll Need
Materials:
- Beads:
- 10 assorted acrylic beads (10mm, various colors)
- These vibrant beads are perfect for adding personality.
- 8 pearls (8mm, white or cream)
- Pearls add a touch of elegance that balances the bright colors nicely.
- Keychain hardware:
- 1 large split ring (1 inch diameter)
- This will hold your keychain pieces together.
- 1 small lobster clasp (1.5 inches)
- For easy attachment to your bag or keys.
- Beading thread:
- 1 yard of nylon thread (size D or 0.5mm)
- Strong enough to handle the weight of the beads.
- Ribbon:
- 1 yard of satin ribbon (1 inch wide, color of your choice)
- This gives a beautiful cascading effect at the end of your charm.
- Crimp beads:
- 2 crimp beads (2mm)
- These secure your beading threads in place.
- Optional embellishments:
- 1 charm (e.g., heart, star) to hang from keychain
- Personalize your keychain even further!
Tools:
- Scissors
- Any standard craft scissors will do just fine.
- Needle:
- Size 10 or 12 beading needle
- This type of needle makes threading the small holes in beads easier.
- Round nose pliers
- Useful for handling wire and beads.
- Crimping pliers
- These are specially designed to flatten crimp beads tightly.
- Tape (optional)
- Handy to hold the beading thread in place while you work.
How to Make It, Step by Step
Step 1: Prepare the Thread
Start by cutting a yard of nylon thread to give yourself enough length to work with. Thread it through your needle and double it for extra durability. Tie a secure knot at the end that’s larger than the crimp bead — this will ensure it doesn't slip through later.
Step 2: String the Beads
Begin your charm by sliding on one acrylic bead, followed by one pearl. Repeat this pattern until you have a total of 10 beads strung (5 acrylic and 5 pearls). I find that alternating colors creates a lovely contrast. Your finished string section should be around 5-6 inches long before adding the keychain.
Step 3: Attach Crimp Bead
Once you have all your beads on, leave a few inches of thread hanging. Slide a crimp bead onto the thread and push it close to the last bead. Make sure to keep the spacing between the beads nice and even!
Step 4: Form the Loop
Now, with the leftover thread, form a loop by pulling the thread back toward the beads, passing the needle through the crimp bead and then through the last bead again. Pull tightly to secure everything. You should feel it snug, but don’t pull too hard — you want to avoid damaging the beads.
Step 5: Crimp the Bead
Using your crimping pliers, flatten the crimp bead securely. This is what will hold everything in place, so make sure it feels solid.
Step 6: Attach the Keychain Hardware
Take the large split ring and slide it onto the crimped section of your thread. Then, attach the small lobster clasp to the split ring. This is where things are really starting to come together!
Step 7: Prepare the Ribbon
Now onto the pretty part! Take your satin ribbon and cut three lengths, each 12 inches long. Gather them together and tie a knot at one end, allowing them to cascade down beneath the knot.
Step 8: Attach Ribbon
Secure the knotted ribbon to the base of your bead charm using the leftover thread. Make several tight knots to really reinforce it. I suggest pulling the ribbons so they lay flat for a neat finish—the more organized they look, the prettier they’ll be!
Step 9: Finishing Touches
If you have an optional charm, now’s the time to add it! Attach it to the lower part of the keychain ring or directly onto the lobster clasp based on your preference. You’ll be amazed how much it adds to the overall look!
Common Mistakes to Avoid
- Rushing the crimping process.
- If you don’t crimp tightly enough, your beads may slip out. Make sure to really secure it.
- Not leaving enough thread.
- If you cut the thread too short, you might struggle to attach the keychain hardware. Always err on the side of caution.
- Uneven spacing of beads.
- Be conscious of bead placement as you string them. If things look crowded or spaced too far apart, just slide them until it feels right.
- Skipping the knots at the ribbons.
- If you don’t tie them securely, they could come loose over time. Make sure they’re sturdy!
Make It Your Own: Variations and Ideas
- Mix different bead shapes.
- Try using faceted or irregular-shaped beads for added visual interest.
- Choose bold ribbons.
- Different ribbon textures can change the entire vibe. Go for lace for a vintage feel or sheer fabric for something whimsical.
- Customize bead colors.
- Seasonal colors can transform the charm for different holidays, just imagine red and green for Christmas or pastels for spring!
- Add more charms.
- Layer on additional small charms to express who you are. Think of tiny stars, moons, or letters that represent something meaningful to you!
I can’t wait to see what you create with this project! It’s so satisfying to make something unique that you can use every day.
Before You Go
Pin this for the next rainy afternoon: Be sure to save this guide about making a beaded bag charm keychain — that way, you’ll have the measurements and all the steps when you’re ready to craft! Come back and tell me how it went: I would love to hear your thoughts, questions, or any hiccups you faced along the way. No question is too simple, and your experiences — whether they went perfectly or went a bit sideways — are always welcome here! Show off what you made: Feel free to share your finished project, I'd love to see it come to life!