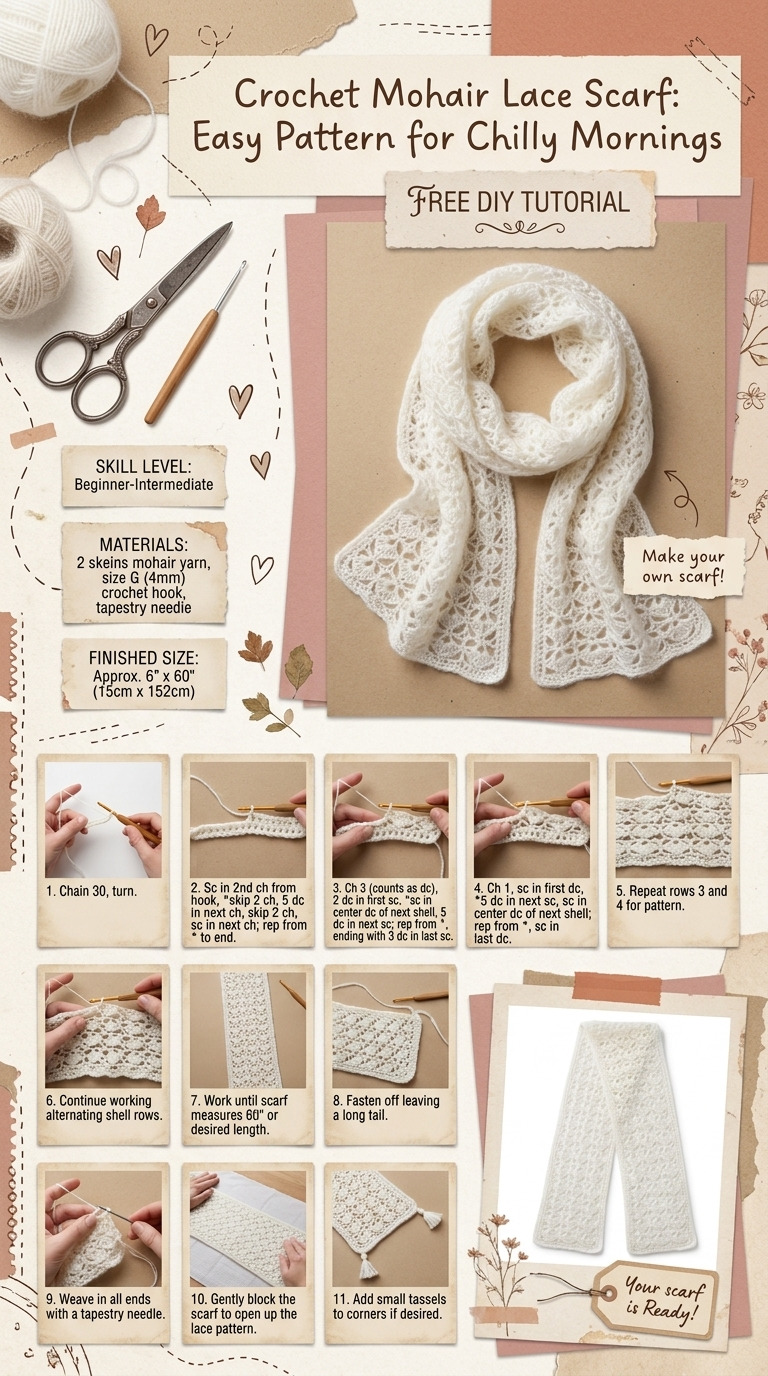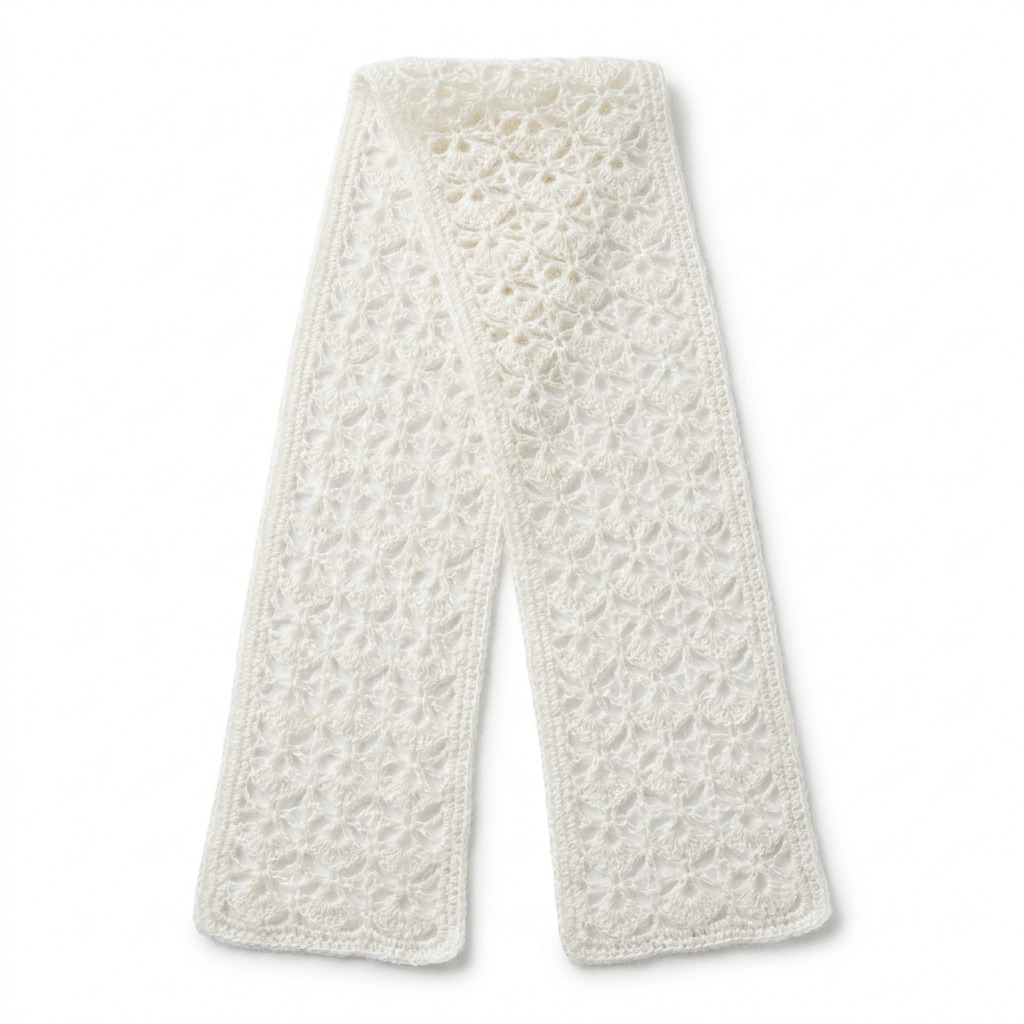
Last winter, I found myself reaching for something warm and stylish to brighten up those chilly mornings. I wanted a scarf that was lightweight enough to wear all day, yet still offered that cozy warmth we all crave when the temperatures drop. After scrolling through countless options online, I realized I could make exactly what I was looking for: a delicate, airy mohair lace scarf. Now, it hangs gracefully in my closet and adds a touch of elegance to my everyday outfits.
This scarf is perfect for beginners and can be made in a few hours. I’m excited to share this easy pattern with you, walking you through every step of the process. Grab your yarn and a hook, and let's get started!
[Descriptive image caption of the finished project]
What You'll Need:
Materials:
- Yarn:
- 2 skeins of mohair blend yarn (50% mohair, 50% acrylic), color: Soft White. Choose a yarn that's soft and comfortable against your skin. Each skein should be at least 50g (approximately 210 yards).
- Crochet Hook:
- Size I/9 (5.5 mm). If you don't have this size, you can use a G/6 (4.0 mm) hook for a tighter stitch, but it'll change the feel of the scarf slightly.
- Tapestry Needle:
- For weaving in ends. A standard yarn needle works great for this too.
- Scissors:
- For cutting yarn.
Tools:
- Work Surface:
- A flat, clear table or desk. Make sure your space is comfortable and has good lighting.
- Safety Equipment:
- Optional: Eye protection if you’re using scissors vigorously or in a cluttered area—better safe than sorry!
How to Make It, Step by Step
Step 1: Foundation Chain
- Start with your yarn and crochet hook. Make a slip knot (this is just tying a knot in the yarn so it can slide on the hook) and create a foundation chain of 34 chains. This will determine the width of your scarf. You should see a nice line of flexibility in those chains.
Step 2: Row 1 – Single Crochet (sc)
- In the second chain from your hook, make 1 single crochet. This means you will insert your hook into the chain, yarn over (wrap the yarn over the hook), pull through, and then yarn over again to pull through both loops on your hook. Continue this process until you reach the end of the row, which should give you a total of 33 single crochets. When you finish, you’ll turn your work so you can start the next row.
Step 3: Row 2 – Chain and Start Lace
- For the second row, chain 3 (this counts as your first double crochet) and turn your work. In the same stitch, make 1 double crochet. Now, this is where the lace pattern starts!
- Here's the important part: skip 2 stitches, in the next stitch make 1 double crochet, chain 1, and in the same stitch make another double crochet. Repeat from the asterisk to the end of the row, ensuring you place 1 double crochet in the last stitch, too. You’ll create 11 lace shells by the end of this row. Take a moment to enjoy how pretty the beginning of your pattern looks!
Step 4: Row 3 – Continue Lace Pattern
- Chain 3 and turn your work once more. Now, here’s the magic: in between the first two double crochets of your first shell, make a double crochet, chain 1, and double crochet again to complete that shell.
- Repeat this between each lace shell all the way to the end of the row. Just make sure to end with a double crochet in the last chain space. It will begin to look more and more like lace!
Step 5: Rows 4-12 – Repeat Row 3
- Keep repeating Row 3 until your scarf reaches about 70 inches long or until you have completed about 12 rows in total of this lovely lace pattern. It can be easy to lose track, so I usually place a marker at the start of each row or count it aloud to keep myself on point.
Step 6: Final Edge
- When you’re ready to finish your scarf, chain 1 and single crochet in each stitch across to create a clean edge. This will give it that polished look.
Step 7: Fasten Off and Weave Ends
- Cut the yarn, leaving about a 6-inch tail. Pull this tail through the last stitch and tighten it. Next, grab your tapestry needle and weave in all those loose ends so they won’t peek out later. Make sure you tuck them in well to keep your scarf looking neat.
Common Mistakes to Avoid
- Not counting chains. If you end up with too few or too many stitches, your scarf may come out uneven. Count your chains as you go, especially in the foundation.
- Skipping the last stitch by accident. This can happen easily when you’re caught up in the rhythm. Always count to ensure you end each row with the correct number of stitches.
- Pulling too tightly. If your stitches are too tight, the scarf will be hard to work with and might not drape nicely. Keep a comfortable tension as you crochet—your stitches should be uniform but not so loose they unravel.
- Not letting the scarf rest. Crocheting can cause tension in your hands. Take breaks every so often to stretch your fingers and relax—your scarf will thank you for it!
Make It Your Own: Variations and Ideas
- Change Colors. If you're feeling adventurous, try a blended mohair yarn with two complementary colors. This will add a fun twist to your scarf!
- Add Fringe. For some extra flair, consider adding fringe to the ends of the scarf. Using 8-inch lengths of yarn and attaching them every few inches can really elevate the look.
- Adjust the Size. Make a wider or shorter scarf by adjusting the foundation chain; just remember each chain is about 1/4 inch, so you can easily calculate your desired size.
- Gifting Option. This scarf would make a wonderful gift. Consider adding a small card or gift tag noting the yarn care instructions for the recipient's ease.
I can't wait to see what you create, so let's embrace your personal touch as you make this scarf just for you!
Before You Go
Pin this for the next rainy afternoon: Save this pattern so you can easily find it later when you have your yarn and hook at the ready.
Come back and tell me how it went: I’d love to hear from you about your scarf! No question is too basic, and if your project takes a turn, those stories are just as valuable.
Show off what you made: I’m excited to see your finished scarf! Sharing is always encouraged, and you can inspire others with your beautiful work.