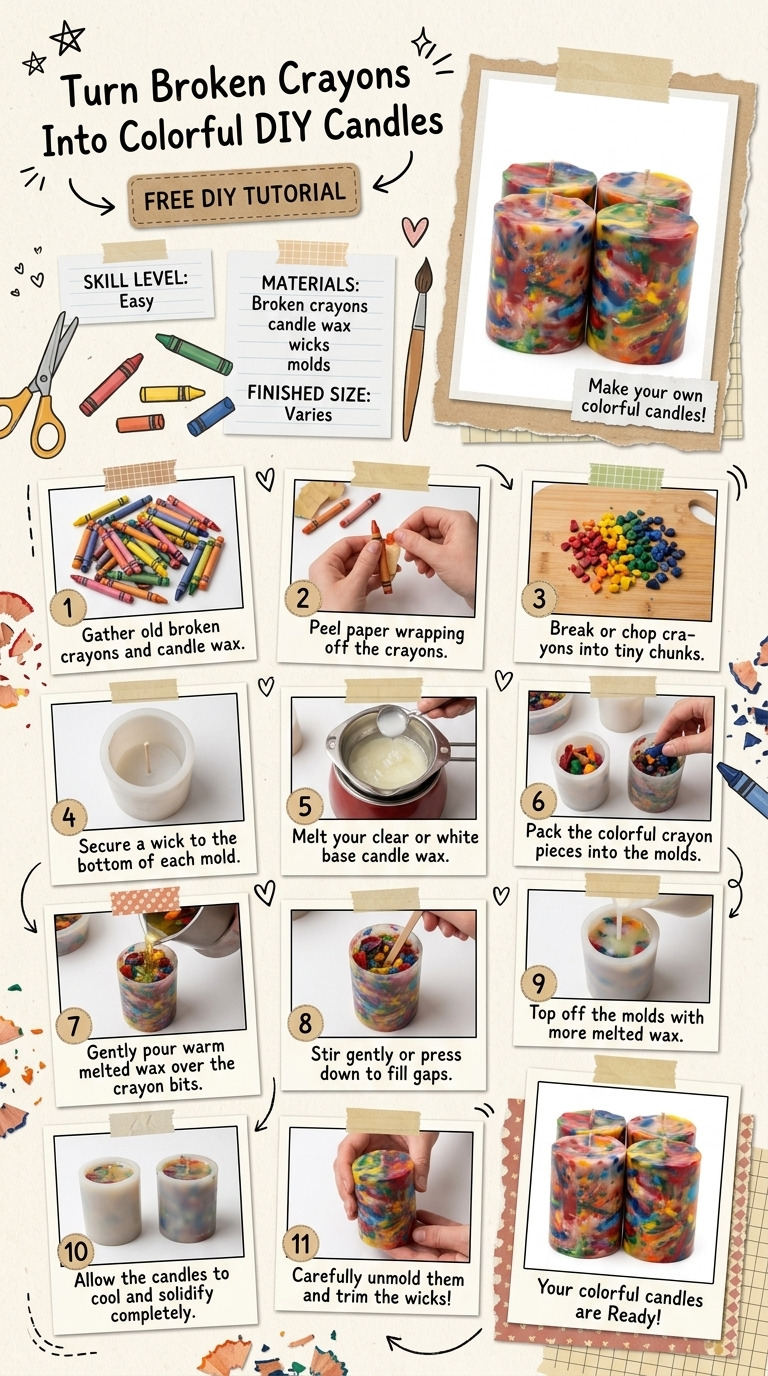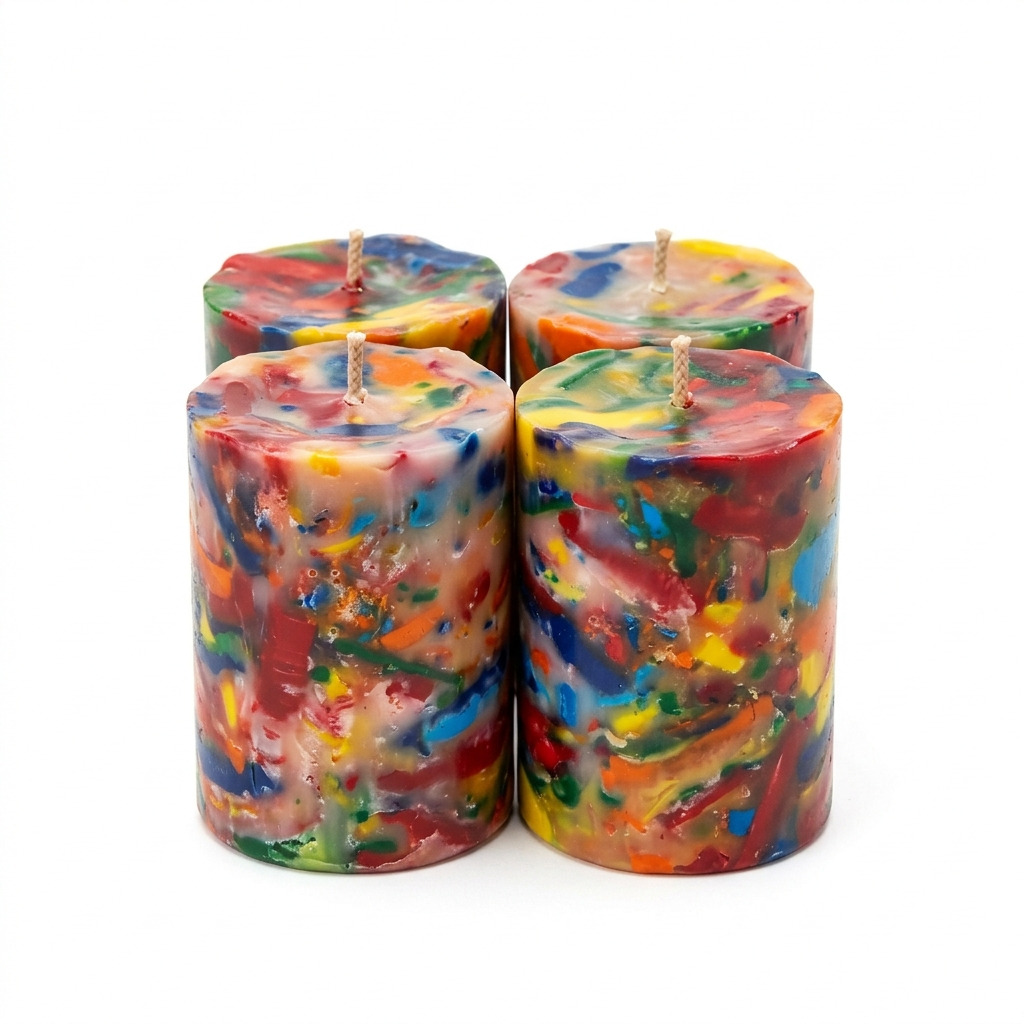
I absolutely love finding new ways to repurpose items that might otherwise go to waste. Last winter, I had a pile of broken crayons cluttering up my craft drawer, and it hit me: why not turn those into colorful candles? Not only does it give a new life to something I’d otherwise toss, but the result is a beautiful, personalized candle that can brighten any room or make a lovely gift. I keep one of these on my coffee table, and they always spark a delightful conversation!
What’s great about this project is how easy it is. If you've never worked with wax or made candles before, don’t worry. I’ll guide you through every step, and by the end, you’ll have your own unique candles ready to shine.
[Descriptive image caption of the finished project]
What You'll Need
Materials:
- Broken crayons: 1 cup (any colors; about 15-20 crayons, depending on size — you can even use colors you don’t like!)
- Wax: 1 pound (you can use paraffin, soy, or beeswax — each will give you slightly different results)
- Candle wicks: 4 wicks (6-inch length, pre-waxed wicks are super easy to use and help the candle burn evenly)
- Candle dye (optional): 1-2 teaspoons (if you want even brighter colors, but crayons will already add a nice hue)
- Essential oils (optional): 1 tablespoon (to add a lovely scent; lavender, citrus, and vanilla are my favorites)
- Small heatproof containers or silicone molds: 4 (silicone molds are perfect because they make removal super easy)
- Old pot or double boiler: 1 (to melt the wax safely)
- Wooden sticks or chopsticks: 4 (for stirring the wax and crayon mixture)
- Pouring pitcher (heat-resistant): 1 (this makes pouring the wax into molds much easier)
- Adhesive or tape: 4 small pieces (to hold those wicks in place while your candles set)
Tools:
- Stovetop or hot plate: 1 (to heat the water for your double boiler)
- Candy thermometer: 1 (to check the wax temperature accurately)
- Safety equipment: Oven mitts (protect your hands from hot containers) and goggles (especially important if you’re using candle dyes, because things can get messy!)
How to Make It, Step by Step
Step 1: Prepare the Wicks
Secure the bottom of each wick to the center of your containers or molds using a small piece of adhesive or tape. Make sure the wick stands upright. This is crucial because if the wick isn't centered properly, your candle will burn unevenly. I actually had one fall over the first time I tried this!
Step 2: Break Crayons
If you haven’t already, cut or break the crayons into small pieces — about 1-inch chunks will work. You'll need around 1 cup of these crayon pieces for your four candles. It’s easier to melt them when they're in smaller bits!
Step 3: Melt the Wax
- Fill the bottom pot of your double boiler with water and bring it to a gentle simmer over medium heat.
- Place the wax in the top pot. You should use about 1 pound for four candles. Then, insert your candy thermometer to keep an eye on the temperature.
- Heat the wax until it reaches around 170°F (77°C). Just keep stirring occasionally!
Step 4: Add Crayon Pieces
Once your wax is thoroughly melted, gently stir in the crayon pieces. This mixture will become beautifully colorful as the crayons dissolve. Expect this to take about 5 to 10 minutes.
- Tip: If you want to add scent, this is the moment! Once the crayon pieces are completely melted, stir in 1 tablespoon of your favorite essential oil.
Step 5: Pour the Wax
- Remove the melted wax from the heat and let it cool slightly. It should be around 160°F (71°C) before pouring. This helps prevent air bubbles and makes for a better finish.
- Carefully pour the colorful mixture into your prepared containers or molds. Be sure to stop a little shy of the top to avoid any spills. Use a wooden stick to keep the wick centered while you pour.
Step 6: Allow to Set
Now, we just need to be patient! Let the candles sit at room temperature until they’re completely solidified — this will take about 4 to 6 hours. Don’t be tempted to stick them in the fridge; rapid cooling won’t be good for the candle.
Step 7: Trim Wicks
Once your candles have fully set, it’s time to trim the wicks. Use scissors to cut them down to about 1/4 inch above the wax surface. This helps the candle burn optimally and keeps it looking neat.
Common Mistakes to Avoid
- Rushing the glue. If you don’t secure your wicks properly, they can lean to one side when the wax is poured.
- Pouring at too high a temperature. This can cause air bubbles and mess up the look of your candles. Always check that the wax is properly cooled before pouring.
- Not using a double boiler. Melting the wax directly on the stovetop can scorch it, which can ruin your candles and create a mess.
- Skipping the essential oils. If you want a fragrant candle, be sure to add them after the crayons have melted but before the wax cools!
- Overfilling containers. Leave a bit of room at the top to avoid spills and make the candles easier to manage.
Make It Your Own: Variations and Ideas
- Layered candles: Pour different colors of wax in layer for a stunning effect, letting each layer cool slightly before adding the next.
- Use unique molds: Try using silicone molds in fun shapes like hearts or stars for a playful twist.
- Scent combinations: Mix two essential oils for a completely unique fragrance that suits your vibe.
- Decorate the outside: Personalize your candles further by painting the containers or adding beautiful stickers.
I can’t wait for you to dive into this fun project! Making these candles is such a joyful way to add color and creativity to your space, or even give thoughtful gifts.
Before You Go
Pin this for the next rainy afternoon: Save this post so you can find the measurements and drying times easily when you're ready to embark on your candle-making adventure!
Come back and tell me how it went: I’m here for any questions, big or small. If something doesn’t go as planned, don’t worry! I’d love to hear about it.
Show off what you made: I’d be thrilled to hear how your candles turn out, so feel free to share your experience!