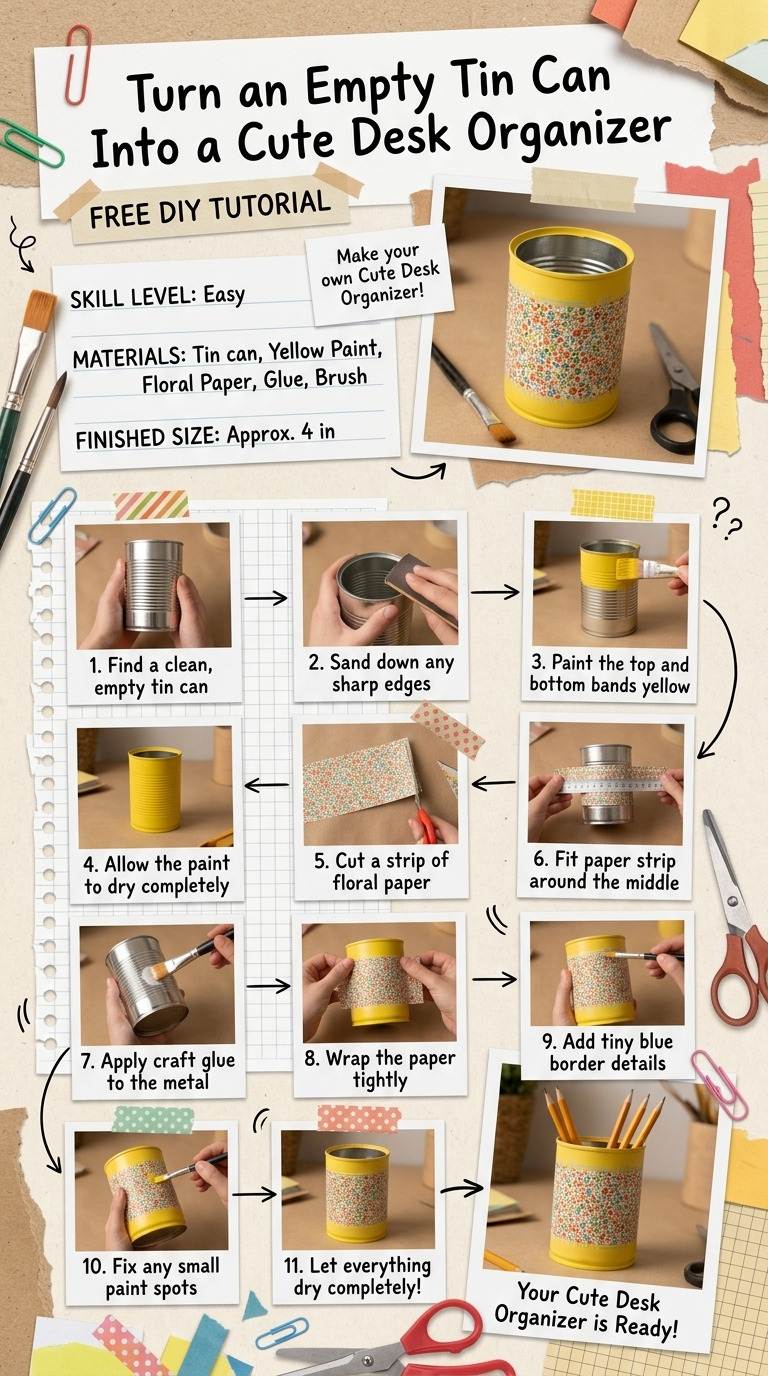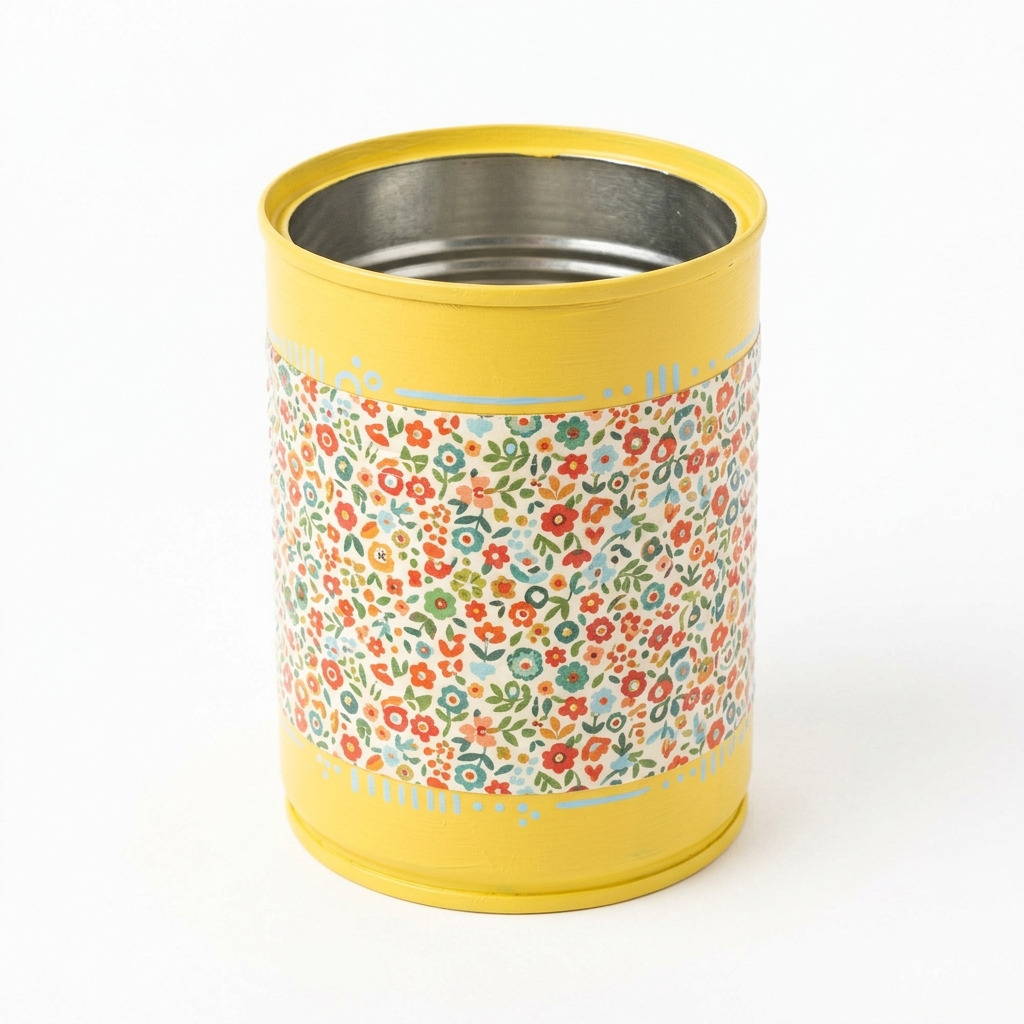
I always find myself buried under an avalanche of pens, paperclips, and miscellaneous office supplies. Last winter, after a particularly chaotic day of trying to juggle work and home life, I decided enough was enough! Staring at the chaos on my desk, I realized I had an empty tin can sitting in my recycling bin. I thought, why not transform it into a cute desk organizer? It turned out to be a fun little project that not only tidied up my workspace but also added a pop of personality to it.
This adorable organizer can hold all those daily essentials — pens, scissors, sticky notes — you name it! After completing this project, mine proudly sits on my desk, making me smile every time I reach for a pen. I’m excited to walk you through this easy DIY; you really can’t mess it up, and I'll ensure you have all the steps you need to make your own!
[Descriptive image caption of the finished project]
What You’ll Need
Materials:
- Empty tin can (1) – a standard size (15 oz). Any empty can will work, but try to use one that is clean and dry.
- Acrylic paint (2 colors) – bright yellow and pastel blue. You can mix and match your favorite colors too!
- Paintbrush (1) – a 1-inch wide brush for the base coat, plus a detail brush for adding accents.
- Mod Podge or white craft glue (1 bottle) – this helps to seal your decorations and hold everything together.
- Decorative paper or scrapbook paper (1 sheet) – pick a patterned floral or geometric design, around 12"x12". Let your personality shine through!
- Scissors (1) – for cutting your decorative paper.
- Ruler (1) – for measuring, so everything fits perfectly.
- Pencil (1) – for marking measurements on your decorative paper.
- Craft knife (1) – for any detailed cutting, if necessary.
- Clear spray sealer (optional) – adds an extra layer of protection, especially if you’re using it often.
- Optional embellishments – washi tape, stickers, or ribbon to add some flair to your organizer.
Tools:
- Workspace setup: Find a clean, flat workspace like a table or desk.
- Surface protection: Use a drop cloth or a large sheet of newspaper to keep your area tidy.
- Safety equipment: Remember to wear safety glasses when using the craft knife to protect your eyes!
How to Make It, Step by Step
Step 1: Clean the Tin Can
First things first, let’s get that can ready! Remove the label and wash the can inside and out with warm soapy water. Rinse it thoroughly and let it dry completely.
Step 2: Paint the Tin Can
Grab your wide paintbrush and dip it into the bright yellow acrylic paint. Apply a base coat to the entire outside of the tin can. Use smooth strokes for even coverage. Let it dry for about 30 minutes or until the paint is completely set.
Tip: If your can has a sharp edge at the opening, be careful when painting so you don’t accidentally scrape yourself.
Step 3: Measure and Cut Decorative Paper
Using your ruler, measure a strip of decorative paper that’s 8 inches high and 12 inches wide. Use your pencil to mark the measurements on the paper, and then carefully cut it out with scissors.
Step 4: Apply Decorative Paper
Once your yellow base is dry, it’s time to decorate! Apply a thin layer of Mod Podge (or white craft glue) on one side of the tin can. Carefully wrap the decorative paper around the can, smoothing it as you go to avoid air bubbles.
Tip: Try to smooth out the paper gently with your fingers rather than pulling it tight to avoid tearing.
Allow this to set for about 15 minutes until it feels tacky to the touch.
Step 5: Seal the Decorations
With your paper securely in place, it’s time to seal it! Apply another coat of Mod Podge over the top of the decorative paper. This helps protect it and give it a nice finish. Let this coat dry for at least 1 hour.
Step 6: Add Details (optional)
If you want to get a bit creative, use a detail brush to add some fun accents, like stripes or little doodles, using the pastel blue paint. Let it dry completely before moving on.
Step 7: Spray Seal (optional)
For extra durability, particularly if you want to keep this organizer for a long time, spray a light coat of clear spray sealer over the entire can. Just follow the manufacturer’s instructions, which usually involves letting it dry for 15-30 minutes.
Assembly & Finishing
Once everything is dry, check that your decorations feel secure. Now, fill your beautiful desk organizer with pens, pencils, scissors, or whatever else you need! If you're feeling extra creative, you can place washi tape around the top edge or add more stickers for personalization.
Common Mistakes to Avoid
- Rushing drying times. If you skip or rush the drying times, your acrylic paint may smudge, or the paper might peel off.
- Pulling the paper too tight. This can cause tears or wrinkles, ruining the neatness of your design.
- Forgetting to seal. If you skip sealing your decorations, they might not hold up as well over time.
- Using rough surfaces. Make sure your workspace is protected with a drop cloth to avoid a messy finish.
Make It Your Own: Variations and Ideas
- Try different colors! Instead of yellow and blue, you could go for radiant red or soft green — whatever suits your vibe!
- Switch up the decoration patterns. Use polka dots, stripes, or a nature theme, depending on your taste.
- Size variations. Don’t limit yourself to just one size. You can use larger cans for a full organizer or tiny cans for an adorable pencil holder.
- Gift it! Personalize a can for a friend and fill it with their favorite writing tools as a sweet gift.
- Get seasonal. Decorate the can with seasonal designs like pumpkins for autumn or snowflakes for winter!
You can really let your creativity flow with this project, and I can't wait to see how you make it your own!
Before You Go
- Pin this for the next rainy afternoon: Save this tutorial so you can find it easily when you want to create your super cute desk organizer.
- Come back and tell me how it went: I love hearing from you! No question is too basic, and I’m all ears for any project mishaps too.
- Show off what you made: I’d love to see how your desk organizer turned out!
Happy crafting!