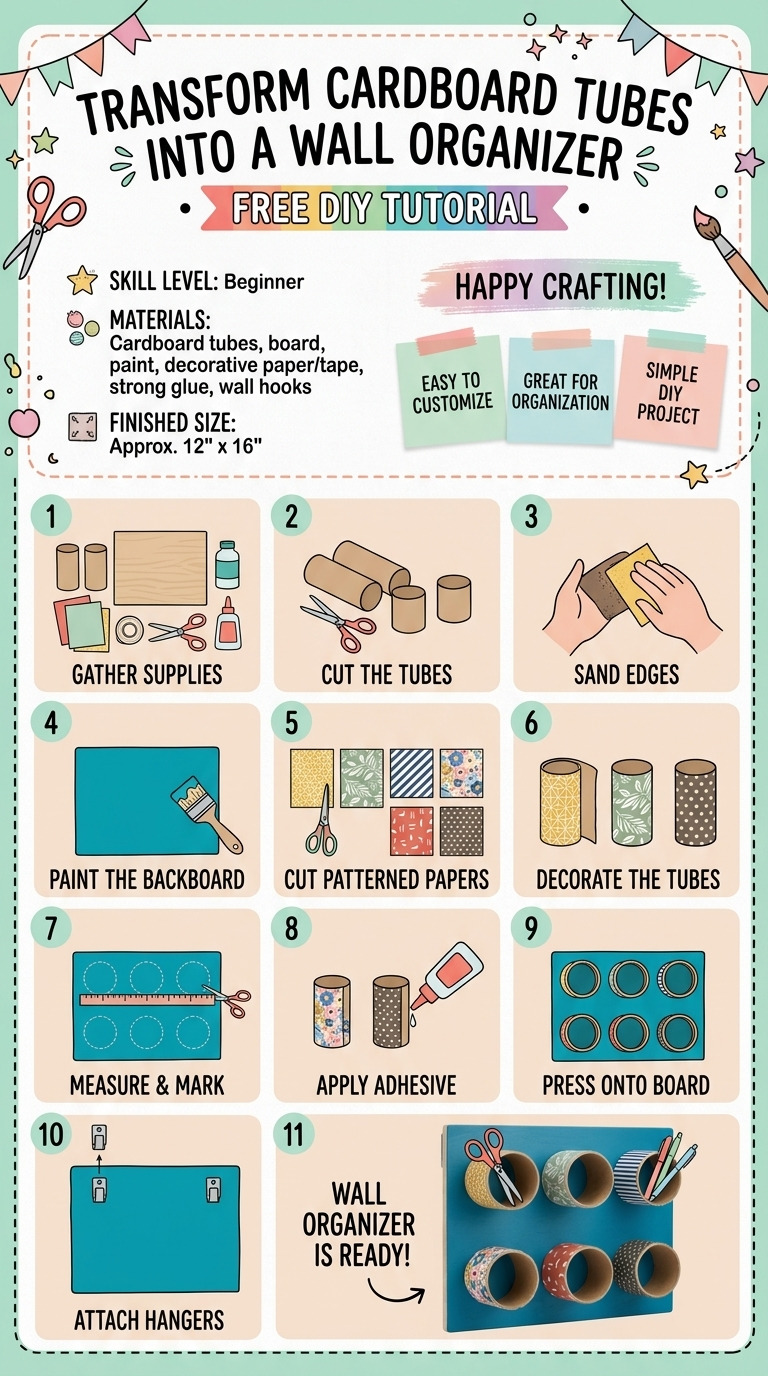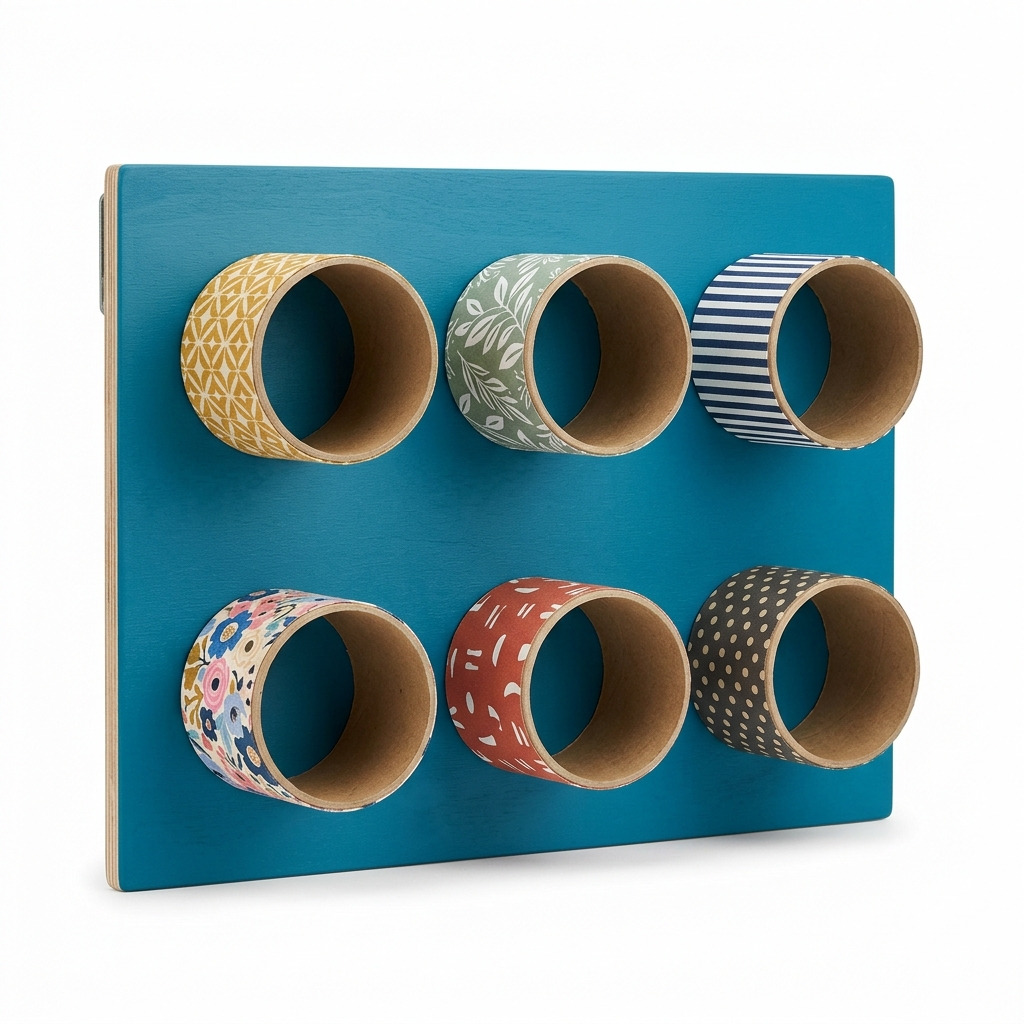
Last winter, I found myself in a bit of a clutter crisis. My home office was overflowing with pens, scissors, and sticky notes, and it didn’t take long for the chaos to spill onto my desk. I needed a storage solution that was not only functional but also visually appealing. As I pondered a way to organize the mess without breaking the bank, I stumbled upon a stash of cardboard tubes from paper towels and toilet paper. I decided to transform these humble tubes into a charming wall organizer that would not only corral my supplies but also add a splash of personality to my walls.
This project is perfect for using up items that might just end up in the recycling bin. The final product sits proudly on my office wall, ready to hold everything I need with style and flair. And I’ll let you in on a little secret—this DIY project is super simple! Whether you’re a crafting novice or have some experience under your belt, I’ll walk you step-by-step through the entire process.
[Image of the finished wall organizer, filled with colorful supplies and hung on a wall.]
What You'll Need
Materials:
- 6 cardboard tubes: These can be from paper towels or toilet paper. Make sure they are all the same height.
- 1 wooden board: 1/2 inch thick plywood, size: 24 inches wide by 18 inches tall. This will serve as the base for your organizer.
- Paint (Acrylic or spray paint): About 1 cup total in your color of choice to brighten up the wooden board.
- Fabric or decorative paper (optional): 1/2 yard to cover the tubes if you want a fun design.
- Hot glue sticks: 5 to 10 sticks to secure the tubes and other materials.
- Wall mounting brackets: 2 brackets to hold the organizer to the wall.
- Screws for brackets: 2 screws per bracket to keep everything secure.
- Paintbrush: 1 inch wide for applying paint.
- Sandpaper: Medium grit, around 120, for smoothing out the wooden board.
- Scissors: For cutting fabric or paper.
- Ruler: To measure and ensure even spacing.
- Pencil: For marking measurements on the board or fabric.
Tools:
- Hot glue gun: To apply glue for securing the tubes and other materials.
- Craft knife or utility knife: For precision cutting of the cardboard tubes and fabric if necessary.
- Power drill and drill bit: For mounting the organizer securely to the wall.
- Safety goggles: To protect your eyes while using the drill.
- Cutting mat: To protect your work surface.
How to Make It, Step by Step
Step 1: Setup Your Workspace
Create a clean, flat space for crafting. Lay down a cutting mat or newspaper to protect your surfaces from paint and glue. A tidy workspace can honestly make all the difference!
Step 2: Prepare the Cardboard Tubes
Inspect each cardboard tube for any leftover adhesive or paper and clean them if necessary. If you’re covering them with fabric, cut the fabric into 5-inch wide strips that are about 2 inches longer than the tubes.
Step 3: Paint the Wooden Board
Grab your paintbrush and apply an even layer of paint on one side of the wooden board. Be generous, but try to avoid drips. Make sure to paint the edges and corners too; they need love, too!
Once you finish painting, allow it to dry for at least 1 hour or until it's touch dry. If you need better coverage, don't hesitate to add a second coat.
Tip: If you accidentally apply too much paint at once, use your brush to help evenly distribute it, as this can save you from waiting longer for a thick layer to dry.
Step 4: Cover the Tubes (Optional)
If you've decided to cover your tubes, use a hot glue gun to apply glue along one edge of your fabric strip. Carefully roll the fabric around the tube, pressing it down to adhere. Make sure you start from the bottom end so the extra fabric can fold over the edge. Repeat this for all six tubes, and give them about 10 minutes to dry completely.
Step 5: Arrange and Glue Tubes to the Board
Before gluing, plan the arrangement of the tubes on your painted board. A popular layout is three tubes side by side on the top and three on the bottom, spaced evenly apart.
Start with the first tube: apply a generous amount of hot glue to one side and press it down onto the board. Hold it for about 30 seconds to ensure it sticks. Continue gluing the rest of the tubes, leaving about 2.5 inches of space between each tube and between rows.
Tip: If you think your glue isn’t holding well, check if you’re applying enough—more than just a dot but not too much to create a mess works best.
Step 6: Wall Mounting
Now, turn your board over. With your power drill, attach the wall mounting brackets using the screws, placing each bracket at the top. Make sure they’re secure!
Choose a spot on your wall where you want the organizer to hang. Use the drill to insert screws through the brackets to securely mount it.
Assembly & Finishing Touches
Take a moment to check if all tubes are secured properly. If you like, you can finish the wooden board with a clear sealant for extra protection against moisture and damage—especially if your space is prone to humidity.
Common Mistakes to Avoid
- Not sanding the wooden board. Sanding helps avoid splinters and ensures a smooth paint finish. If you skip this step, you might end up with a rough surface that isn’t pleasant to touch.
- Applying too much glue. A few dots along the edge of the tube should do the trick. Too much can cause a mess and may not hold as effectively.
- Overcrowding the tubes. Allow enough space between them not just for looks but also to make sure you can easily grab what you need.
- Forgetting to measure. It’s easy to eyeball things, but measuring ensures everything is lined up nicely and looks professional.
Make It Your Own: Variations and Ideas
- Mix up the colors: Use multi-colored paint for the board or various patterns for the fabric to create a vibrant display.
- Play with sizes: Use larger or smaller tubes for different supplies—maybe big ones for scissors and small ones for pens.
- Personalize the board: Add your name or a fun quote to the board with paint or vinyl transfers for a unique touch.
- Hang it horizontally: If space allows, you can arrange the tubes in a single row for a different look.
Don’t hesitate to get creative with your personal touch!
Before You Go
Pin this for the next rainy afternoon: Save this project to refer back to when you gather the materials and find a cozy crafting spot! Remember, you can check back for those measurements and drying times when you’re ready to make your wall organizer.
Come back and tell me how it went: I absolutely want to hear about your crafting experience, no matter how it turns out. Whether you ran into hiccups or everything went smoothly, your stories are always welcome!
Show off what you made: I’d love to see your finished wall organizer, so don’t be shy about sharing your creations!