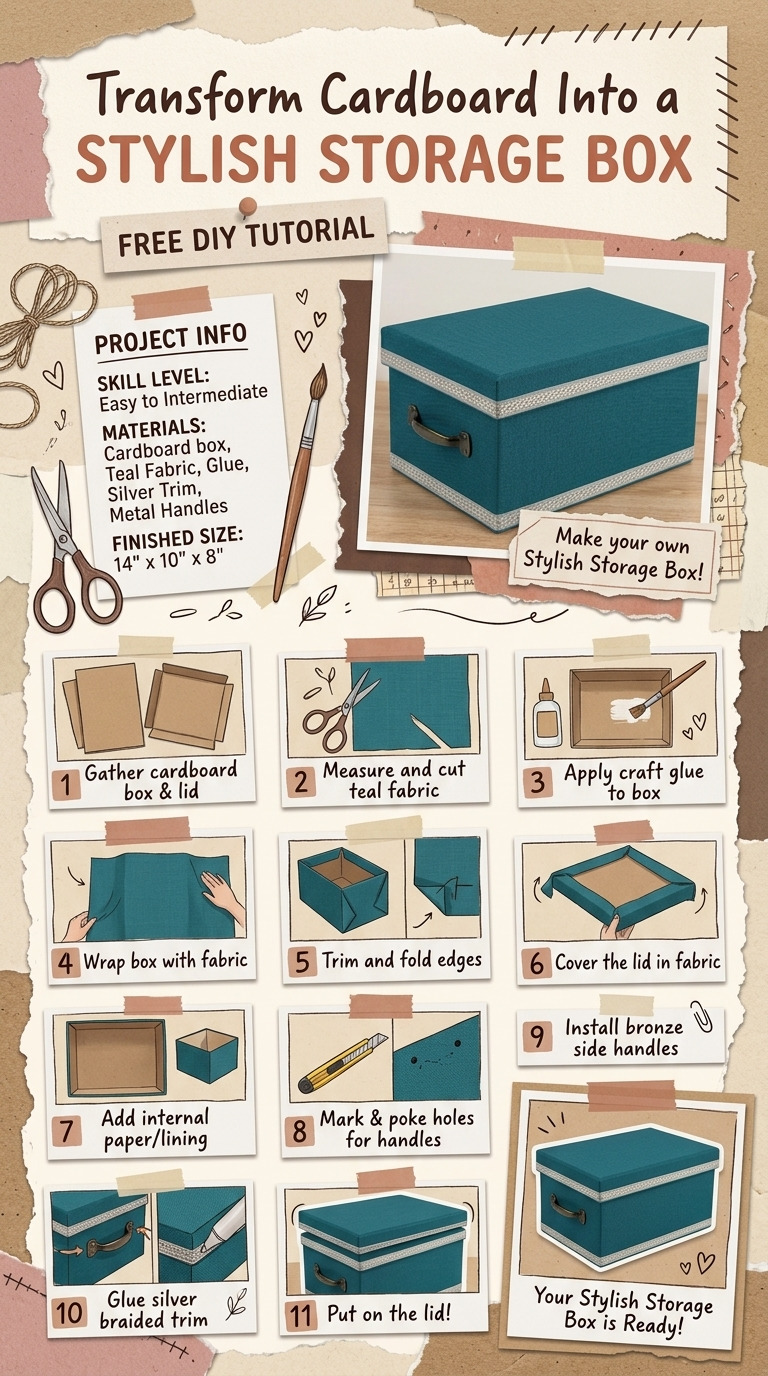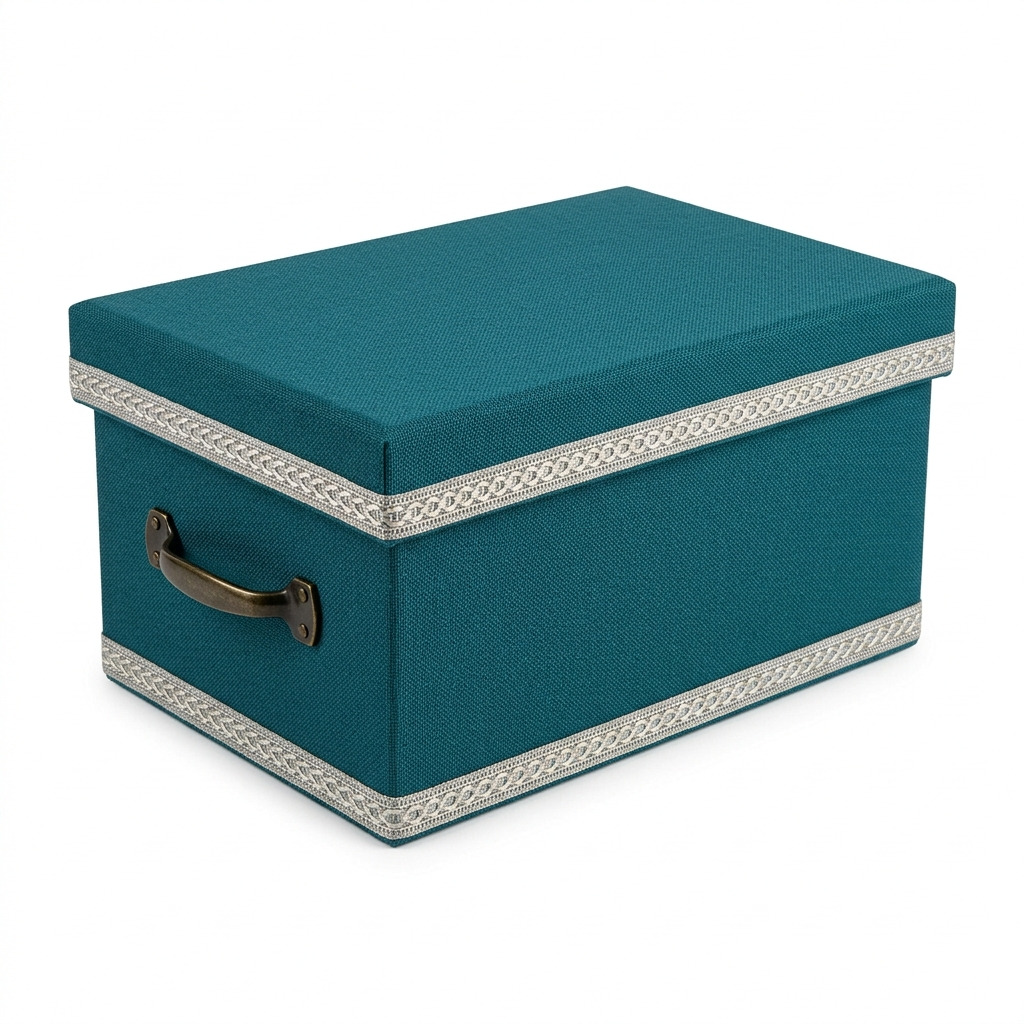
I’ve always had a ton of little things lying around my house that seem to multiply overnight! I could never find a stylish way to store them, and I didn’t want to spend a bundle on decorative boxes. That’s when I realized I could take something as simple as cardboard and transform it into a chic storage solution that not only looks great but is also ridiculously practical.
After a little brainstorming, I ended up with these beautiful, fabric-covered storage boxes that sit proudly on my bookshelf. They hold everything from remote controls and craft supplies to receipts and miscellaneous items. Best of all, this project is genuinely easy! I’ll walk you through each step, so you’ll have your own stylish storage box in no time.
![Descriptive image caption of the finished project]
What You'll Need
Materials:
- Cardboard sheets: 3 pieces, each measuring 12” x 24” (preferably sturdy cardboard; if you can recycle old boxes, that's perfect!)
- Decorative fabric: 0.5 yards, such as cotton or canvas (I chose a lovely teal, but go with whatever color speaks to you)
- Hot glue sticks: 1 pack (standard size; these help everything hold together snugly)
- Craft glue: 4 oz (non-toxic; I find this works better for fabric)
- Clear acrylic spray sealer: 1 can (this protects your finished work from wear and tear)
- Decorative trim: 1 yd (like ribbon, lace, or pompom trim to fancy it up)
Tools:
- Scissors: 1 pair (sharp ones work best for clean cuts)
- Ruler: 1 (12” or longer to make accurate measurements)
- Pencil: 1 for marking your cuts
- Hot glue gun (this is essential for quick bonding)
- Craft knife (for precise cuts, but use carefully)
- Cutting mat (this protects your surfaces)
- Paintbrush (to apply craft glue or paint)
Optional materials:
- Paint (color of your choice) if you prefer a painted finish instead of fabric covering; you can customize it even more this way!
- Stencils for decorative designs on fabric or painted surfaces.
How to Make It, Step by Step
Step 1: Prepare Your Workspace
I really love having a clean area to work in, so lay down a cutting mat to protect your surface. Gather all your materials and tools so you won’t need to pause your work.
Step 2: Cut the Cardboard
Next, measure and cut the cardboard pieces based on these dimensions:
- 2 pieces measuring 12” x 8” (for the base)
- 2 pieces measuring 12” x 6” (for the longer sides)
- 2 pieces measuring 8” x 6” (for the shorter ends)
- 1 piece measuring 12” x 8” (for the lid)
Tip: Use the craft knife on your cutting mat for precision, and be cautious while cutting to avoid any slips.
Step 3: Assemble the Box
Start with one of the 12” x 8” pieces. Take one of the 12” x 6” side pieces and apply hot glue to one edge. Press it against the bottom piece. Make sure it’s standing straight!
Repeat this for the second 12” x 6” piece. Now, you’ll have the two longer sides attached to the base.
Step 4: Add the Ends
Time to add the two 8” x 6” pieces. Glue these onto the ends of the box as you did with the longer sides. Make sure everything is aligned; it should look like a rectangular box now. Let the glue set for about 5 minutes.
Mistake to Avoid: I made the error of trying to rush this step once and ended up with a wonky box. Just be patient—you want those corners lined up!
Step 5: Reinforce the Corners
Once the glue is set, reinforce all the corners with a bit of craft glue around the joints. This makes your box stronger and sturdier.
Step 6: Create the Lid
Now, take the last 12” x 8” piece you cut. If you’re using decorative fabric, lay it down and place the cardboard piece on top. Apply craft glue and fold any excess fabric over the edges of the cardboard. You’ll want to smooth everything so it looks nice from the top.
Allow this to dry for about 15-20 minutes.
Step 7: Cover the Box in Fabric
Now, repeat the fabric process for the entire outer surface of the box. Don’t forget to fold and glue the edges neatly. This will give you a well-finished look. If you prefer paint, just apply it evenly with your paintbrush and let it dry for around 1 hour.
Step 8: Seal It Up
Once dry, apply a coat of clear acrylic spray sealer all over the fabric or painted surface from about 6-12 inches away. This will help it last longer and look lovely! Follow the instructions on the can, but usually, it will need about 30 minutes to dry.
Step 9: Add Trim and Handles
Now for the fun part: adding your decorative trim! Glue it along the edges of the box, starting from one corner and working your way around. You can also add handles if you wish. Measure and mark where you want them, then glue them on firmly with hot glue.
Common Mistakes to Avoid
- Rushing the glue. If you try to move parts before they’re completely set, the box can fall apart. Always give your glue some time to dry!
- Cutting inaccurately. Make sure your measurements are exact. Any saving of a slice here or there can lead to a box that doesn’t fit together properly.
- Ignoring edge alignment. If the edges aren’t aligned well at the assembly stage, it’ll show later. Take your time!
- Skip sealing. Not using the clear coat means your box could wear down faster. Always seal for longevity.
Make It Your Own: Variations and Ideas
- Color Choices: Have fun with colors! Try a bright fabric for a pop or sophisticated neutrals for an elegant touch.
- Play with Shapes: Want a taller box? Just adjust your cardboard sizes!
- Seasonal Designs: Change the fabric or paint according to the seasons for a festive feel!
- Personalization: Use stencils to paint or embellish your box with letters or patterns that reflect your personality.
- Gift It: This makes a lovely gift for anyone! You can customize it for their favorite colors or themes.
You’ve got all the tools to create a unique, stylish storage box now! Have fun making it your own.
Before You Go
Pin this for the next rainy afternoon: Save this easy project for later so you’ll remember how to transform cardboard scraps into beautiful storage boxes when you’re ready to craft.
Come back and tell me how it went: I’d love to hear your thoughts or any questions you might have about the process! No question is too basic. Feel free to share your experiences, whether it went perfectly or had a little hiccup.
Show off what you made: I’d be thrilled to hear how your box turns out—don’t hesitate to share your final creation! Remember, each box tells a story, just like you!