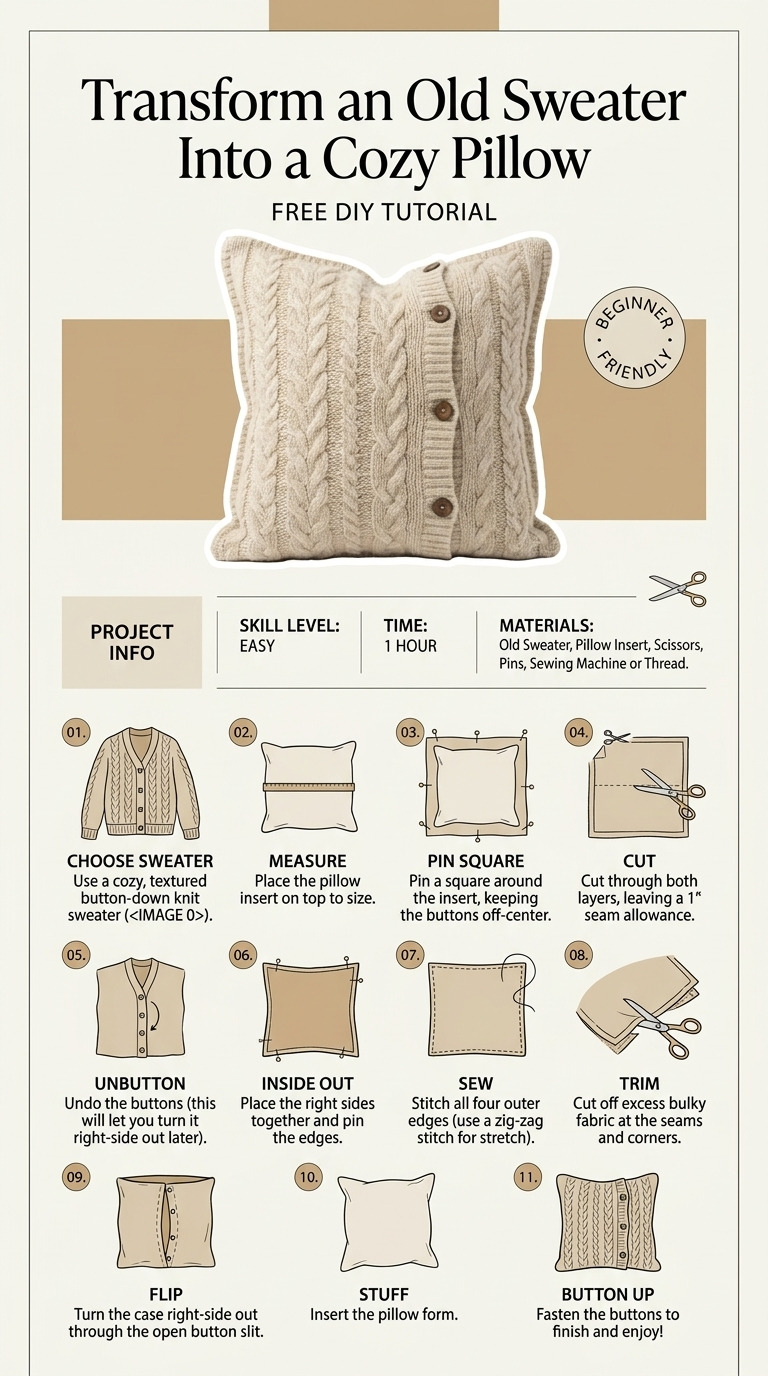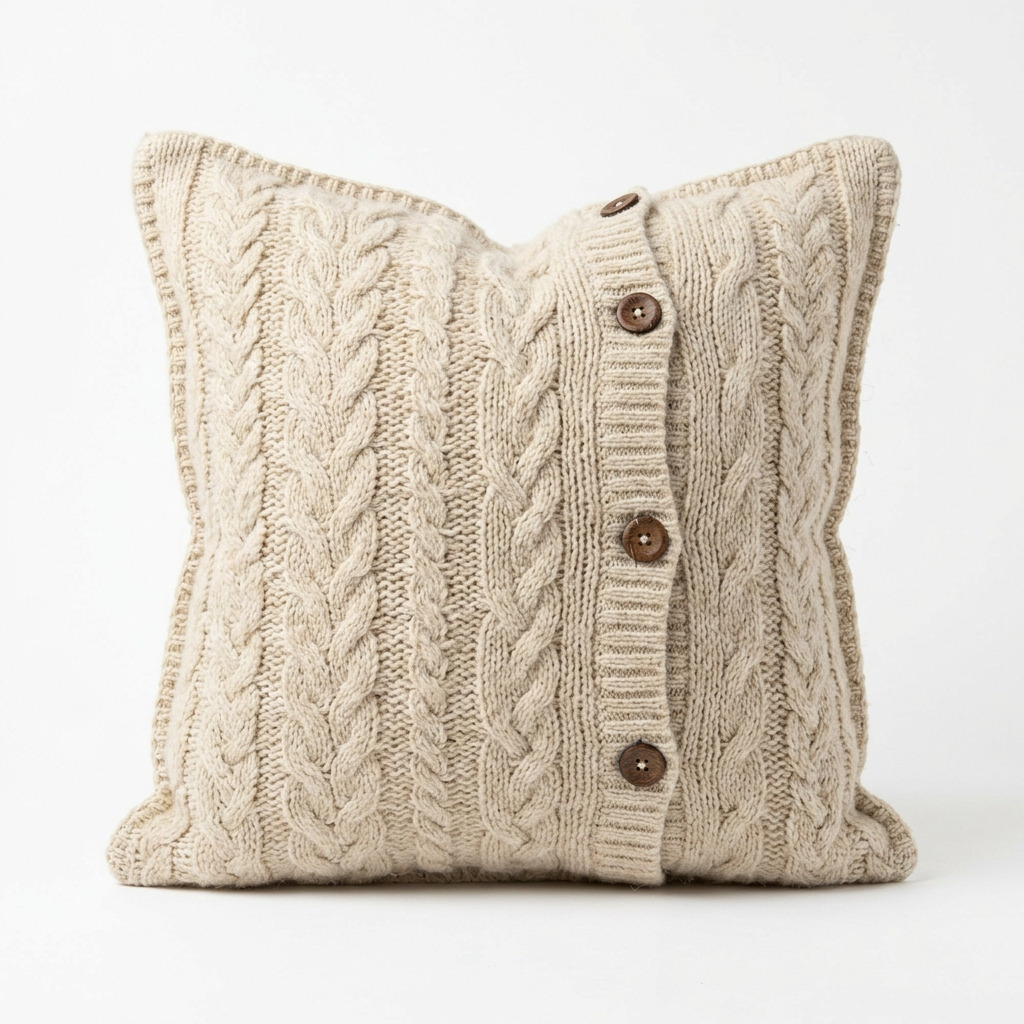
Do you have an old sweater tucked away in the back of your closet? You know, that one that’s seen better days but you just can’t bring yourself to throw away? Well, I found a fantastic way to breathe new life into a forgotten piece: turning it into a cozy decorative pillow! Not only does this project give your old sweater a new purpose, but the end result adds such warmth and personality to your home decor. I keep mine on my reading chair, and every time I see it, I’m reminded of cozy afternoons sipping tea while wrapped up in the original sweater.
You’ll be pleased to know that this is an easy project — perfect for beginners! I’ll walk you through every single step, from preparing the sweater to stuffing and sewing it into a delightful pillow. Let’s get started!
[Descriptive image caption of the finished project]
What You'll Need
Materials:
- 1 old sweater: Look for a knit fabric (like wool or acrylic), which feels soft and comfy. If it's a little worn out, that's totally okay; it will add character!
- Polyfill stuffing or pillow insert (16 inches x 16 inches): If you want a nice full pillow, grab about 1-2 cups of polyfill stuffing.
- Optional: You might like to use buttons or other decorative embellishments to make it look even cozier.
Tools:
- Fabric scissors: Any standard size will do; I recommend having a good, sharp pair.
- Sewing machine or needle and thread: A basic sewing machine is great if you have one, or you can hand-stitch if you prefer.
- Tailor’s chalk or fabric marker: This will help you mark where you need to cut.
- Sewing pins: These are used to hold your pieces together before sewing.
- Iron: Not essential, but it can be helpful for smoothing out any seams.
How to Make It, Step by Step
Step 1: Prepare the Sweater
Lay your old sweater flat on a clean cutting surface, with the front side facing up. Make sure to smooth out any wrinkles because they can make it tricky when you're cutting. Give it a quick check to ensure it’s in good shape. If you spot any holes, you might want to patch them up or choose another sweater.
Step 2: Measure and Cut
Take your measuring tape and mark out a square that is 16 inches by 16 inches on the front and back of the sweater using your tailor's chalk. This can be done on both sides so you can cut through two layers at once! Carefully cut along the marked lines. You should end up with two identical squares.
Tip: Take your time cutting and stay as close to the line as you can. I once rushed this step and ended up with uneven edges, which made sewing much harder!
Step 3: Sew the Sides Together
Place your two sweater squares together, lining them up with the inside of the sweater facing out. Use your sewing pins to hold the edges in place. Leave about a half-inch seam allowance for sewing so you won't be sewing too close to the edge. Now, sew along three sides of the square, starting from the bottom of one side, across the top, and down the other side. Remember, you’ll be leaving one side open for stuffing!
Step 4: Prepare for Stuffing
Now it's time to turn your pillow case inside out. You’ll want the nice sweater exterior showing. You can help push out the corners using a pencil or even your fingers to ensure they’re nice and defined.
Step 5: Stuff the Pillow
Now for the fun part—stuffing! Begin filling the pillow with your polyfill or insert the pillow form. Go for your desired fullness, and make sure to distribute the stuffing evenly so there are no lumpy bits.
Step 6: Close the Opening
Once you're happy with the stuffing, fold the edges of the open side inward to create a clean edge. Use your pins to hold it together. After that, sew across this open side to secure your pillow closed.
Step 7: Final Touches (Optional)
If you want to add a touch of flair, now is the time to sew on any embellishments like buttons or patches. This part is totally up to you! And if you notice any seams that are uneven, give them a quick press with an iron, set on low heat.
Common Mistakes to Avoid
- Cutting too close to the edge. If you cut too close, your seams might unravel. Aim for about a ½ inch seam allowance.
- Forgetting to pin the edges. Not pinning can lead to misaligned edges. Make sure everything is secure before sewing.
- Overstuffing the pillow. If you stuff too much, it may lose its shape or be difficult to sew shut. Fill it, but don’t overdo it!
- Neglecting to iron the seams. Not ironing can lead to lumpy seams. Take a moment to give them a smooth finish.
- Skipping seam reinforcement. If you want durability, consider sewing a zigzag stitch along the edges. This helps prevent fraying over time.
Make It Your Own: Variations and Ideas
- Different Sizes: If you'd like a larger or smaller pillow, adjust your cuts accordingly while keeping those shapes nice and square or rectangular.
- Patchwork Pillow: Use various sweaters in different colors and patterns to create a beautiful patchwork design.
- Hideaway Pocket: Consider sewing a small pocket onto the pillow to stash remote controls or other bits and bobs.
- Seasonal Themes: Make a holiday-themed pillow by choosing sweaters in festive colors or patterns!
Transforming your old sweaters into cozy pillows is such a lovely way to both recycle and personalize your space. This project is all about having fun and expressing your creativity, so feel free to play with ideas as you go.
Before You Go
Pin this for the next rainy afternoon: Save this project so you can easily find it next time you're ready to transform that old sweater into a cozy pillow.
Come back and tell me how it went: I’d love to hear about your experience, whether it went just as planned or took a little twist! Remember, there are no silly questions here.
Show off what you made: Feel free to share your finished pillow — I can’t wait to see what you create!