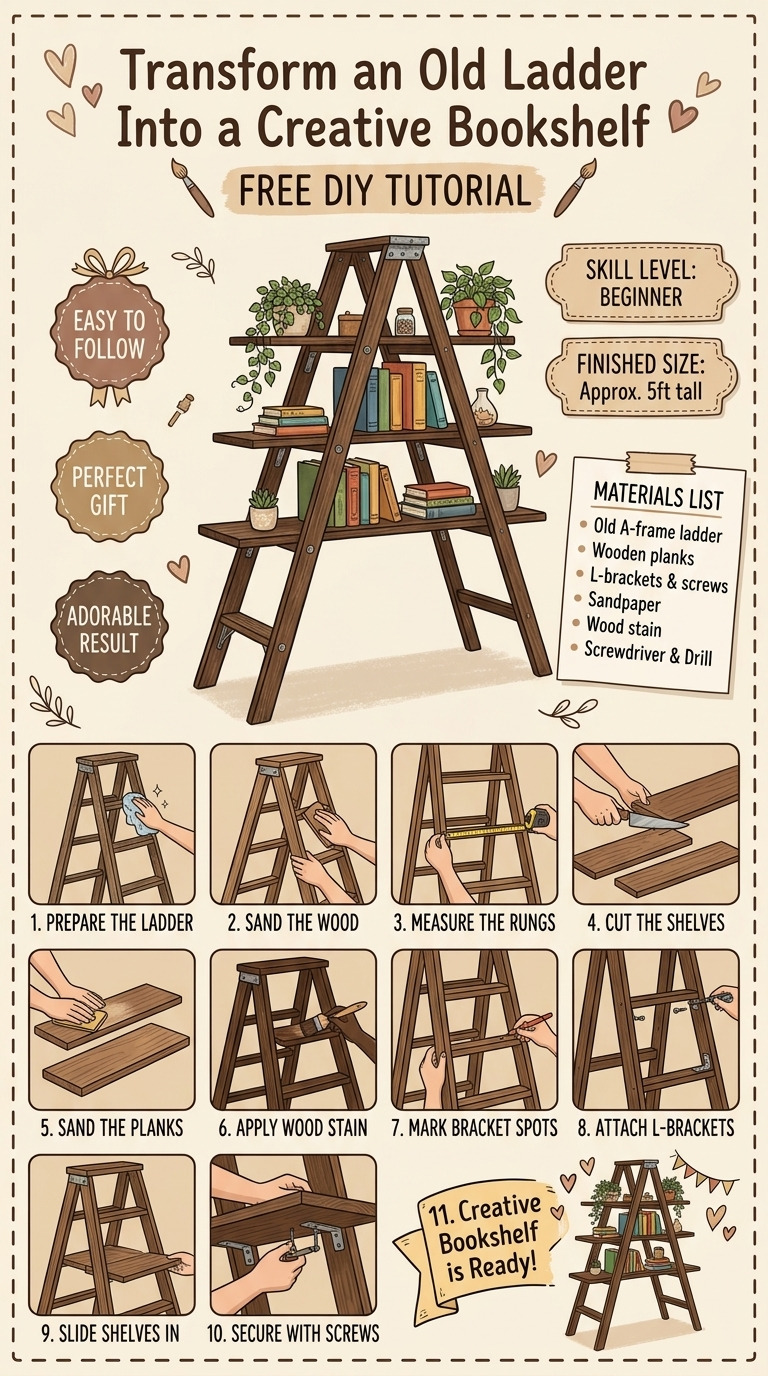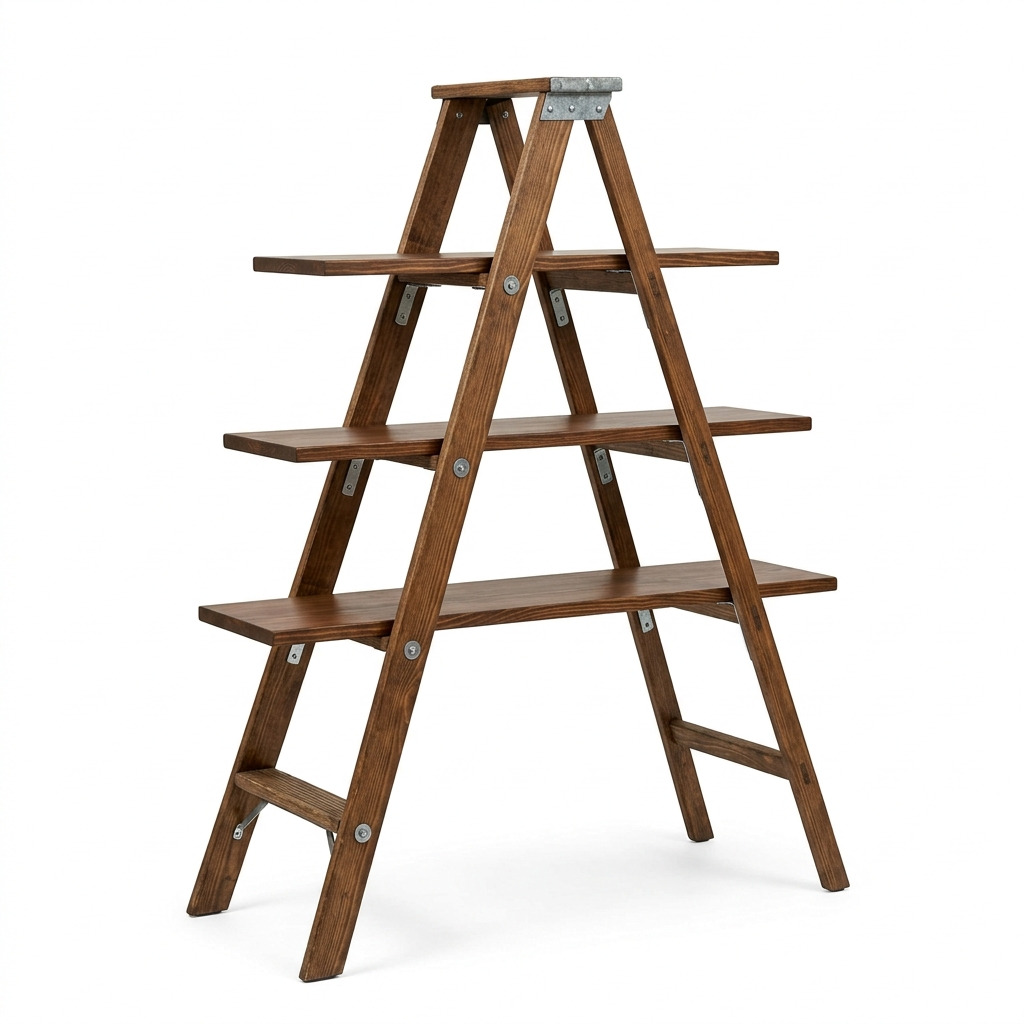
I love a good DIY project that not only gives new life to something old but also adds a unique touch to my home. Last winter, I stumbled upon an old wooden ladder in my garage that had seen better days. I couldn’t bear to throw it away, and instead, I saw an opportunity. What if I turned that ladder into a rustic bookshelf? The idea excited me, so I rolled up my sleeves!
Now, this bookshelf stands proudly in my living room, holding my favorite novels, some quirky decor, and even a few plants. It has become not just a storage solution, but a real conversation starter. The best part? It’s an easy project you can tackle too, and I promise to walk you through every single step.
![Descriptive image caption of the finished project]
What You'll Need
Materials:
- Old Wooden Ladder
- Quantity: 1
- Size: Standard step ladder (approximately 5 feet tall)
- Note: Choose one with sturdy rungs.
- Wooden Shelves
- Quantity: 3
- Size: 1” x 10” x 24” (length)
- Note: Pine is great for a rustic look, but you can use any wood you prefer.
- Wood Stain or Paint
- Quantity: 1 quart
- Color: Optional (for example, dark walnut or classic white)
- Wood Screws
- Quantity: 12 screws
- Size: 1.5-inch wood screws
- Note: These will hold your shelves up firmly.
- L-brackets
- Quantity: 6
- Size: 2” x 2”
- Note: Galvanized is a good choice for durability.
- Wood Glue
- Quantity: 1 bottle (4 oz)
- Note: This will help keep everything steady.
Tools:
- Circular saw or handsaw (for cutting shelves, if needed)
- Drill and drill bits (1/8” for pilot holes)
- Screwdriver (or power drill with a screwdriver bit)
- Measuring tape (25-foot)
- Level (to keep everything nice and straight)
- Sandpaper (medium grit, 120 and fine grit, 220)
- Paintbrush (1.5 inch)
- Safety gear: Gloves, dust mask, safety goggles
How to Make It, Step by Step
Step 1: Prepare the Ladder
First things first, you need to give your ladder some TLC. Clean it thoroughly with a damp cloth to get rid of dust and cobwebs. Then, using medium-grit sandpaper, sand down any rough patches or old paint. Finish with fine-grit sandpaper to make sure it feels smooth to the touch.
Tip: Pay attention to the rungs; they should feel nice and smooth so no splinters surprise you later.
Step 2: Stain or Paint the Ladder
Now comes the fun part! Choose your wood stain or paint color. Using a paintbrush, apply it all over the ladder. I painted mine a lovely shade of teal, and it really pops against my white walls. Let it dry for about 2 hours or until it feels completely dry to the touch.
Step 3: Attach L-brackets
Decide where you want your shelves to be positioned. I like to keep them about 12-14 inches apart for balance. Use a measuring tape to mark these points on the ladder's sides.
Drill small pilot holes for your screws where you made your marks, and then attach an L-bracket at each shelf location with 2 screws. This adds stability to your shelves.
Tip: Double-check that your brackets are level before securing them — no one wants wobbly shelves!
Step 4: Prepare and Attach Shelves
Now it's time for the shelves! If your wood isn’t pre-cut, cut each shelf to 24 inches long. Place the first shelf on the L-brackets and make sure it’s level.
For extra hold, squeeze some wood glue on top of each L-bracket before placing the shelf down. Then, screw the shelf into the L-brackets with 2 screws per bracket. Repeat this for the other two shelves, ensuring each one is level as you go.
Step 5: Final Touches
Once all the shelves are attached, wipe away any excess glue with a damp cloth. Allow your entire ladder bookshelf to cure for at least 24 hours before putting any items on it. This is super important! Rushing this step could cause your shelves to feel wobbly.
Common Mistakes to Avoid
- Rushing the glue. It really needs time to set. If you don’t wait, your shelves might fall off.
- Forgetting to level the brackets. This can lead to shelves that look crooked and are not functional.
- Using untreated wood. If you opt for untreated wood shelves, they might warp quicker. Consider a protective finish.
- Overloading the shelves. Don’t put too many heavy books; it's best to mix in some lighter decor.
Make It Your Own: Variations and Ideas
- Color Your World: Choose bright colors or distressed finishes for a more eclectic look. You can even mix and match colors for the shelves and the ladder.
- Personalized Decor: Decorate your shelves with plants, candles, or picture frames that resonate with you. Change these out seasonally for a fresh look!
- Add Hooks: Consider adding hooks to the side of the ladder for hanging keys or scarves if you're placing it near an entryway.
- Scale Down: If space is an issue, you can make a smaller version using a shorter ladder or fewer shelves.
- Gift Idea: Transform a ladder as a gift, filled with books or decorative items that suit the recipient’s personality!
Remember, crafting is all about self-expression. What you create doesn’t have to be perfect — it just has to be you!
Before You Go
Pin this for the next rainy afternoon: Save this project to your Pinterest board so you’ll have all the details when you’re ready to start transforming that old ladder into an amazing bookshelf.
Come back and tell me how it went: I love hearing about your projects, questions are always welcome, and don’t worry if things didn’t go perfectly. We've all been there!
Show off what you made: I can’t wait to see how your ladder bookshelf turns out! Share your creations and inspire others to get crafty too.