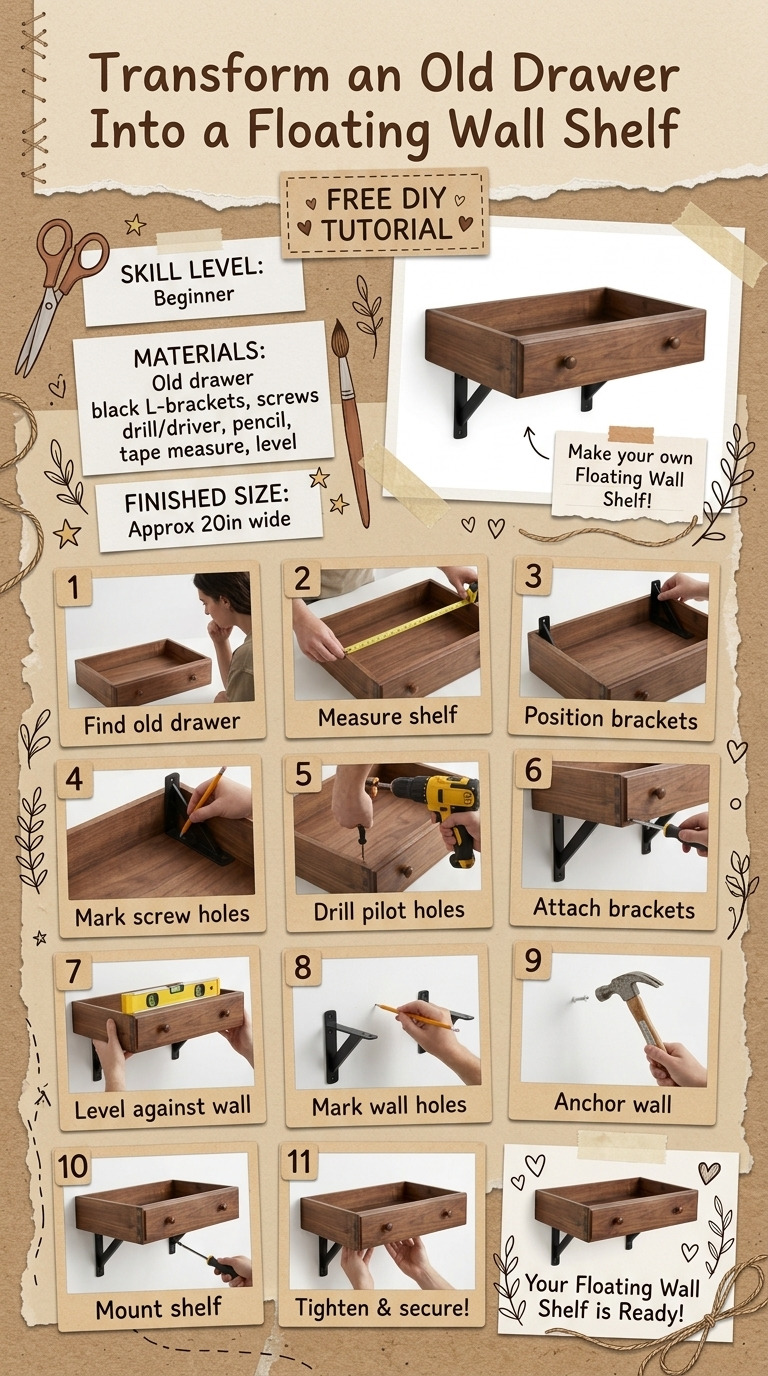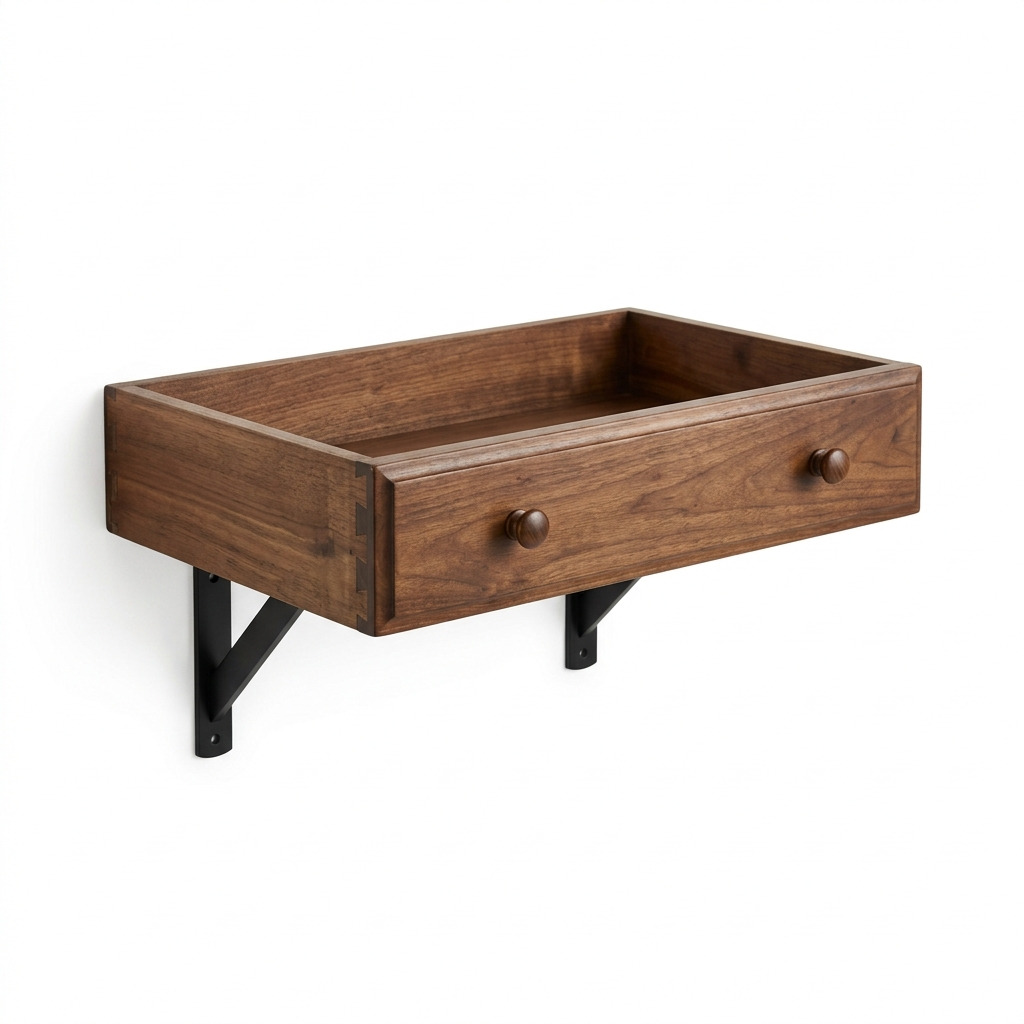
I absolutely love giving old furniture a second life, don't you? Last spring, I came across a bunch of old drawers at a thrift store, and I couldn’t resist picking one up. It was a little worn but had great potential. I decided to turn it into a floating wall shelf, perfect for displaying some of my favorite plants and books. It turned out to be one of the easiest, most rewarding projects I've done! This little beauty now hangs proudly in my living room, adding character and charm to the space.
If you’ve ever wanted to transform something you already have without spending a fortune, this project is for you. I’ll walk you through each step of turning that old drawer into a fabulous floating shelf — you’ll see it’s super simple!
[Descriptive image caption of the finished project]
What You'll Need
Materials:
- Old drawer: Minimum dimensions of 24 inches wide, 15 inches deep, and 6 inches high. If you have a smaller drawer, you can adjust the L-brackets accordingly.
- Sandpaper: Medium grit (120) and fine grit (220). This will help smooth out any rough spots.
- Wood stain or paint: Optional, but it adds a lovely finish. Consider classic colors like walnut or white.
- Wood sealer or polyurethane: Optional, but this will protect your finish and last longer.
- 2 heavy-duty L-brackets: Approximately 6 inches x 6 inches for sturdy support.
- Wall anchors and screws: Make sure they’re appropriate for your wall type, especially if it’s drywall.
- Optional: Small decorative knobs or handles for added flair.
Tools:
- Drill and drill bits: A 1/4-inch bit for anchors and appropriate bits for screws.
- Screwdriver: To secure everything tightly.
- Level: To ensure your shelf is straight — no one likes a crooked shelf!
- Ruler or measuring tape: To mark your spots accurately.
- Paintbrush: If you choose to paint, this is what you’ll need for a smooth finish.
- Safety equipment: Dust mask, safety goggles, and work gloves. Protect yourself while you work!
How to Make It, Step by Step
Step 1: Clean and Prepare the Drawer
First, take a close look at your drawer. Remove any hardware like handles or knobs on it. Then, sand it down using the medium-grit sandpaper. Focus on the surfaces and particularly on any rough edges. Once you've done that, switch to the fine-grit sandpaper to smooth it out.
Tip: Make sure to sand in the direction of the wood grain. It’ll make a big difference in the final finish!
Once you’ve finished sanding, wipe away dust and debris with a damp cloth. Let it dry completely.
Step 2: Stain or Paint the Drawer
If you're staining, grab your wood stain and a good brush. Apply it evenly across the surface, following the manufacturer's instructions. If you're going for paint, use your brush to coat the drawer and let it dry for about 1-2 hours before applying a second coat.
Tip: I personally love the look of a stained drawer. It brings out the natural beauty of the wood!
Step 3: Seal the Drawer (Optional)
After your stain or paint has fully dried (about 24 hours is a good rule of thumb), consider adding a layer of wood sealer or polyurethane. This will protect your beautiful finish from scratches and wear. Follow the instructions on the product for drying time.
Step 4: Attach L-Brackets
Now, it’s time to hang your shelf! Use your level to find and mark the spots on the wall where the L-brackets will go. They should be at least 24 inches apart to support the shelf’s weight properly.
Drill pilot holes into the wall at your marked spots. If you hit drywall, insert wall anchors to ensure a secure hold. Next, attach the L-brackets to the wall using your screws, checking that they’re level before tightening them all the way.
Step 5: Mount the Drawer on Brackets
Carefully position the drawer onto the L-brackets. It should fit snugly, with the back resting securely on the brackets.
Tip: You may want to have someone help you hold the drawer in place while you secure it to ensure everything is stable.
Step 6: Secure the Drawer
Using screws, secure the drawer into the brackets by drilling into the bottom of the drawer through the brackets. This extra step helps keep everything stable and prevents shifting.
Step 7: Final Touches
If you want, you can now add your decorative knobs or handles to the front of the drawer. They give a lovely final touch and add personality.
Common Mistakes to Avoid
- Rushing the glue. If you don’t let your paint or stain dry completely, it can bubble or peel. Always give it the full drying time!
- Over-sanding. Make sure to stop before you remove too much wood. You want a smooth finish, not a thin drawer!
- Misplacing brackets. Double-check your measurements. A crooked shelf is not a good look!
- Skipping the anchors. If your wall is made of drywall and you skip the wall anchors, your shelf might come crashing down.
- Not securing the drawer. Remember to screw it into the brackets! Skipping this step can lead to a wobbly shelf.
Make It Your Own: Variations and Ideas
- Try a Pop of Color: Bright colors can add personality! Consider painting the drawer in a fun, vibrant color to make a statement in your space.
- Add Shelves Inside: If your drawer has enough room, you can create small internal shelves for smaller items.
- Use Different Brackets: Consider using old bookshelf brackets for a unique touch.
- Create a Gallery Wall: Mount multiple drawers at different heights for a whimsical gallery shelf display.
However you decide to customize your floating shelf, remember to have fun with it and let your creativity shine!
Before You Go
Pin this for the next rainy afternoon: Save this project on Pinterest so you can easily find the steps and tips when you’re ready to create your own floating shelf. Especially keep an eye on those measurements!
Come back and tell me how it went: I’m here for any questions, no matter how basic! Whether your project turned out flawlessly or went a little sideways, I want to hear about it.
Show off what you made: If you try this project, I’d love to see your creations! Share your beautiful floating shelf with pride.
Happy crafting, my friend!