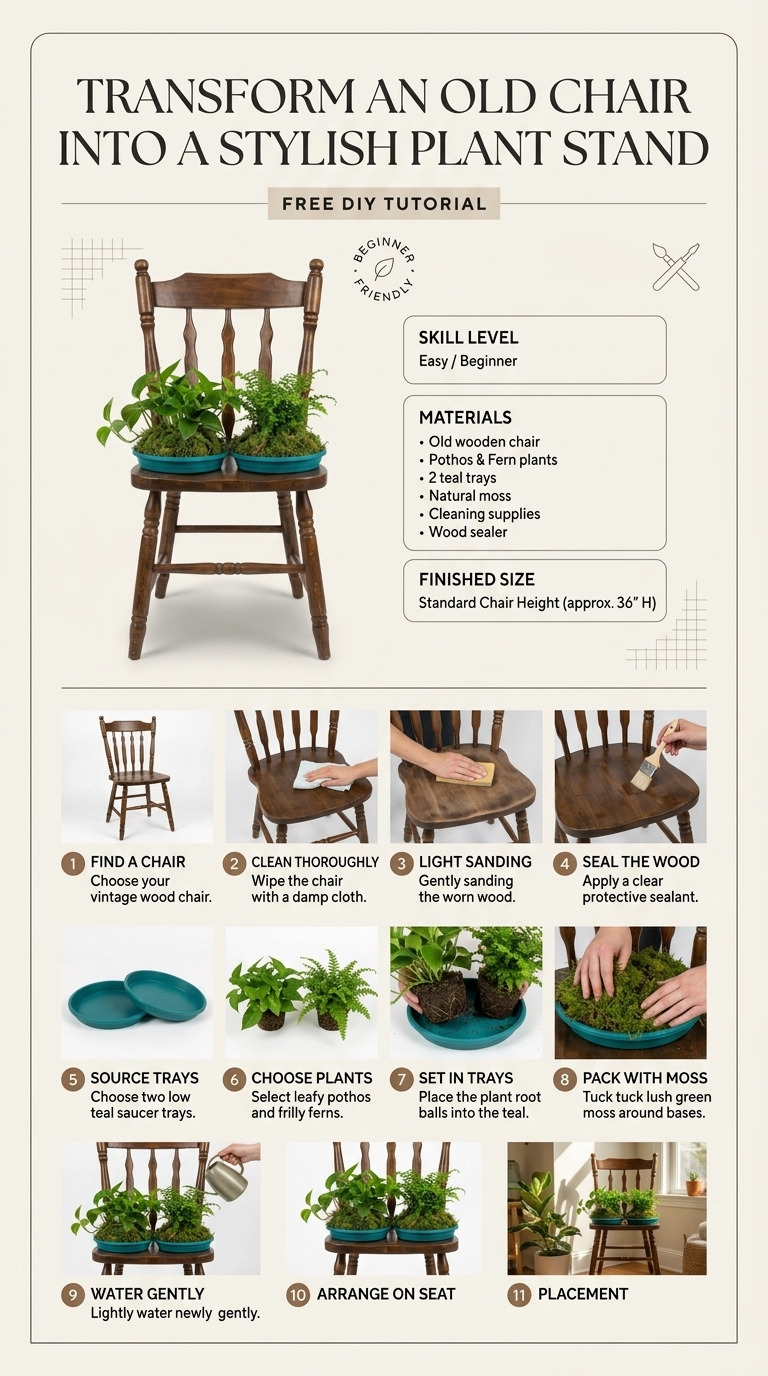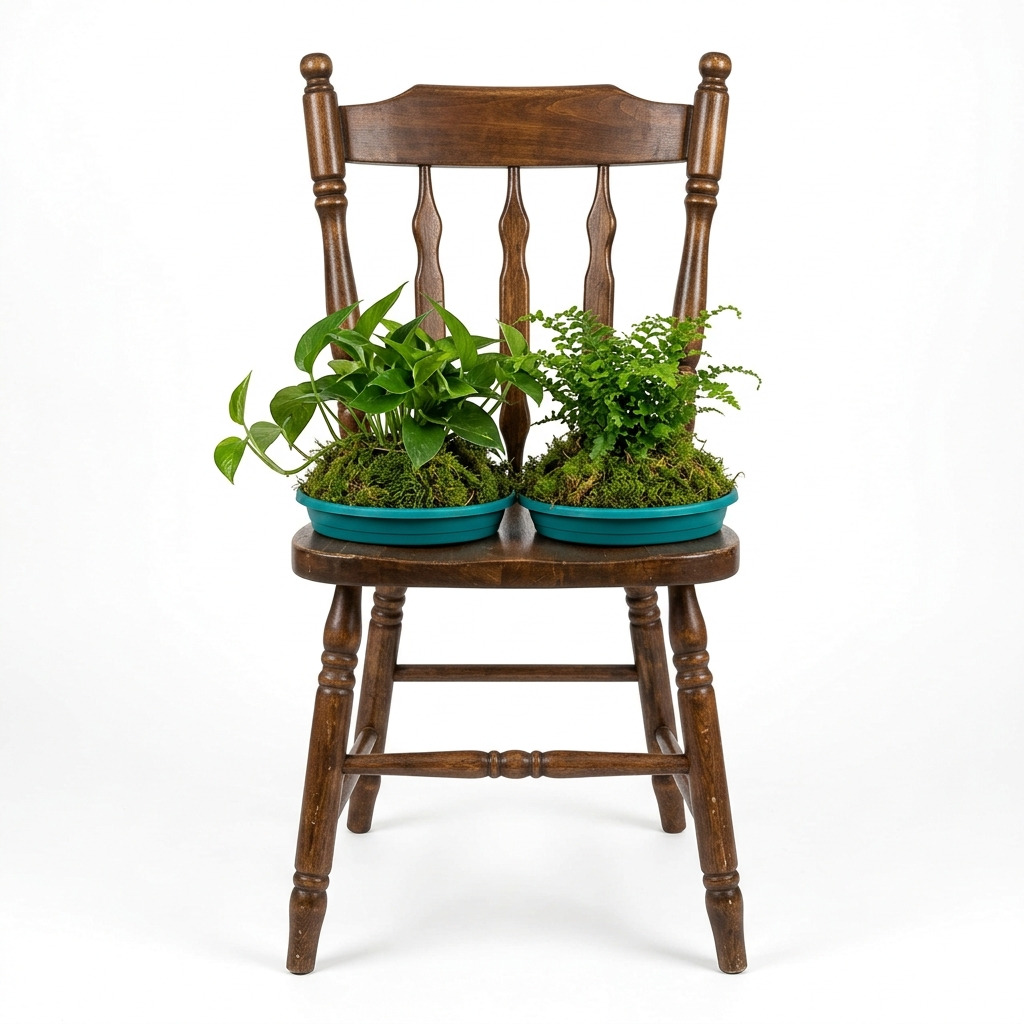
Have you ever found an old chair just sitting in your garage or a thrift store that has great potential but no longer suits your home? That’s exactly what happened to me! I stumbled across this charming, slightly wobbly wooden chair that was begging for a new life. Instead of tossing it away, I decided to transform it into a stylish plant stand. It now brightens up my living room and proudly holds my favorite potted plants, adding a touch of whimsy to my space.
This project not only gives old furniture a new lease on life but also creates a lovely spot for your greenery. Trust me, you don't need any advanced skills or fancy tools to pull this off—I'll walk you through every single step!
[Descriptive image caption of the finished project]
What You'll Need
Materials:
- Old chair: 1 (any style—preferably a wooden one with a sturdy seat)
- Sandpaper: 1 sheet each of medium grit (100-150) and fine grit (220)
- Wood stain or paint: 1 quart of any color (natural stains like walnut or bright colors like turquoise work beautifully)
- Sealer: Clear polyurethane or outdoor sealant (optional, but essential if you're using it outside)
- Faux moss or decorative stones: 1 bag (optional, but it adds a lovely touch to your plants)
- Plastic plant saucer: 2 (6-8 inches in diameter, to hold the pots)
- Potted plants: 2-3 (small to medium, depending on the chair size)
Tools:
- Paintbrushes: 1-inch and 2-inch width
- Screwdriver: Phillips and flathead
- Clamps: 2 (to stabilize the chair while you work)
- Rag or old cloth: For applying stain/paint
- Measuring tape: To ensure everything fits perfectly
- Drop cloth: To protect your workspace
- Safety equipment: Dust mask while sanding, gloves for staining and sealing, and safety goggles
How to Make It, Step by Step
Stage 1: Preparing the Chair
Step 1: Remove Fabrics and Cushions
If your chair has any cushions or fabric, start by removing them carefully. You'll want to do this gently to avoid damaging the chair. Use a screwdriver if necessary to get to the screws holding everything in place.
Step 2: Sand the Chair
Grab your medium grit sandpaper and sand the entire chair down. Pay extra attention to areas with chipping paint or rough spots—these need to be smooth for a good finish. Sanding will reduce the chance of peeling paint later.
Tip: Sand in the direction of the wood grain for best results. It feels nice and will make the chair look smoother overall.
Step 3: Clean It Up
Once you finish sanding, take a damp rag and wipe down the chair to remove all the dust and debris. Let it sit for about 30 minutes to dry completely.
Stage 2: Staining or Painting
Step 4: Apply Stain
If you’re using stain, grab your rag or brush and apply it evenly across the chair's surface. Allow the stain to soak in for 5-10 minutes, and then wipe off any excess with a clean rag.
Let it dry for 1-2 hours; it's tempting to skip this, but take your time!
Step 5: Paint, If You Prefer
If you're painting instead, use the 2-inch brush for larger areas and the 1-inch brush for detailed bits. Make sure each section is covered evenly. Allow the first coat to dry completely, which usually takes about 1-2 hours. If needed, add a second coat.
Stage 3: Sealing and Final Touches
Step 6: Seal the Finish
Once the paint or stain has dried, apply a coat of sealer. Check the manufacturer's instructions for drying times (typically, you should wait around 2-4 hours between coats). This is key for durability!
Step 7: Decorative Touches
Now for the fun part! Take your plastic plant saucers and place them on the seat of the chair. Fill them with faux moss or decorative stones if you like—for that extra flair.
Step 8: Arrange Your Plants
Place your potted plants in the saucers, ensuring they fit securely. They should look balanced and not wobbly.
Assembly & Finishing
Make sure to tighten any loose parts with your screwdriver to ensure stability. If your chair has any charms you want to enhance, like twine around the legs or a small sign dangling, feel free to get creative!
Measurements & Dimensions
- Finished dimensions: Approximately 36 inches tall, 18 inches wide
- Plastic plant saucers: 6-8 inches in diameter
- Chair height: Generally between 30-36 inches; feel free to alter leg lengths if you need adjustments.
Timing Information
- Estimated active working time: 4-6 hours
- Drying/curing time: Approximately 4-6 hours depending on your materials
- Total time: Around 8-12 hours if you space it out over a day.
Common Mistakes to Avoid
- Skipping the sanding: This is a recipe for peeling paint. You really need the surface to be smooth!
- Rushing drying times: Painting over wet paint or stain will lead to smudges and an uneven finish.
- Not checking stability: A shaky stand isn't safe for your plants! Always double-check your work before adding pots.
- Overloading the chair: If you put too many heavy pots, the chair may not hold up. Keep it reasonable!
Make It Your Own: Variations and Ideas
- Different finishes: Try a bright color to add a pop to your décor, or a rustic stain for a cozy feel.
- Size adjustments: Use a tall barstool or a small chair depending on your space—it can be customized!
- Custom materials: If you've got an old metal chair or even a wicker one, those would work just as well.
- Personal touches: Add your monogram or a cute quote on the backrest to really make it yours.
You have the power to turn an ordinary chair into an extraordinary plant stand! I can’t wait to see how yours turns out.
Before You Go
Pin this for the next rainy afternoon: Save this example to your Pinterest board so you can find the measurements and tips when you tackle your own chair makeover.
Come back and tell me how it went: I would absolutely love to hear about your experience! No question is too small, and even a project that didn’t go perfectly is worth sharing.
Show off what you made: Feel free to share your creation when you're done. Enjoy your project!