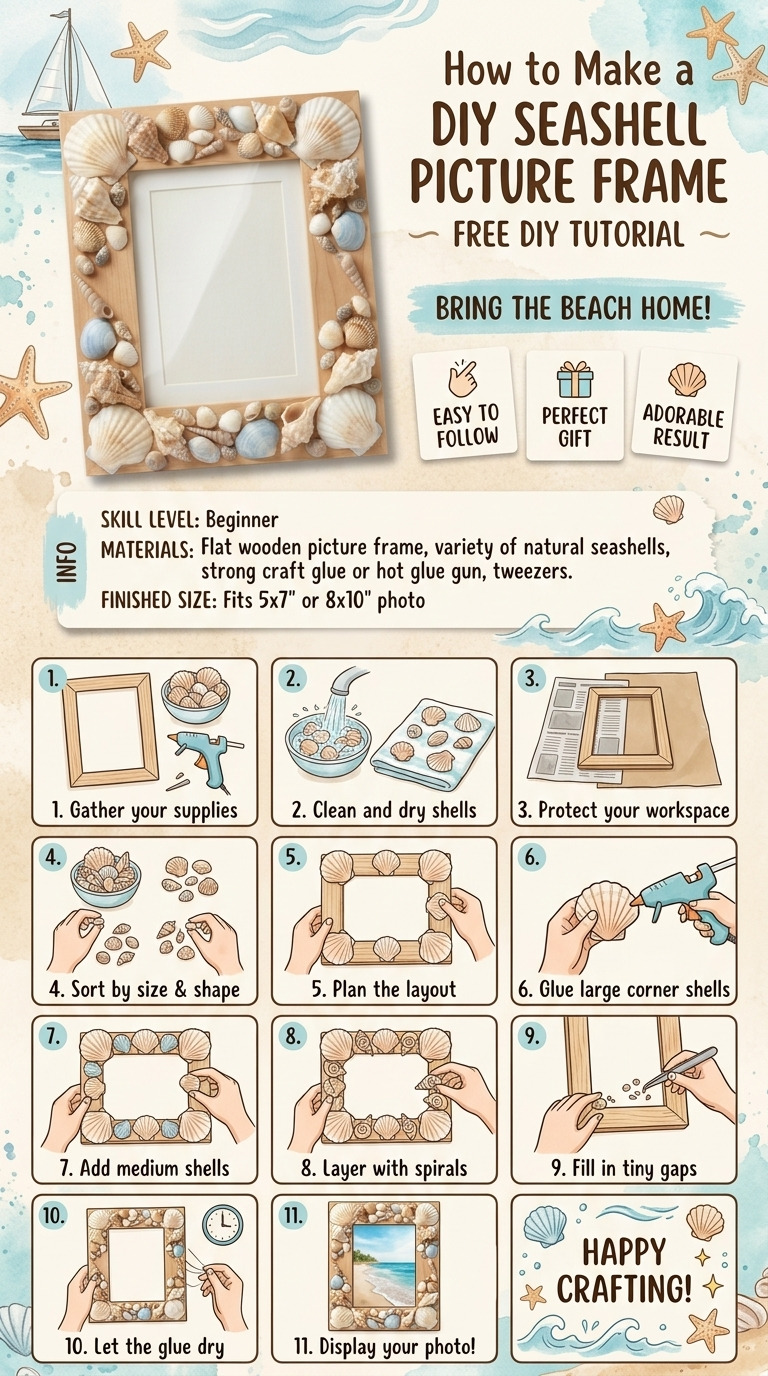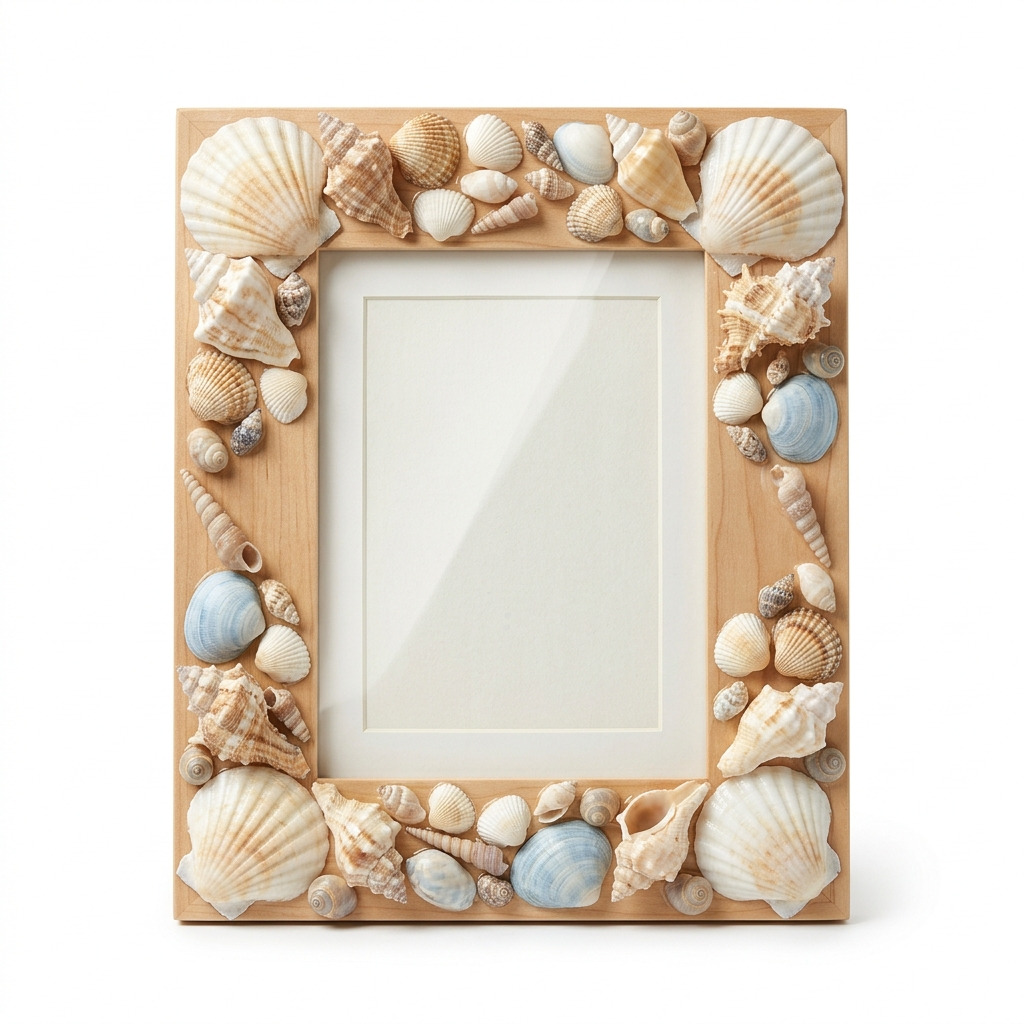
Every time summer rolls around, I find myself itching for a trip to the beach. Last year, I brought back a whole collection of seashells, and they were sitting in a bowl on my shelf, gathering dust. One day, as I was flipping through some of my favorite beach photos, it hit me: why not create a picture frame that celebrates those beach memories? I decided to make a seashell picture frame, and let me tell you, it turned out even better than I imagined! It now hangs proudly in my living room, and every time I see it, I’m reminded of the warm sun, the sound of waves, and those carefree days.
This project is incredibly simple and perfect for all skill levels! You don’t need any fancy tools or expertise — just a little creativity and a willingness to get a bit of glue on your fingers. I’ll walk you through every step, so you can make your very own gorgeous seashell picture frame filled with your favorite memories.
!DIY Seashell Picture Frame Beautiful seashell picture frame capturing memories of the beach
What You'll Need
Materials:
- Wooden Picture Frame: 1 (8 in x 10 in) A natural wood frame is perfect to start with, but you can also use a finished one if you wish!
- Seashells: Approximately 30-40 pieces of varying sizes and shapes Mix of colors like white, cream, light brown, and pale blue — pick shells that speak to your beach experience.
- Hot Glue Sticks: 1 pack (0.28 in diameter) Hot glue works best here as it sets quickly.
- Acrylic Paint (Optional): 1 bottle (4 oz) in Seafoam Green This adds a nice pop of color, but you can skip it if you prefer a natural wood look.
- Clear Sealant Spray: 1 can (10 oz) A light coat will protect your frame and keep it looking fresh.
Tools:
- Hot Glue Gun: Standard size Essential for attaching the seashells.
- Craft Knife: Standard utility knife Useful for trimming any tricky bits — be cautious when using it!
- Ruler: 12 inch Great for measuring, though an optional tool for this project.
- Scissors: Standard scissors Handy for any cutting needs.
- Paintbrush: 1-inch flat brush (if painting) This makes applying paint easy and quick!
- Pencil: Standard To help you plan out the shell arrangement before gluing.
- Safety Equipment: Gloves (for handling hot glue), goggles (if cutting shells) Just to be safe, no one wants burned fingers!
How to Make It, Step by Step
Step 1: Select Your Frame
- Start by choosing an 8×10 wooden picture frame. I love the natural wood look, but go for whatever matches your decor!
Step 2: Plan Shell Arrangement
- Before diving into the glue, lay out your seashells on the frame without attaching them first. Mix larger shells at the corners and space smaller ones in between, making sure there's a spot open for your photo in the center. This way, you can experiment with placement until you find the design you love.
Step 3: Glue Shells to Frame
- Once you’re happy with the arrangement, it’s time to glue! First, pick up one shell, apply hot glue to its base, and press it firmly onto the frame. Hold it there for about 10-15 seconds so the glue starts to set.
- Tip: Don’t rush through gluing! Make sure to give each shell enough time to adhere properly. I once tried to move a shell too soon, and it popped right off!
Step 4: Optional: Paint the Frame
- If you want a touch of color, use your paintbrush to apply the seafoam green acrylic paint over the entire frame. Be sure to let it dry for about 30 minutes before moving on. This step is great to add contrast and make those shells pop!
Step 5: Seal the Frame
- Once your frame and shells are all dried and secured, spray a light coat of clear sealant over the entire frame. This not only protects your frame but also gives it a lovely shine! Let the sealant dry for at least 1 hour before handling.
Step 6: Insert Photo
- After everything is completely dry, slide your cherished 4×6 photo into the frame. This is the moment when all your hard work pays off!
Common Mistakes to Avoid
- Rushing the glue. If you try to move or adjust a shell before the glue has set, it won't stay put, and you'll just end up making a mess.
- Overcrowding shells. Leaving too little space between shells can make your frame look cluttered. Always leave ample breathing room.
- Skipping the sealant. Neglecting to seal your frame can result in shells getting loose over time, especially with humidity. A good sealant goes a long way!
- Ignoring drying times. Skipping drying times can lead to assembling a frame that falls apart. Patience is key here!
Make It Your Own: Variations and Ideas
- Colorful Shells: Experiment with painting your seashells before gluing them for a more vibrant look.
- Different Shapes: Try using a round frame or varying the sizes of the shells for a different feel.
- Themed Frames: Create a seasonal frame — pastel shells for spring or darker tones for autumn!
- Gift It: Add a personal touch by making one for a friend or loved one with their favorite photo. It makes a lovely gift!
This project is all about channeling your creativity, so don’t be afraid to play around and make it your own!
Before You Go
Pin this for the next rainy afternoon: Save this tutorial so you can come back to it when you're ready to create your gorgeous seashell picture frame filled with treasured memories. I understand how important it is to keep these treasured moments close! Come back and tell me how it went: I would love to hear from you about your experience with this project! No question is too small, and stories of frames that didn’t go quite to plan are just as welcome as the success stories. Show off what you made: I can't wait to see what you create, so don’t hesitate to share your finished project!
Happy crafting!