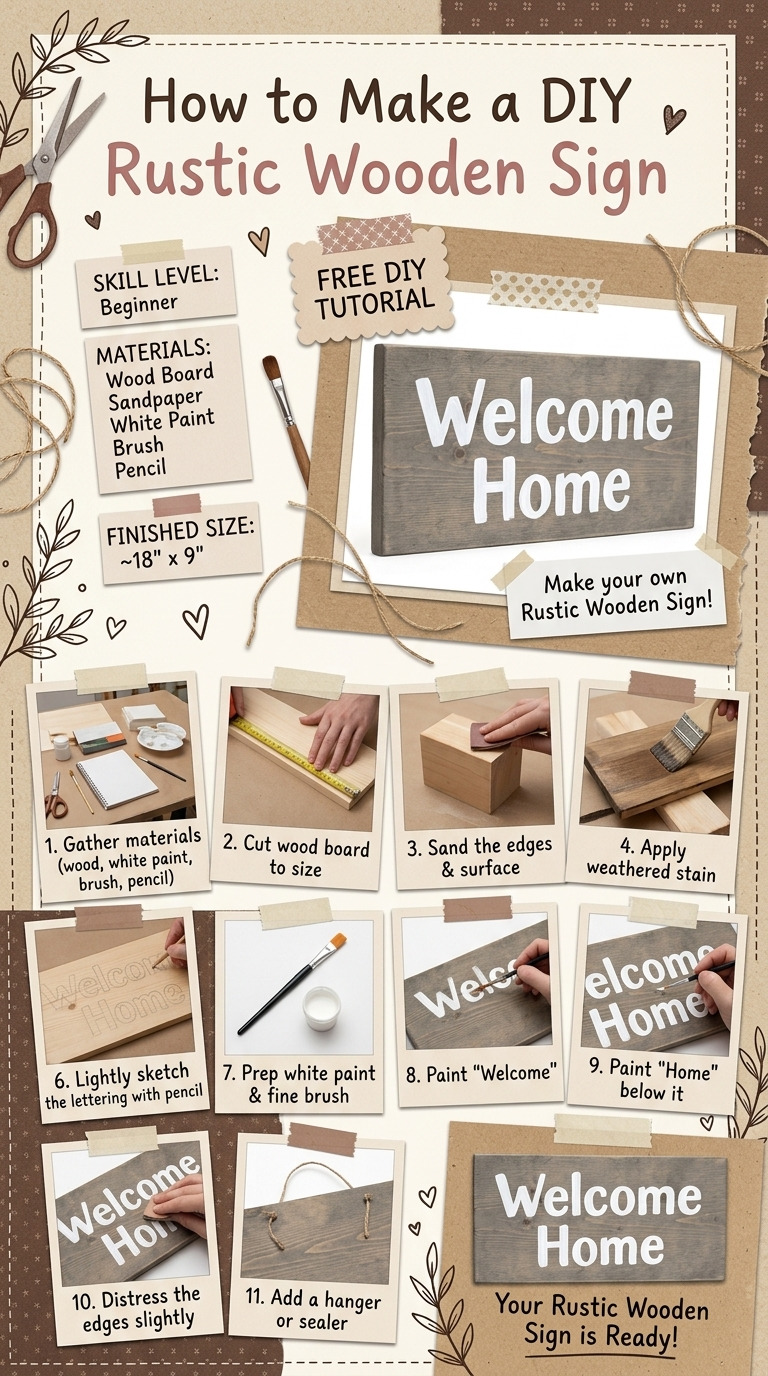
Last summer, I wanted to add a personal touch to my front porch. I kept seeing beautiful rustic wooden signs in shops, and I thought, “Why can’t I make my own?” The idea grew into a fun and creative project: I decided to create a rustic wooden sign for my home that says "Welcome Home." This sign has become the perfect welcoming touch to my entryway.
Making my own sign was not only fulfilling, but it also saved me a bit of money that I could spend on other decor. Plus, I get to say, "I made that!" every time someone compliments it. If you’re looking for an easy project that you can customize to reflect your style, this DIY rustic wooden sign is just what you need. I’ll walk you through every single step, so let’s get started!
[Descriptive image caption of the finished project]
What You'll Need
Materials:
- Wood Plank: 1 piece of pine or cedar, 1" x 6", 24" long — This will be the base for your sign.
- Sandpaper: 120 and 220 grit — For smoothing the wood surface.
- Wood Stain: 1 can of Minwax Weathered Oak (or any preferred wood stain) — Adds a beautiful finish to the wood.
- Paint: 1 small tube of white acrylic paint (Craft Smart) — Needed for the lettering.
- Paintbrush: 1 flat synthetic paintbrush, 1-inch width — Use this for both staining and painting.
- Transfer Paper: 1 sheet — Helps transfer your lettering design onto the wood.
- Graphite Paper: 1 sheet (optional) — An alternative for transferring designs.
- Sealer: 1 spray can of clear polyurethane (matte finish) — Protects your finished sign.
- Hanging Hardware: D-ring hangers, 2 pieces with screws — For hanging your sign.
Tools:
- Cutting Tool: Hand saw or miter saw — For cutting the wood plank if it's not pre-cut.
- Drill: Electric drill with a 1/16" drill bit — To make holes for the hanging hardware.
- Clamps: 2 adjustable clamps — Helpful for securing your work while you paint or stain.
- Ruler: 24-inch metal ruler — To measure and mark straight lines.
- Pencil: For marking measurements and designs.
- Workspace Protection: Drop cloth or newspaper — Protects your surface from paint and stain.
- Safety Equipment: Safety goggles for eye protection — Always prioritize your safety when working with tools.
How to Make It, Step by Step
Step 1: Stain the Wood
Start by staining your wood for that warm, rustic look. Using a flat paintbrush, apply the Minwax Weathered Oak evenly across the wood plank. Make sure to cover all areas; you want a nice, uniform color. After you’ve applied the stain, let it sit for about 5-10 minutes. This allows it to soak into the wood fibers.
Next, wipe off any excess stain with a clean cloth. Let your stained plank dry for at least one hour. This is crucial! If you skip this drying time, your paint won’t adhere well to the surface.
Step 2: Select and Prepare the Design
Now comes the fun part—deciding what you want your sign to say! I recommend something simple, like "Welcome Home." Print your chosen design using a bold typeface at a size that fits comfortably on your plank. Cutting the printed design down to size is essential; leave some space around the edges, so it doesn’t overlap.
Step 3: Transfer the Design onto the Wood
Place the printed design face down on your wood plank. If you’re using graphite paper, position it between the wood and the design. Firmly trace each letter with a pen or pencil to transfer the graphite onto the wood. If you’re using transfer paper, just trace the outline of the letters lightly with your pencil.
Tip: It might help to have some light behind your project so you can better see the lines as you trace.
Step 4: Paint the Letters
Once you’ve transferred your design, take your white acrylic paint and a clean paintbrush to paint over the traced letters. Go slowly and take your time; this is where a steady hand pays off! Make sure to fill in all the spaces well. Let the paint dry for about an hour.
Step 5: Seal the Sign
The final step to protect your hard work is sealing the sign. Grab your clear polyurethane spray and hold it about 12 inches away. Apply a light, even coat over the entire surface of the sign. Let it dry for at least 4 hours. If you're feeling fancy, apply a second coat for added durability, but remember to let the first coat dry completely before the second.
Assembly & Finishing
Once everything is dry, it’s time to attach the D-ring hangers. Position them about 2 inches from each end of the sign, and use your electric drill with a 1/16" drill bit to make small holes for the screws. Secure them, ensuring they’re aligned properly. This alignment is key; it helps with how your sign hangs.
Finally, check for any touch-ups needed on the paint or the stain, ensuring your sign looks just the way you envisioned.
Common Mistakes to Avoid
- Rushing the glue. If you rush and try to attach the hangers while the paint or stain is still wet, you can end up with a messy result. Always wait until everything is completely dry.
- Skipping sanding the edges. I once didn’t sand properly and ended up with rough edges that snagged on everything. Make sure the board is smooth!
- Forgetting to wipe off excess stain. If you don't wipe off the excess stain, it could look blotchy or too dark. Always check!
- Not allowing the paint to dry. I tried to seal my sign before the paint was dry once, and it caused the paint to smear. Don’t skip that drying time!
- Misplacing the hangers. Ensure the D-rings are aligned and level. If they aren’t, your sign will hang crooked!
Make It Your Own: Variations and Ideas
- Color Variations: Instead of white, try using a bright color for your lettering to match your decor.
- Different Stains: Experiment with varying wood stains like dark walnut or a whitewash for a unique finish.
- Seasonal Signs: Change the wording to something seasonal, like "Happy Fall!" or "Merry Christmas!" to customize your sign throughout the year.
- Size Adjustments: Feel free to make a larger or smaller sign using different wood dimensions.
- Add a Illustrative Touch: Consider adding a small painted design, like a flower or a heart, next to your lettering for an extra personal touch.
You now have the freedom to make this project truly yours! I hope you enjoy the process of creating a beautiful rustic sign that adds character to your space.
Before You Go
Pin this for the next rainy afternoon: Save this guide to your Pinterest so you can refer back to it when you’re ready to create your own rustic wooden sign, especially for those specific measurements and tips!
Come back and tell me how it went: I’d love to hear about your experience! No question is too simple, so don’t hesitate to ask if you get stuck or need guidance.
Show off what you made: I’d be thrilled to see your beautiful signs! Feel free to share your creations with me, as every piece is special and unique. Happy crafting!