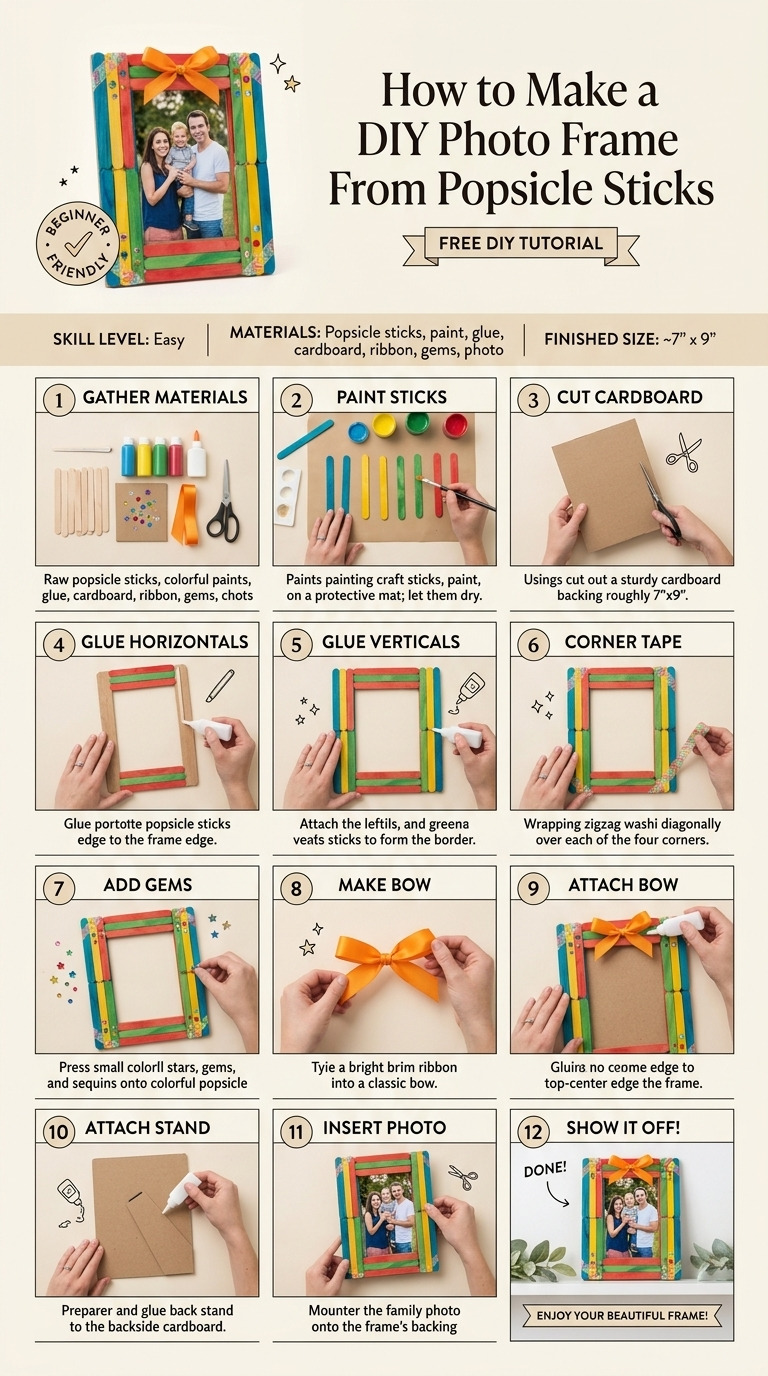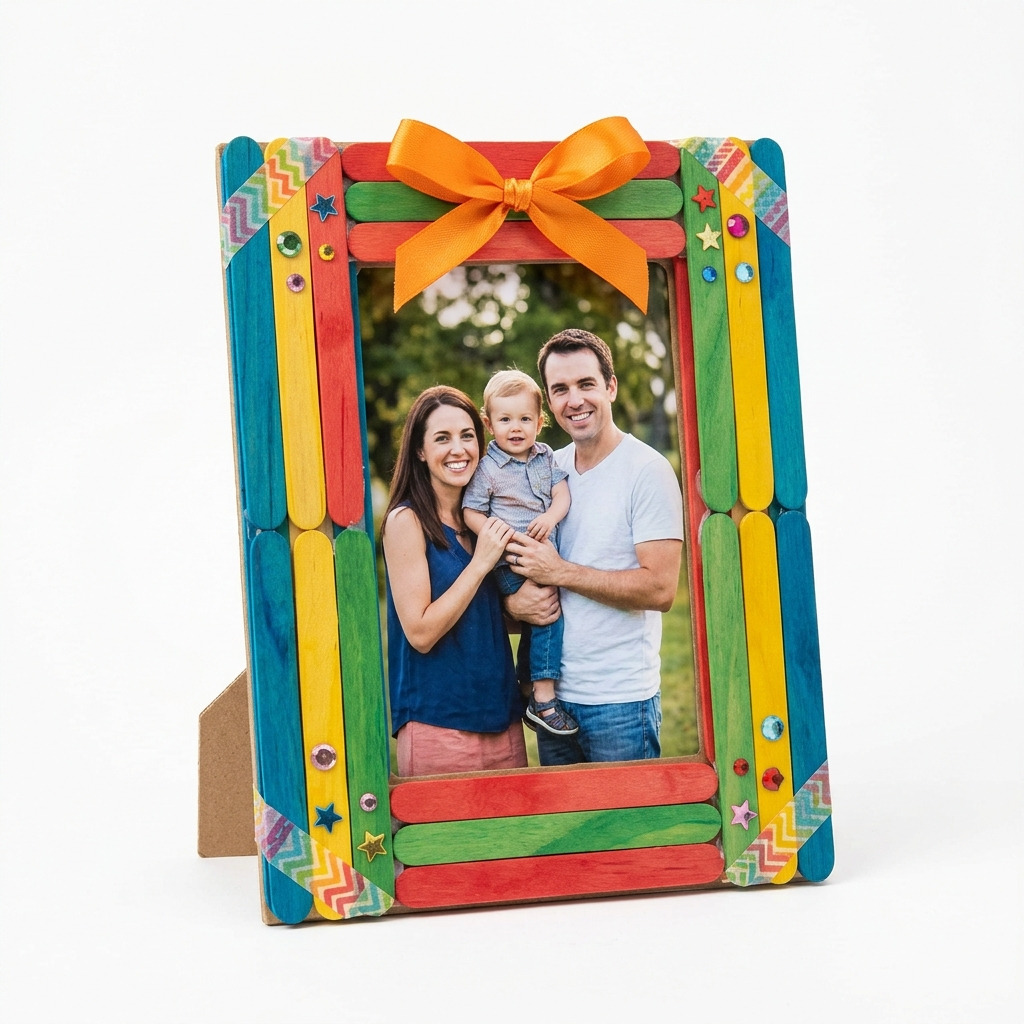
Have you ever thought about making your own picture frame? I realized last winter that I had so many beloved photos without a proper place to display them. I didn’t want to buy a boring frame from the store, especially when I could create something unique and colorful. That's when I decided to make a DIY photo frame using popsicle sticks. It was a fun afternoon project that allowed me to unleash my creativity while making my home feel a bit cozier with all those happy memories framed nicely. This easy project makes a lovely home decor piece or a heartfelt gift for someone special. I promise, you’ll love how simple this is—I’ll walk you through every single step!
[Descriptive image caption of the finished project]
What You'll Need
Materials:
- Popsicle sticks: 30 regular-sized (4.5 inches long) in assorted colors (red, blue, green, yellow) — Get whatever colors appeal to you!
- Photo backing board: 1 piece of 6 inches x 8 inches (cardboard or cardstock) — Recycle an old box if you want!
- Photo: 4 inches x 6 inches (to fit the frame) — Pick your favorite picture!
- Craft glue: 1 small bottle (white school glue or tacky glue) — If you have it around, great!
- Decorative ribbon: 1 yard, in a color of your choice — This adds a nice touch but is optional.
- Washi tape: 1 roll (optional, for decoration) — A fun way to add more flair if you have some!
- Decorative embellishments: Stickers, sequins, or small gems (optional) — Get creative with these!
Tools:
- Hot glue gun: Standard size with glue sticks — This makes assembly super quick and easy.
- Craft knife: Sharp for cutting — Be cautious! If you're unsure, ask a friend for help.
- Ruler: For measuring — Any straight edge will do if you don’t have one.
- Pencil: For marking measurements — Even a pen works in a pinch!
- Cutting mat: To protect surfaces while using the craft knife — If you don't have a cutting mat, use an old cardboard piece.
- Safety gloves: For handling the craft knife — You can also skip these if you’re careful.
How to Make It, Step by Step
Step 1: Create the Frame Base
- Begin by taking 8 popsicle sticks — 4 for the width and 4 for the height. Lay them out in a rectangle shape on your cutting mat. This is going to be your frame!
- With the hot glue gun, glue two sticks horizontally for the top and bottom (the 6-inch sides). Make sure they are even! Next, glue the other two vertically on the sides (the 8-inch height).
- Tip: If you’re finding your corners aren’t quite square, use a ruler to push them into place gently as the glue dries. Let the frame sit untouched to dry for about 10 minutes.
Step 2: Add Colorful Sticks
- Now, take the remaining 12 popsicle sticks. Lay them around the edges of your frame, overlapping each corner by about 0.5 inches to create a layered look.
- Glue each stick one at a time, alternating colors for that vibrant vibe (I love to use red, blue, green, and yellow!). Make sure to allow 5 minutes for each stick to set before moving onto the next.
- Tip: If a stick slides out of place, quickly adjust it before the glue dries too much. It’s okay if they don’t line up perfectly; that’s part of the charm!
Step 3: Prepare the Photo
- Check your backing board. If you need to cut it down, make sure it measures 6 inches x 8 inches.
- Tip: Use a pencil to mark your measurements on the cardboard before cutting for a clean edge.
Step 4: Assemble the Frame
- Once your colorful sticks are dry, gently flip the frame over so that the back is facing up.
- Center your backing board on the frame, with the adhesive side down towards the surface.
- Apply some craft glue along the edges of the backing board, then press the frame down on top. Make sure it all aligns, and let it set for about 10-15 minutes.
Step 5: Insert the Photo
- Finally, take your 4 inches x 6 inches photo and slide it into your new frame!
Step 6: Add Finishing Touches
- To give it some extra flair, cut a length of decorative ribbon, around 1 yard long, and tie it around the top of the frame.
- Tip: Don’t be afraid to experiment! Try a bow or a simple knot and see what you like best.
- If you’re feeling extra crafty, you can add washi tape at the corners or on the inner edges for more decoration. You can also stick on any embellishments like stickers or gems for personality.
Common Mistakes to Avoid
- Misaligning sticks. Make sure your popsicle sticks are straight and square; a ruler can help. If you catch it early, you can adjust the glue!
- Over-gluing. Too much glue can ooze out and make a mess. A little goes a long way. You can always add more if needed.
- Rushing the glue. Allow each glue application time to dry as directed. This helps prevent your frame from falling apart later!
- Cutting the backing wrong. Double-check your dimensions before making any cuts to avoid having to start over!
Make It Your Own: Variations and Ideas
- Color combinations: Try using different colors based on the seasons or your photo’s theme — think autumn hues or pastel springs!
- Size variations: Create larger frames for bigger photos or smaller ones for desktop decor.
- Use different materials: Try round wooden discs or popsicle sticks of varying widths for a different look altogether.
- Personalize it further: Add names, dates, or special messages with paint or markers right onto your frame.
- Throw in a memory: Instead of just a picture, attach tiny notes or memories next to the photo for a really sentimental gift.
Now it’s your turn! I can’t wait for you to dive into this project and see what lovely frame you create.
Before You Go
Pin this for your next rainy afternoon: So you can access all the measurements and steps whenever you need them. You’ll want this handy for decorating your space!
Come back and tell me how it went: No question is too basic, and I’d love to hear about any projects that may have turned a little sideways too.
Show off what you made: Sharing is caring! I’d love to see your frame—don’t be shy!