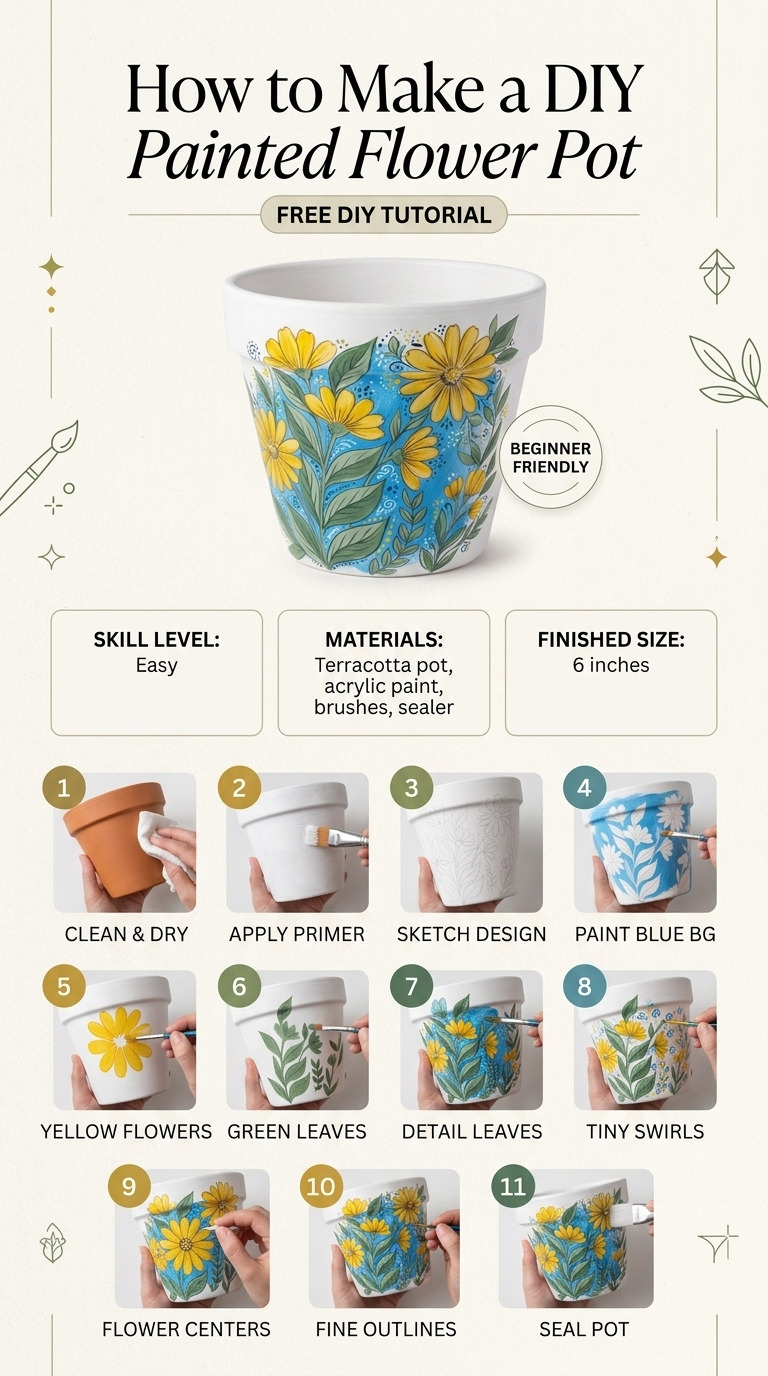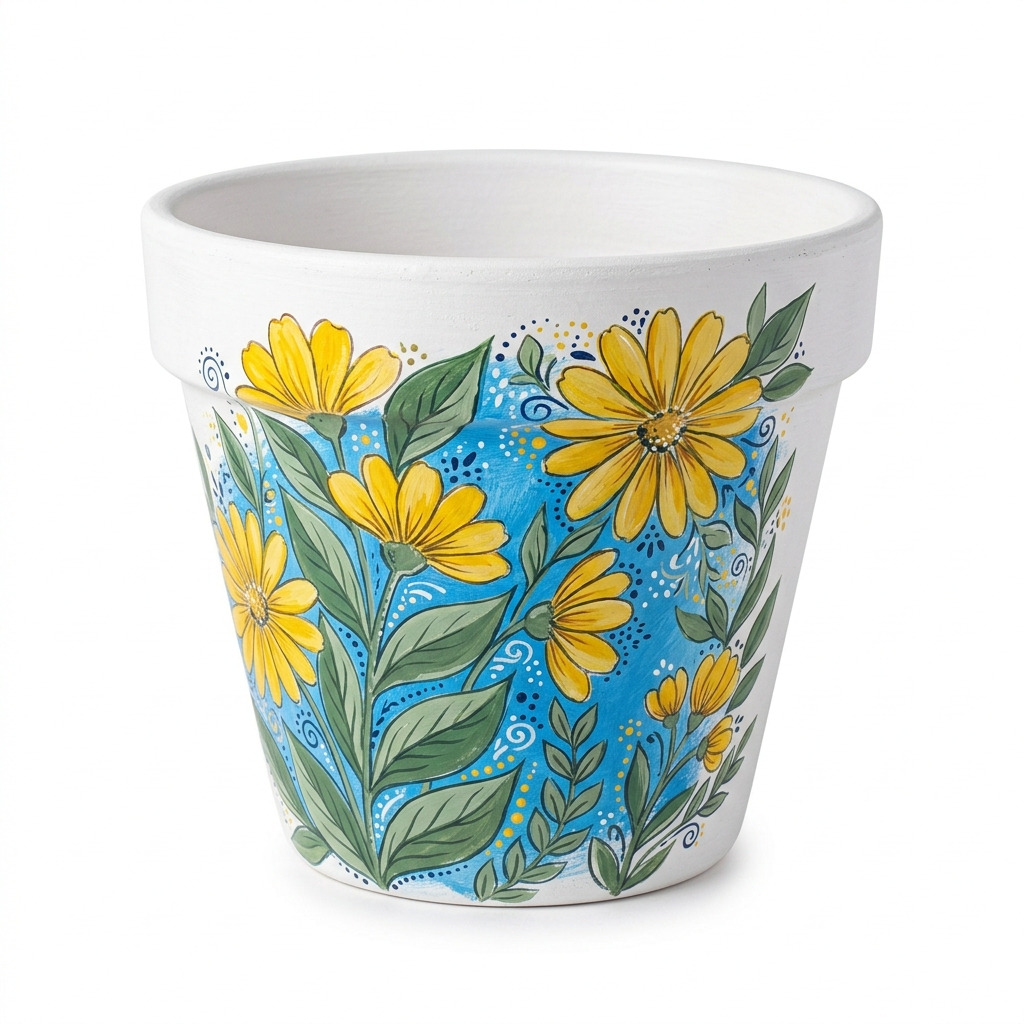
Last summer, I found myself staring at a plain terracotta flower pot on my porch, and I couldn’t shake the feeling that it needed some life! I wanted something vibrant and unique to showcase my favorite flowers. Instead of buying an expensive, pre-decorated pot, I decided to paint one myself. Honestly, how hard could it be? With a little acrylic paint and creativity, I turned that pot into a cheerful centerpiece that brightens up my outdoor space every day. Don’t worry if you’ve never painted before — this is super easy! I’ll walk you through every single step.
[Descriptive image caption of the finished project]
What You'll Need
Materials:
- Terracotta Flower Pot: 1 piece, about 8 inches tall and 8 inches in diameter. This will be your canvas!
- Acrylic Paint:
- White – 1 small bottle (2 oz) for the base coat.
- Yellow – 1 small bottle (2 oz) for flowers or bright accents.
- Blue – 1 small bottle (2 oz) for a colorful background.
- Green – 1 small bottle (2 oz) for the leaves.
- Paint Brushes:
- 1 flat brush (1 inch) for the base coat and larger areas.
- 1 round brush (1/2 inch) for medium-sized areas.
- 1 detail brush for fine lines and details.
- Paint Sealer: 1 small bottle (8 oz) — matte or gloss finish to protect your design.
- Painter’s Tape: 1 roll, 0.94 inches wide for masking off sections.
- Drop Cloth or Newspaper: To protect your workspace from splashes and spills.
Tools:
- Water Container: For rinsing brushes between colors.
- Palette or Paper Plate: To mix your paints.
- Scissors: To cut the painter’s tape.
- Pencil: For sketching your design (optional).
- Ruler: For measuring sections (optional).
Preparation & Setup
- Choose a well-ventilated workspace. I usually set up outside or in my garage to avoid paint fumes.
- Lay down a drop cloth or sheets of newspaper to catch any drips. This makes cleanup a breeze!
- Gather all your materials so they're at arm’s reach. You don’t want to get halfway through and realize you need to hunt for something!
- If you like, sketch out your design on paper before painting. A little planning can go a long way! You can use a ruler to help with straight lines if you’re aiming for something geometric.
How to Make It, Step by Step
Step 1: Base Coat
Using the flat brush and white acrylic paint, apply a base coat over the entire surface of your terracotta pot. Make sure to cover every bit thoroughly so that no terracotta is visible. This layer will help the colors pop later on. Allow to dry completely for at least 1 hour.
Step 2: Design Layout
Once your base coat is fully dry, take the pencil and lightly sketch your design on the pot if you opted to. Simple motifs like flowers, stripes, or dots are great for a first-timer!
Step 3: Masking
To create clean lines, use painter’s tape to mask off areas where you want different colors. Press down firmly on the edges of the tape to prevent paint from sneaking under. If it starts to lift, just press it back down.
Step 4: Painting the Design
Now comes the fun part! Start painting your masked off areas:
- Use yellow for flowers, blue for the background, and green for leaves or stems.
- Try to work with one color at a time.
- Tip: Allow each color to dry for about 30 minutes before moving to the next section — this helps prevent smudging and you’ll be less likely to carry paint from one area to another!
Step 5: Detailing
Once your main colors are dry, grab the detail brush. This is your tool for adding outlines, dots, or any finer details to your design. These little touches can really make your pot stand out.
Step 6: Drying Time
Patience is key! Allow the painted pot to dry completely for at least 2 hours after your last layer of paint. The longer you wait, the better, especially before sealing it.
Step 7: Sealing the Pot
After everything is dry, it’s time to protect your masterpiece! Use your flat brush to apply a layer of paint sealer evenly over the painted surface. Follow the instructions on the sealer for the drying time. Generally, allowing it to dry for about 1 hour before handling is a good rule of thumb.
Step 8: Final Reveal
Carefully remove the painter's tape. You’ll be greeted with those crisp, clean lines that make your design look professional! Check for any touch-ups you might need. If you see missed spots, grab a matching paint and fix them up!
Common Mistakes to Avoid
- Rushing the glue. If you don’t let paint layers dry enough, they can easily smudge together. Make sure each section is dry before moving on to the next.
- Skipping the base coat. Without it, your colors might look dull or uneven. Always start with a solid white base for vibrancy.
- Overloading the brush. If you have too much paint on your brush, it may drip or smear. A little paint goes a long way!
- Neglecting to press down the painter's tape thoroughly. If you don’t press it down well, paint can seep underneath and ruin your clean lines.
Make It Your Own: Variations and Ideas
- Color Variations: Use any colors you love! Pastels for spring vibes or deep tones for autumn.
- Finish Options: A gloss finish can give a vibrant pop, while a matte finish offers a softer, more understated look.
- Add Patterns: Try polka dots, swirls, or even geometric designs for more flair!
- Gift Idea: These customized pots make fantastic gifts — just paint them to match your friend's style or favorite colors!
I can’t wait to see what you come up with! Remember, there are no mistakes here, just opportunities to add your own unique charm.
Before You Go
Pin this for the next rainy afternoon: Don’t forget to save this post so you’ll have the full instructions and tips handy when it’s time to bring your creative masterpiece to life!
Come back and tell me how it went: I’d love to hear about your painted flower pot! Seriously, don’t hesitate to ask any questions, even if you think they’re basic. And if your pot has a mishap, share that too — we all learn from experiences that didn’t go as planned!
Show off what you made: Feel free to share your finished painted flower pot. I can't wait to celebrate your creativity!