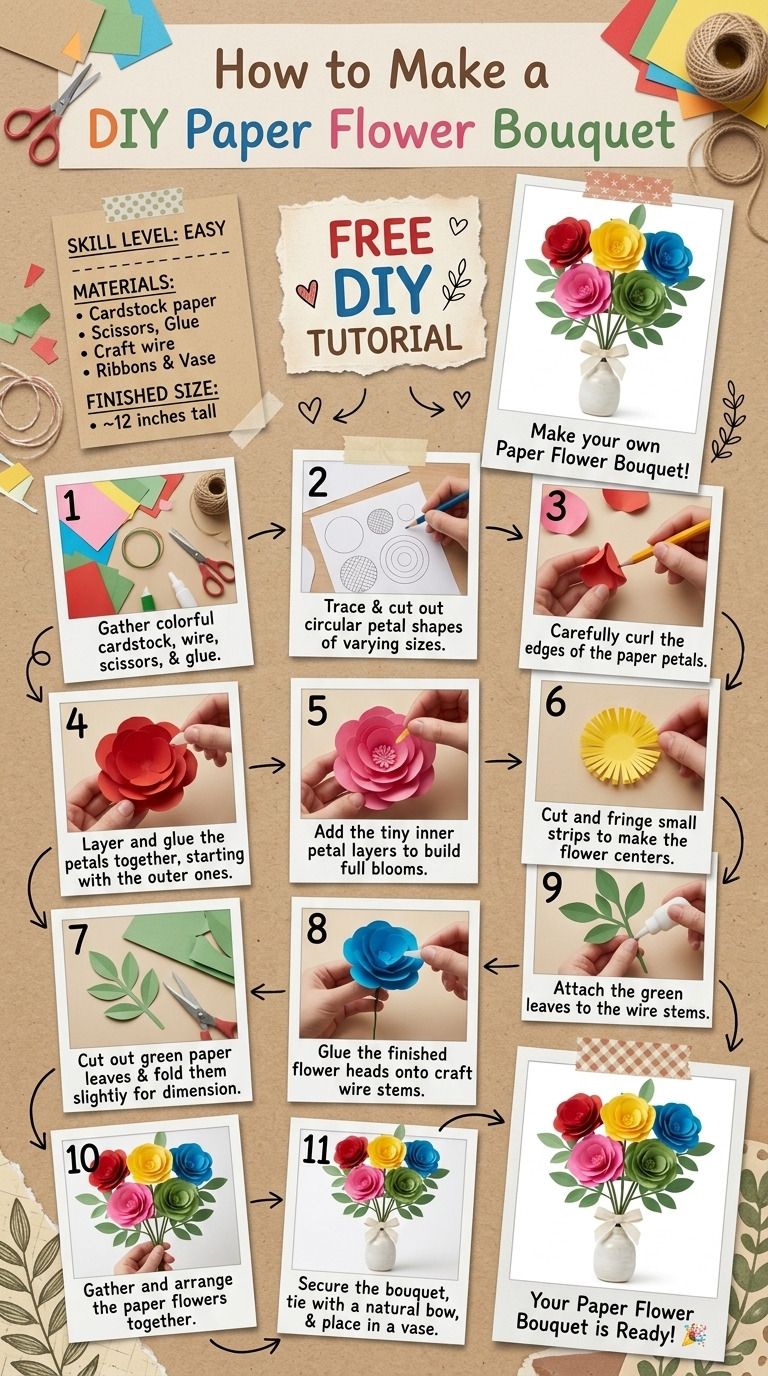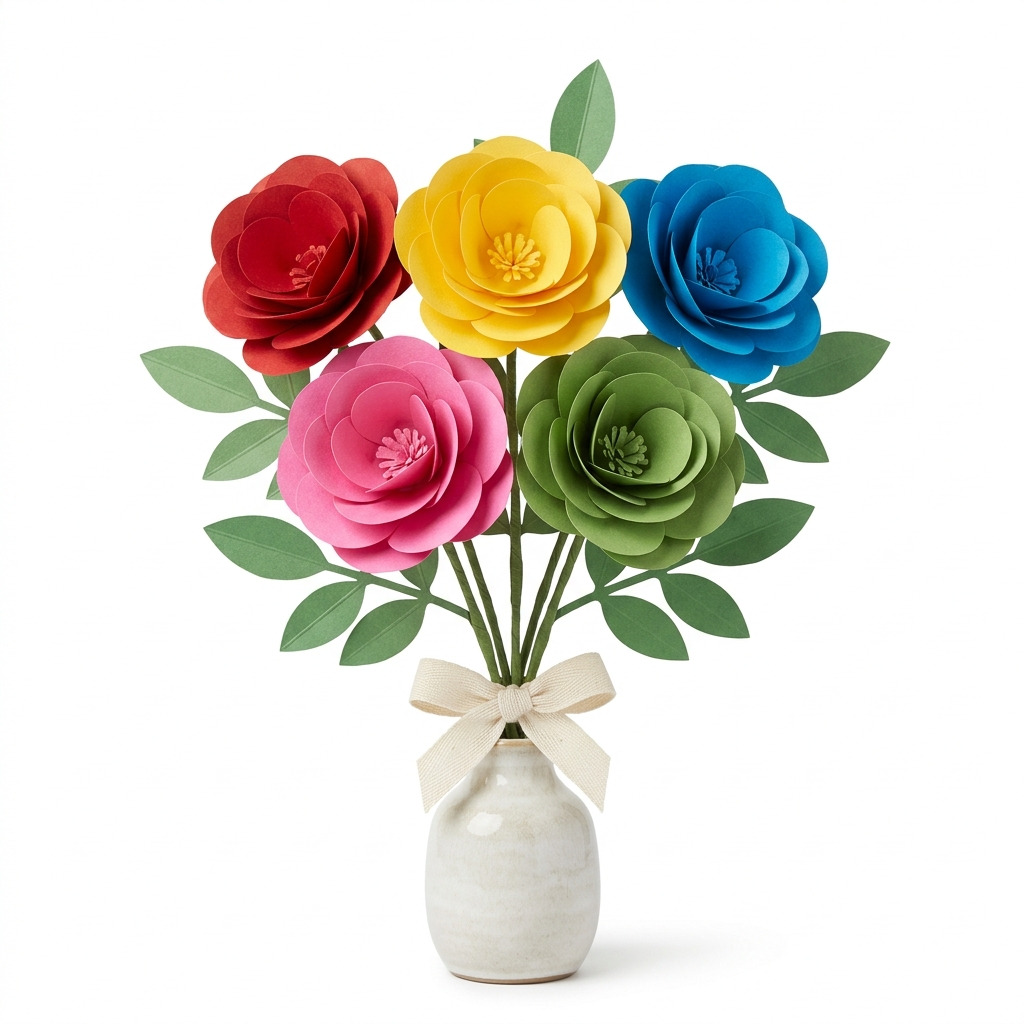
When I was looking to spruce up my living room last spring, I wanted something cheerful but didn’t want to spend a fortune on fresh flowers that would wilt in a week. I started experimenting with colorful cardstock I had lying around, and thought, why not make my own paper flowers? From that little idea bloomed this delightful DIY paper flower bouquet! It adds a pop of color to my space and definitely catches the eye of anyone who stops by.
The best part is that this project is super easy, even if you’ve never crafted anything before. I will walk you through each step of the process, so let's dive in!
[Descriptive image caption of the finished project]
What You'll Need
Materials:
- Cardstock in various colors: 5 sheets (8.5×11 inches each) in red, yellow, blue, pink, and green. You can swap these colors out with what you have or what you like!
- Floral wire: 3 pieces (18 gauge, each 12 inches long). This gives the flowers structure. If you don’t have floral wire, you can use sturdy pipe cleaners instead.
- Florist tape: 1 roll (green). It helps bundle the stems together. If you don’t have florist tape, masking tape can work in a pinch.
- Decorative ribbon: 1 spool (optional, for finishing touches). This adds a lovely finishing touch, but you can skip it if you prefer a simpler look.
- Decorative vase or jar: 1 (to hold the bouquet). Any jar or vase you have at home will do just fine!
Tools:
- Scissors: To cut the cardstock. Regular scissors work perfectly!
- Hot glue gun: 1 (with glue sticks). You can use craft glue, but hot glue holds better and dries faster.
- Craft knife: 1. This is optional, but it’s handy if you want cleaner cuts.
- Cutting mat: 1 (optional but recommended). If you have a spare piece of cardboard, that works too!
- Ruler: 1. A standard ruler will help with measurements.
- Pencil: 1. This is for marking your cuts on the cardstock.
- Safety equipment: Safety glasses (if using a craft knife). Better safe than sorry!
How to Make It, Step by Step
Step 1: Cut the Flower Petals
Start by cutting your flower petals. Take your cardstock and measure out pieces that are 2.5 inches wide by 3.5 inches long. Using the scissors or a craft knife, cut out a total of 20 petals. Aim for rounded edges with a slight point at the end for a flower-like shape.
Tip: If you’re using a craft knife, ensure you’re on a cutting mat or a surface that you don’t mind getting scratched up.
Step 2: Cut the Flower Centers
Next up, grab a contrasting color of cardstock for the flower centers. You’ll need to cut out 5 small circles, each about 0.75 inches in diameter. These will sit in the middle of each flower.
Tip: To make perfect circles, you can trace around a small cup or lid!
Step 3: Cut the Leaves
Now, let’s get to the leaves! Using your green cardstock, cut 10 leaf shapes. Each leaf should be 1 inch wide and 4 inches long with a pointed tip.
Tip: For a fun twist, you can round the tips of the leaves or make them wavy instead of pointed.
Step 4: Form the Flowers
Take a group of 4 petals and overlap them slightly in the shape of a flower. Use a small dab of hot glue to secure the petals at the base, then attach a flower center to the middle with hot glue. Repeat this for all 5 flower clusters.
Mistake to avoid: Don’t rush the glue; give it a minute to set properly before moving on to the next step!
Step 5: Attach the Stems
Now it's time to attach the stems! Take one piece of floral wire and secure the bottom of a flower cluster to it with a generous amount of hot glue. Hold it for a moment to let it set.
Next, wrap florist tape around the base of the flower and wire, covering any exposed parts. This also adds support to your flower. Leave about 10 inches of wire for the stem length.
Tip: Florist tape sticks better when you stretch it slightly while wrapping.
Step 6: Attach Leaves
With the hot glue, attach 2 leaves to each stem, positioning them halfway down the wire. This will add that lovely detail and make your flowers look more realistic!
Step 7: Assemble the Bouquet
Gather all the flower stems together, adjusting their heights for a visually appealing arrangement. Use florist tape to tightly bundle the stems together at their base, ensuring they’re secure.
Step 8: Finishing Touches
For the finishing touch, you can wrap decorative ribbon around the stems at the base to hide the tape and add a stylish flair. If you're feeling extra crafty, try finishing off with a cute bow at the front!
Tip: When tying the bow, use a loop-and-twist technique for a neat look.
Now, place your beautiful bouquet inside a decorative vase or jar. You’ve done it!
Common Mistakes to Avoid
- Rushing the glue. If you hurry the glue process, petals may pop off. Make sure each layer has set before moving on.
- Cutting uneven pieces. This makes the flowers look messy. Take your time and measure carefully.
- Skipping the florist tape. Don’t omit this step as it adds strength and keeps your bouquet together.
- Too much or too little overlap on petals. Too much overlap can make your flower look muddy. Just a slight overlap works best!
- Forgetting to flatten curled cardstock. If your cardstock is curled, the petals won’t lay flat and will be hard to glue. Flatten them first!
Make It Your Own: Variations and Ideas
- Use patterned paper for petals. Add some flair or a cheerful theme that suits your style!
- Try different flower sizes. Adjust the petal sizes to make larger or smaller flowers as you see fit.
- Add glitter. A sprinkle of glitter on the centers or edges of the petals gives a lovely sparkle to your bouquet.
- Seasonal themes. Use colors reflecting different seasons, like pastels for spring or warm tones for autumn.
- Gift it! Create a small bouquet as a sweet gift option for friends or family!
I can’t wait to see what unique twists you put on this paper flower bouquet! Have fun playing with colors and styles as you craft.
Before You Go
Pin this for the next rainy afternoon: Save this post so you can easily refer back to the measurements and steps when you have your materials out and ready to create your beautiful DIY paper flower bouquet! Come back and tell me how it went: I can’t wait to hear about your crafting adventures. No question is too basic—every experience, whether smooth sailing or a little sideways, is welcome. Show off what you made: I’d love to see your gorgeous bouquets once you’re done! Happy crafting!