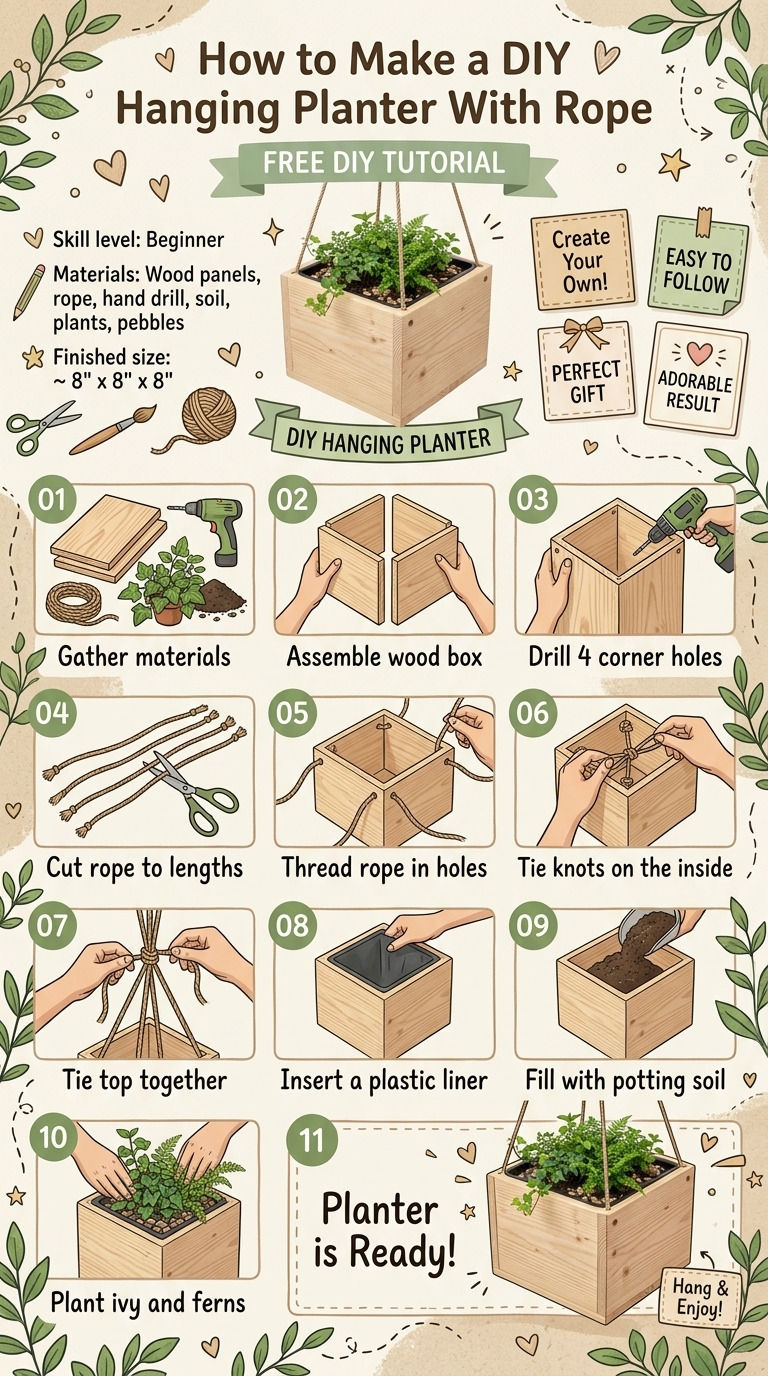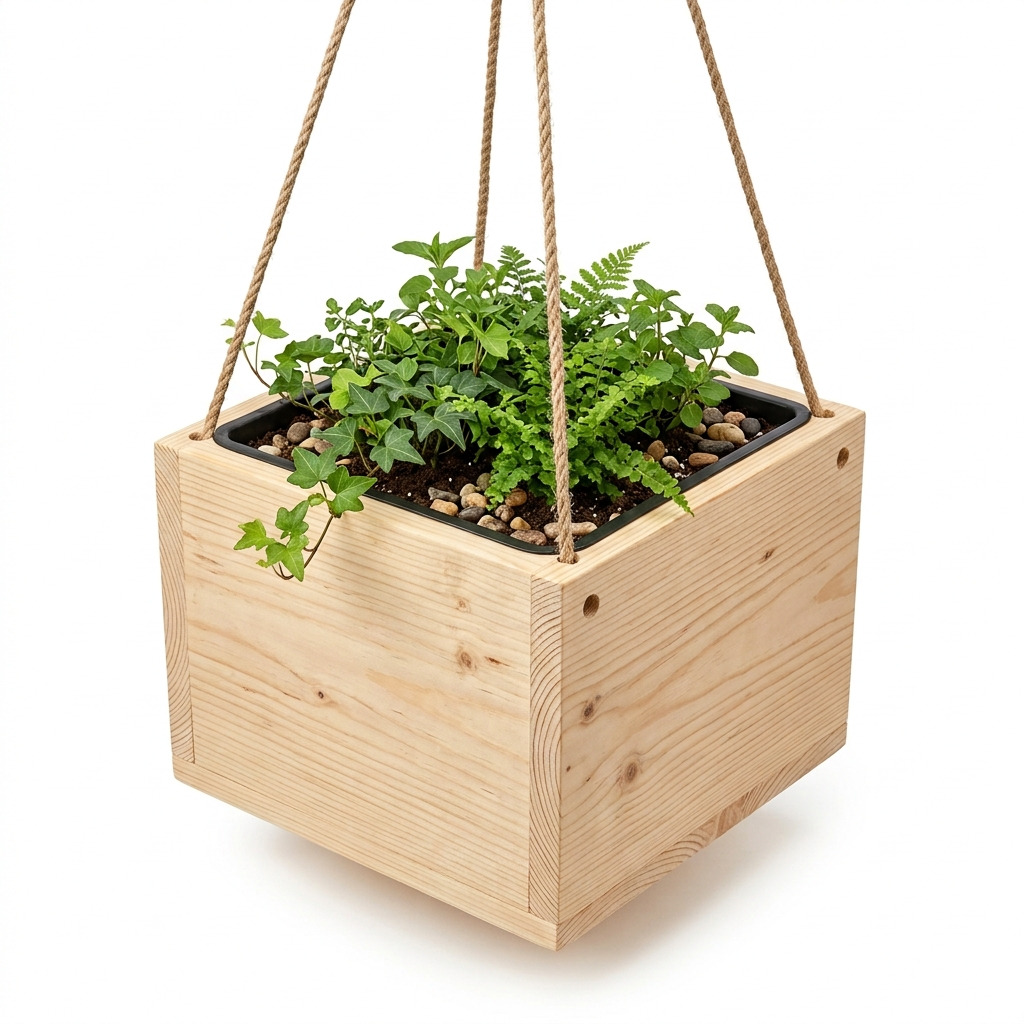
When I first started gardening, I ran into a little dilemma. I loved the idea of having plants in my home but was short on counter and floor space. After some browsing and a bit of inspiration, I decided to create my own hanging planter. This would be a perfect spot for my favorite herbs, and I thought it’d look adorable swaying gently by the window. Guess what? It turned out to be an easy project that even a beginner can tackle. Today, I want to share this delightful DIY hanging planter with you. I’ll take you through every step, so you can bring some greenery into your own space!
[Descriptive image caption of the finished project]
What You'll Need
Materials:
- Wood:
- 1 piece of untreated pine or cedar wood, 1 inch thick, for the planter box
- Size: 12 inches x 48 inches (this will create an open-top box)
- Rope:
- 1 roll of ¼ inch thick cotton or jute rope, approximately 50 feet (great durability)
- Wood glue:
- 1 bottle, 4 oz (to hold the wood pieces together)
- Wood screws:
- 12 screws, 1.25 inches long (for securing the box)
- Paint or wood stain (optional):
- 1 small can, any color or finish of your choice (to enhance the look)
- Plastic planter liner or trash bag:
- One 6-gallon heavy-duty trash bag (to create a waterproof lining)
- Potting soil:
- 1 bag (1.5 cubic feet) (to fill your planter)
- Plants:
- Choose small plants or herbs based on preference (I love basil and mint!)
- Optional embellishments:
- Decorative stones or moss for aesthetics (adds a beautiful touch)
Tools:
- Saw:
- Circular saw or hand saw for cutting the wood (whichever you're comfortable with)
- Drill:
- Cordless drill with drill bits (1/8-inch for pilot holes and a screwdriver bit)
- Screwdriver:
- Phillips head (for tightening screws)
- Sandpaper:
- Medium grit (120) and fine grit (220) (to smooth the wood edges)
- Measuring tape
- Ruler
- Pencil:
- For marking cuts
- Hot glue gun (optional):
- For securing the liner or embellishments
How to Make It, Step by Step
Step 1: Cut the Wood for the Planter Box
Start by measuring and marking your wood according to the cutting list. You’ll need:
- 4 pieces for the sides: 12 inches x 12 inches
- 2 pieces for the bottom: 12 inches x 12 inches
Using your saw, carefully cut along the marked lines. Make sure you’re on a stable surface, and take your time. I once rushed this step and got a jagged edge — not what you want!
Step 2: Assemble the Planter Box
Now, take two of your side pieces and apply wood glue along the edges. Clamp or hold them together, then insert 3 wood screws on each side. Tip: Always drill pilot holes first to prevent the wood from splitting. Repeat this until the entire box is assembled. The corners should meet at right angles, and the box should feel sturdy.
Step 3: Sand the Edges
Take your sandpaper and lightly sand the edges and corners. This will help remove any sharpness. You want it so smooth you could safely run your hand along it!
Step 4: Paint or Stain (Optional)
If you want to add a pop of color or enhance the wood grain, now’s the time to apply a coat of paint or stain on the outside of the box. Let it dry according to the manufacturer’s instructions – usually about 1 hour. I skipped this once and regretted it when I saw how boring my planter looked!
Step 5: Line the Inside of the Planter Box
Cut the heavy-duty trash bag to fit inside the box, making sure it reaches the top edges. Secure the liner to the box edges with a hot glue gun if needed. This makes sure the soil doesn’t leak through.
Step 6: Drill Holes for the Rope
Take your drill and, on each of the four corners of the box, drill a ¼ inch hole for the rope. Keep it steady! You want these holes to be clean and in a straight line for hanging later.
Step 7: Prepare the Rope
Cut four lengths of rope, each 6 feet long. If you're stretching for a different hanging height, adjust the lengths accordingly, but 6 feet has worked wonderfully for me!
Step 8: Attach the Ropes
Now, thread each rope through the holes at the corners of the planter box. Tie a secure knot on the interior side to hold it in place. Adjust the lengths so that the box hangs at your desired height. It can be a little tricky getting the lengths equal — I had to redo this step once!
Step 9: Fill With Potting Soil and Plants
Gently fill the lined box with potting soil, creating holes to plant your chosen greenery. Feel free to arrange them as you desire — there’s no right or wrong way here!
Step 10: Finish With Embellishments (Optional)
To make your creation even more beautiful, you could add decorative stones or moss on top of the soil. It adds an eye-catching look and keeps the moisture in.
Common Mistakes to Avoid
- Not pre-drilling the holes. This can cause the wood to split. Always drill pilot holes first!
- Rushing the glue. If the glue isn’t dry, things might fall apart. Give it plenty of time to set.
- Over-sanding. You want it smooth, but don’t go too far and take away the wood's character!
- Ignoring the rope length. If you cut the ropes unevenly, your planter will hang at odd angles. Measure twice, cut once!
Make It Your Own: Variations and Ideas
- Experiment with colors: Try different colors for the paint or stains to match your home decor.
- Use different plants: Mix herbs with flowers for a colorful twist.
- Change the size: Want something larger or smaller? Adjust your wood dimensions accordingly.
- Add hooks: Secure the planter with hooks for a stable hold.
- Decorate with labels: Use little tags for herb names to add charm.
The possibilities are endless! This hanging planter can be a fun centerpiece to brighten up your space. Enjoy the process, get creative, and let it reflect your own taste!
Before You Go
Pin this for the next rainy afternoon: Save this DIY hanging planter project to your Pinterest board for when you have the materials ready and time to craft! You might need to remember the measurements and drying times, so make it easy on yourself.
Come back and tell me how it went: I’d love to hear about your experience! No question is too basic, and I’m so happy to help if you have any concerns. A project that went sideways? I'd love to hear about that too!
Show off what you made: Feel free to share your finished hanging planter — I can’t wait to see your beautiful creations!