I love creating cozy and whimsical touches in my home, and nothing does it quite like fairy lights! Last summer, while planning a quiet outdoor dinner, I stumbled upon some charming fairy light lanterns in a store. They were beautiful, but let’s be honest—my wallet wasn’t ready for that kind of splurge. So, I decided to make my own!
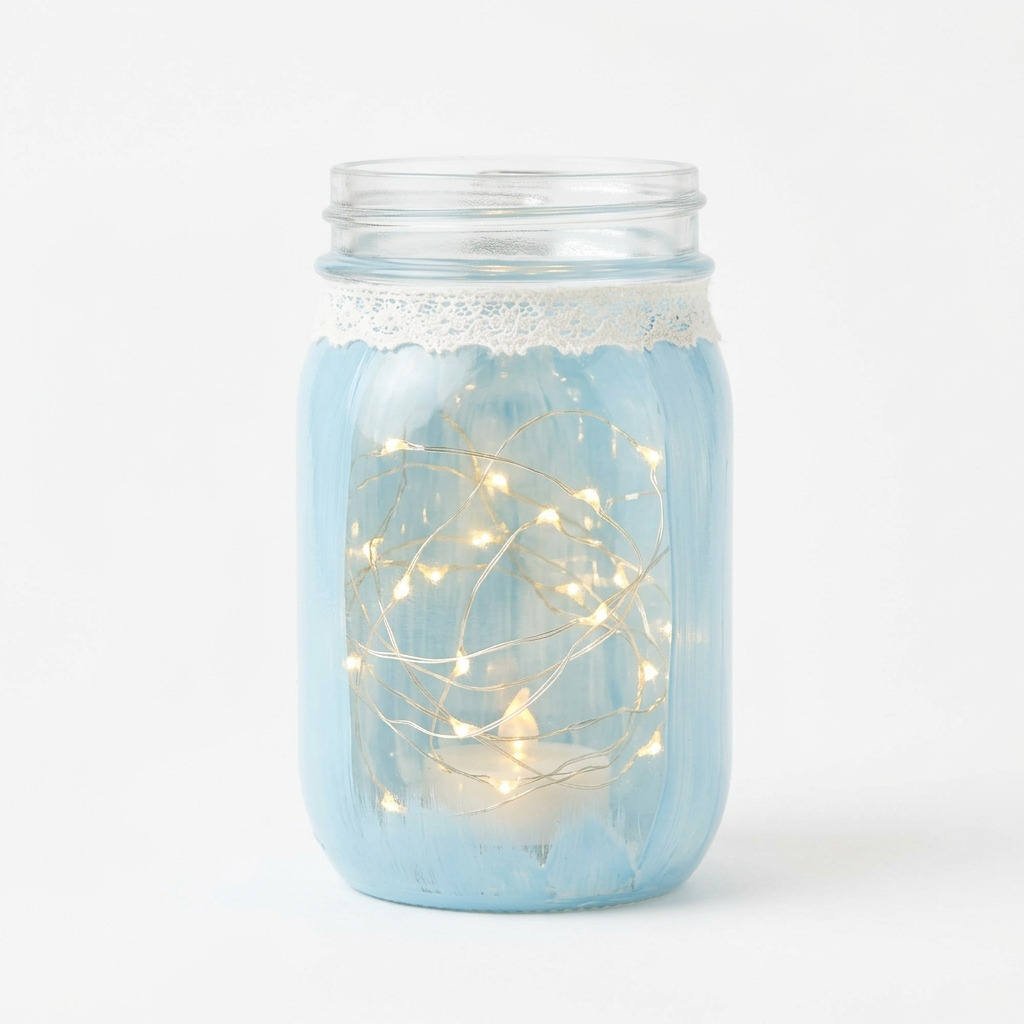
This DIY Fairy Light Lantern is simple to put together and really brightens up any space, whether you’re setting the mood for a romantic evening or adding sparkle to a party. It features twinkling fairy lights in a mason jar, dressed up with lace and a lovely coat of paint. It fits in perfectly on my patio table, and I sometimes even hang it by a tree branch for an extra touch of charm. I’m excited to share this easy project with you, and I’ll walk you through every step!
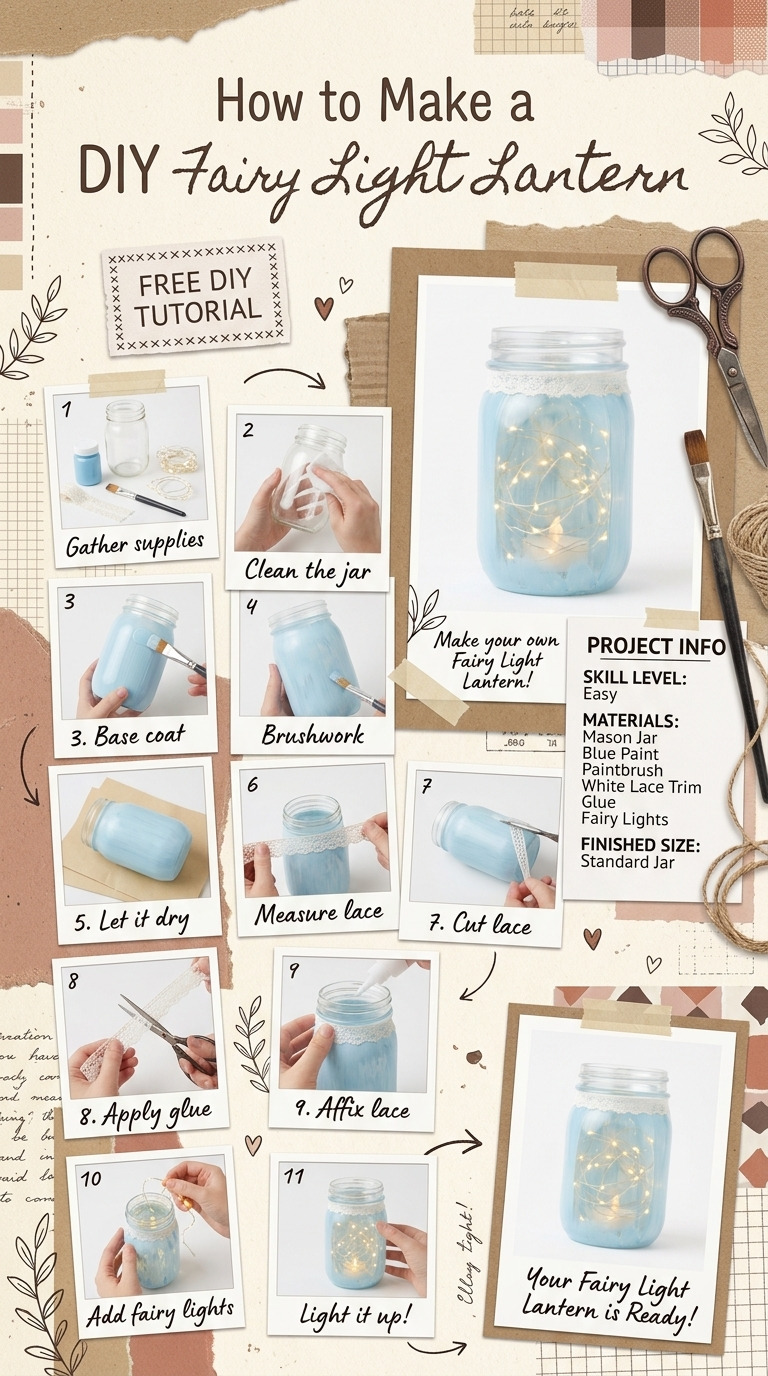
[Descriptive image caption of the finished project]
What You'll Need
- Mason jar: 1 (pint size, clear glass) — This will be the main body of your lantern.
- Fairy lights: 1 string (battery-operated, 20 LED lights, warm white) — You want these to be battery-operated for safety and ease of use.
- Lace ribbon: 1 yard (white or cream) — This adds a pretty touch around your jar.
- Acrylic paint: 1 small bottle (color: light blue) — Choose any color that suits your décor!
- Paintbrush: 1 (1-inch width) — You’ll use this to apply the paint smoothly.
- Hot glue gun: 1 — This will help secure the lace and any other decorations.
- Hot glue sticks: 2 — To use with the glue gun.
- Tea light candle (optional): 1 (battery-operated for safety) — This can create an additional warm glow if you wish.
- Sandpaper: Fine grit (optional) — Use this to prep the jar for better paint adhesion.
- Scissors: 1 pair — For cutting the lace ribbon.
Tools & Equipment
- Cutting mat: 1 — Protects your workspace when cutting materials.
- Ruler: 1 — To measure your lace accurately.
- Pencil: 1 — For marking your lace length.
- Safety gloves: 1 pair (optional) — Helpful when working with hot glue to avoid burns.
How to Make It, Step by Step
Step 1: Paint the Mason Jar
Start by applying a layer of light blue acrylic paint on the outside of the mason jar with your paintbrush. Dip the brush in the paint, then start at the top and work your way down, making sure to cover the entire surface.
Tip: Use long, even strokes to prevent streaks. If you accidentally get paint drips, don’t worry! You can smooth them out before it dries.
Let the paint dry for approximately 30 minutes. You can check if it’s dry by gently running your finger over an area; if it’s cool and not sticky, you’re good to go.
Step 2: Apply a Second Coat (Optional)
If you'd like a deeper, more opaque color, you might want to apply a second coat. Just repeat the same process as before and wait another 30 minutes for the paint to dry completely.
Personal Note: I usually go for two coats, especially if it’s a lighter color, as it makes everything more vibrant!
Step 3: Prepare the Lace
While waiting for the paint to dry, cut a piece of lace ribbon about 24 inches long. This will wrap around the upper part of the jar, giving it that lovely, finished look.
If you're feeling adventurous, you can cut the lace into smaller pieces and layer them for a fun texture!
Step 4: Attach the Lace to the Jar
Once the paint is dry, position the lace around the upper part of the mason jar. Take your hot glue gun and apply a dot of glue every few inches, pressing down to secure the lace to the jar.
Tip: Don’t overdo the glue, or it may spill out and create a mess. A little goes a long way!
Let this set for about 10 minutes, ensuring the lace is firmly attached.
Step 5: Insert the Fairy Lights
Next, open the battery pack of your fairy lights and place it inside the jar first. Then, gently tuck the string of lights inside, spreading them out a little so they light up beautifully when you turn them on.
Make sure the battery pack sits tightly in the jar so it doesn’t rattle around!
Step 6: Add Optional Tea Light
If you’re using a tea light, place it at the bottom of the jar. The glow from the tea light combined with the fairy lights will look magical!
Step 7: Final Touch
Once everything is in the jar and looking cozy, consider adding a small bow made from the leftover lace around the top of the jar. This small touch pulls everything together.
Common Mistakes to Avoid
- Rushing the glue. If you skip letting the glue set properly, the lace might peel off later. Give it full time to dry!
- Overloading the jar. If you stuff too many decorations inside, the lights won't shine through effectively. Keep it simple for the best glow.
- Skipping the second paint coat. If you want a vibrant color, not using two coats can leave your jar looking translucent.
- Using regular candles. Real candles can be hazardous! Always stick to battery-operated options for safety.
- Not checking for battery life. You don’t want to light up your lantern on a cozy evening only to find the batteries are dead. Always have extras on hand!
Make It Your Own: Variations and Ideas
- Change the Paint Color: Use seasonal colors like orange for Halloween or red for Christmas to match your decor.
- Try Different Materials: Swap lace with burlap for a rustic touch, or use decorative twine for a more casual look.
- Mix Up the Lights: Use colored fairy lights for a fun summer vibe!
- Create a Lantern Trio: Make three different colored jars to create a beautiful centerpiece or hanging display.
- Use Larger Jars: Scale up the project by using larger jars or even lantern-style containers to make a bigger statement.
The possibilities are endless, and I can’t wait to see what you come up with! This lantern is not just a project but an invitation to explore your creativity.
Before You Go
Pin this for the next rainy afternoon: Save this post so you can remember the steps for making your DIY fairy light lantern, especially the drying times and measurements.
Come back and tell me how it went: I’d love to hear about your experience! No question is too basic, and I’m just as eager to learn about any projects that turned sideways as those that went smooth.
Show off what you made: I can’t wait to see your versions of this sweet lantern! Enjoy the process, and happy crafting!