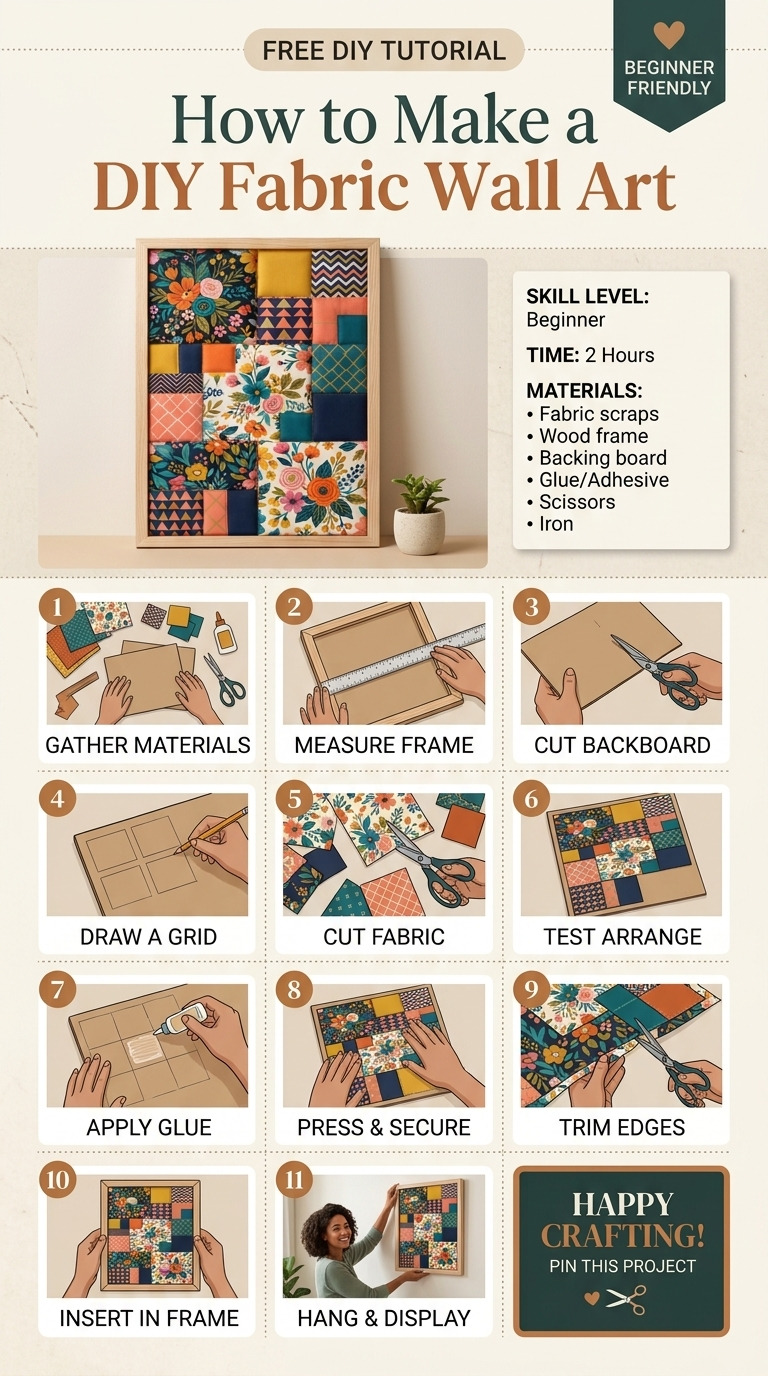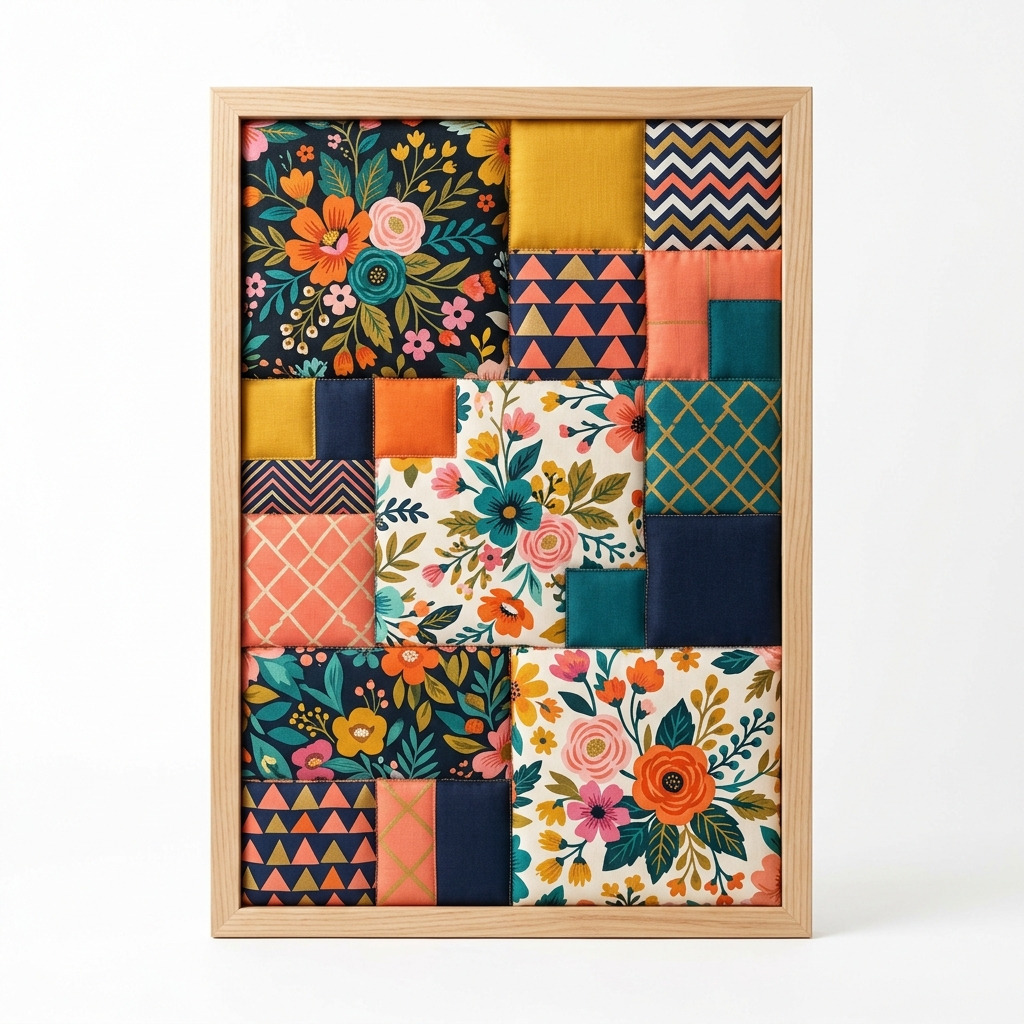
Last winter, I found myself staring at a blank wall in my living room that just felt too empty. I wanted something that would add color and warmth, but I didn't want to spend a fortune on decor. That's when the idea hit me — why not create my own piece of fabric wall art? It sounded fun, and it would allow me to showcase some favorite fabric patterns. I gathered my supplies, and before I knew it, I had a beautiful piece of art that became a conversation starter when friends came over. This project turned out to be easy, customizable, and so satisfying.
In this tutorial, I'm excited to share exactly how I made my fabric wall art, so you can create your own unique masterpiece too. Let’s dive into it!
[Descriptive image caption of the finished project]
What You'll Need
Materials:
- Wood Frame:
- 1 x 24" x 36" wooden frame (you can use a ready-made or DIY frame)
- Color: Choose natural wood (light or dark, based on preference)
- Fabric:
- 1 yard each of 4 different cotton fabrics, in coordinating colors and patterns (like florals, geometrics, stripes, solid colors). Go for what speaks to you!
- (optional) Use fabric scraps if you want a fun patchwork effect.
- Fabric Glue:
- 1 bottle (approximately 4 oz), washable, all-purpose fabric glue.
- Batting:
- 1 piece (approximately 24" x 36") of quilt batting (optional for added padding).
- Backing Board:
- 1 piece of foam board or cardboard (24" x 36") to give stability to your art.
- Stencils (optional):
- Various shapes like stars or circles, pre-made or store-bought for added design elements.
- Scissors:
- 1 pair of sharp fabric scissors for cutting fabric pieces.
- Rotary Cutter and Cutting Mat (optional but helpful if you want precise cuts).
Tools:
- Hot Glue Gun Kit:
- 1 hot glue gun and glue sticks for an extra strong hold.
- Paintbrush:
- 1 large flat brush (2-inch width) to spread the glue smoothly.
- Ruler:
- 1 measuring ruler (36-inch) to measure out fabric cuts accurately.
- Pencil:
- 1 for marking where you'll cut your fabric.
- Safety Equipment:
- Safety goggles (if using a rotary cutter) to keep your eyes protected.
How to Make It, Step by Step
Step 1: Prepare the Frame
If you plan to paint your wooden frame, go ahead and do that now. Use acrylic paint for a pop of color and let it dry completely before moving on to the next step. If you are using a natural wood frame, just make sure it’s clean and ready to go.
Step 2: Prepare the Backing Board
Cut your foam board to the size of the frame (24" x 36"). This foam will serve as the base for gluing all your fabric pieces.
Step 3: Lay Out Fabric Pieces
Now comes the fun part! Arrange your cut fabric pieces on the foam board. Start with the larger pieces and layer smaller ones on top to create depth and an appealing layout. Play with different placements until something catches your eye.
Step 4: Attach Fabric to the Backing Board
Start gluing! Apply fabric glue evenly to the backing board where each fabric piece will go. Press the fabric securely in place, smoothing out any wrinkles. Begin with the largest pieces and work down to the smaller ones until all fabric is attached.
Tip: Don’t go crazy with the glue — too much can cause the fabric to wrinkle and look messy. A thin layer is usually enough!
Step 5: Optional Batting Addition
If you’re using batting for added padding, place it over your fabric layers, ensuring it covers the whole surface. Trim any excess batting from the edges for a clean finish.
Step 6: Secure Everything in Place
Now, take that hot glue gun and reinforce the edges or corners of your fabric pieces on the board. This will help everything stay in place and look tidy.
Step 7: Assemble the Frame
Once your fabric piece is completely dry, insert it into your wooden frame. Gently arrange it so that the fabric side is facing inside the frame. Ensure that no fabric is pinched or misaligned. Secure the fabric and backing with frame clips or screws as needed.
Step 8: Final Touches
Inspect your masterpiece! Check for any excess glue around the edges and wipe it away for a polished look. Now, decide how you'd like to display your new art — hang it using D-rings, adhesive hooks, or simply lean it against a wall for a cozy touch.
Common Mistakes to Avoid
- Using Too Much Glue. If you use too much glue, it can cause your fabric to wrinkle. Aim for a thin, even layer instead.
- Not Allowing to Dry Fully. Skipping the drying time can lead to pieces falling off later. Give everything a good half-hour to dry before moving on, especially after applying glue.
- Misaligning Fabric in the Frame. If your fabric isn’t straight or tight in the frame, it’ll look wonky. Take your time when inserting it to ensure it lays flat and properly aligned.
- Cutting Pieces Inconsistently. Messy edges can ruin the overall look. Use sharp scissors or a rotary cutter for clean cuts.
- Using Incompatible Materials. Not all fabrics glue well with all types of glue. Stick to fabric glue for best results!
Make It Your Own: Variations and Ideas
- Change Up Fabric Sizes: Experiment with different fabric dimensions for a more playful look. Maybe mix in some larger pieces or go really small for a detailed collage!
- Seasonal Themes: Create new art pieces for different seasons or holidays. Think autumn colors or cheerful spring patterns!
- Use Textured Fabrics: Incorporate textured fabrics like burlap or velvet for more tactile interest.
- Incorporate Paint: If you’re feeling artsy, use paint alongside fabric to add another dimension to your piece. You could paint geometric shapes as background elements.
- Create a Gallery Wall: Make several pieces in different sizes and arrange them together for a fun gallery wall effect.
This project is truly a canvas for your creativity, so have fun with it!
Before You Go
Pin this for the next rainy afternoon: Save this post so you’ll have all the steps and measurements at your fingertips when you decide to make your own fabulous fabric wall art.
Come back and tell me how it went: I would love to hear how your project turned out! No question is too basic — if your piece went sideways, I want to know about that too!
Show off what you made: It’s always great to see your wonderful creations. Enjoy crafting your unique fabric wall art!