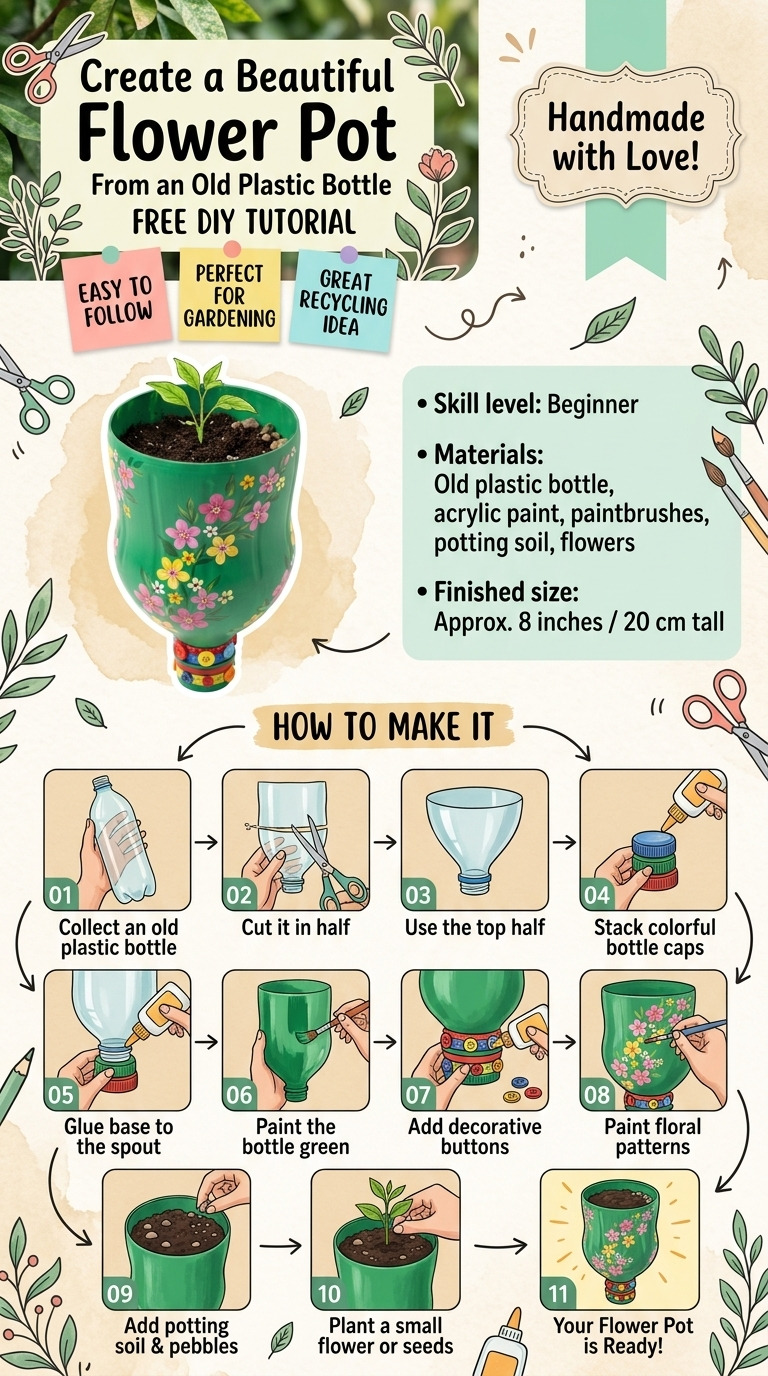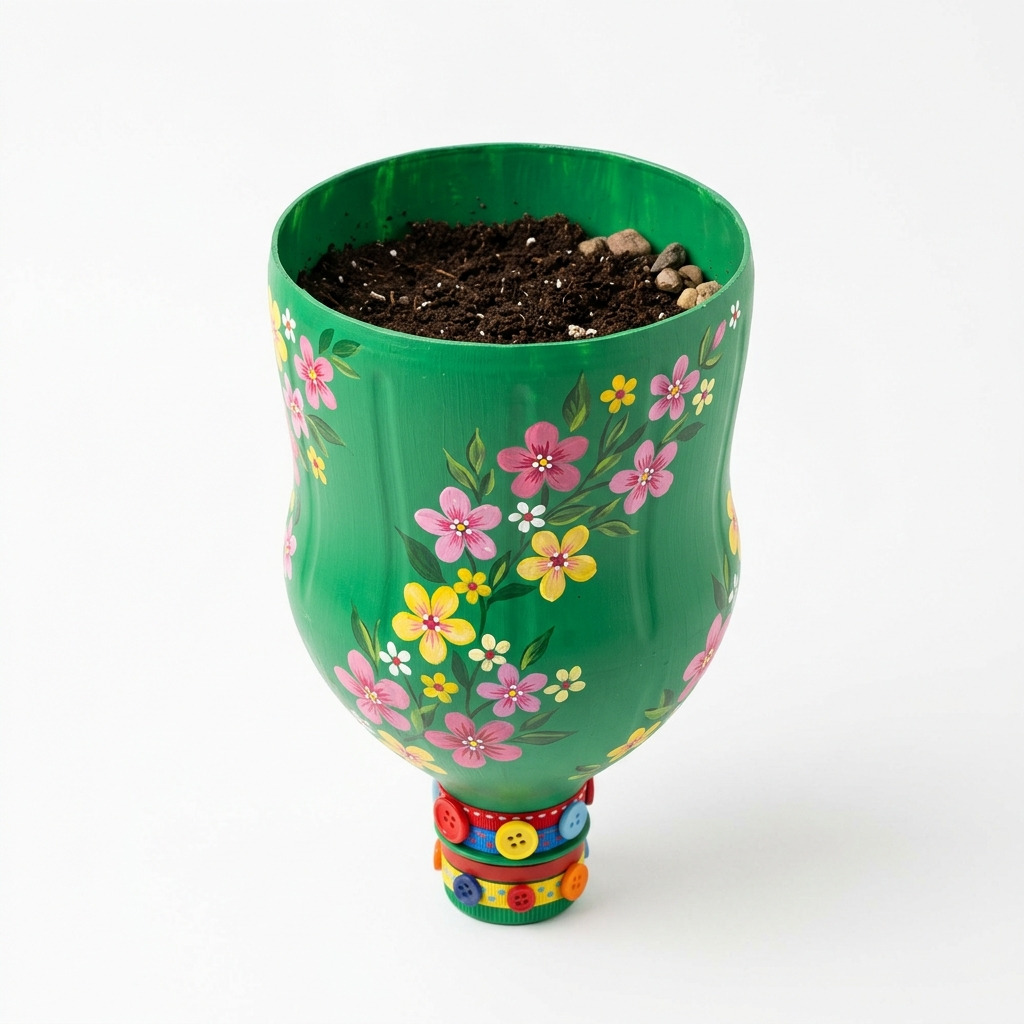
Let me tell you how this project came about. I was rummaging through my recycling bin one lazy afternoon and stumbled upon an empty 2-liter soda bottle. My heart skipped a beat! I’ve always hated the idea of tossing plastic away, and I needed a cozy new home for my little houseplants. So, I thought, why not transform this old bottle into a chic flower pot? After a few colorful brush strokes and some fun decorations, I ended up with a quirky and unique flower pot that brightens my porch. It’s easy to make, and I’m excited to share the entire process with you!
This project is beginner-friendly and requires minimal materials. You'll have a gorgeous flower pot ready to show off in no time. Let’s jump in!
[Descriptive image caption of the finished project]
What You'll Need
Materials:
- Plastic bottle: 1 empty 2-liter soda bottle (this will be the main body of your flower pot)
- Acrylic paint: Various colors (like green for the base and some bright colors for flowers)
- Paintbrushes: 1 medium (about 1 inch wide for the main color) and 1 fine-tipped (for details)
- Cement or potting soil: 2 cups (to fill with soil for your plants)
- Small drainage stones: 1 cup (optional, helps keep soil from getting soggy)
- Sealing spray: Clear acrylic sealant (especially if you plan to put it outside)
- Embroidery thread or twine: 1 roll (in any color you fancy for additional decoration)
- Decorative embellishments: Optional items like ribbons, buttons, or stickers to personalize your pot
Tools:
- Scissors: Regular household scissors, sharp enough to cut through plastic
- Hot glue gun: To attach decorative elements and glue sticks
- Ruler: For measuring where to cut your bottle
- Marker: To mark your cutting lines
- Pencil: For sketching out your designs (if you want)
- Safety goggles: For safety when cutting (better safe than sorry!)
How to Make It, Step by Step
Step 1: Cut the Bottle
Grab your scissors and carefully cut your plastic bottle into two halves.
- Measure about 5 inches from the bottom and cut all the way around, making sure you cut in a straight line (this can be tricky, so take your time).
- You should have a top half for your flower pot and a bottom half that can be discarded or used as a saucer. Make sure the cut edge is smooth.
Tip: If the edge feels sharp or rough, lightly sand it with fine-grit sandpaper to avoid any cuts later.
Step 2: Prepare for Drainage
If you choose to use the bottom half of the bottle as a saucer, poke a few small holes in the bottom. This allows excess water to drain out so that your plants won’t drown!
Step 3: Create Design
Think about how you want your flower pot to look. This is the fun part!
- Use a pencil to lightly sketch designs on the outside of the top half of the bottle. Flowers, swirls, or even stripes can add a lovely touch.
Step 4: Paint the Pot
Now let’s bring that design to life!
- Using your medium paintbrush, apply a base coat of green acrylic paint to the entire outer side of the bottle.
- Allow it to dry for about 30 minutes. You want it fully dry before moving to the next step so it doesn’t smudge.
Once it's dry, grab your fine-tipped brush:
- Add some whimsical flowers or patterns using pink, yellow, or any other colors you fancy with your fine-tipped paintbrush. Aim for charming designs that make you smile!
- Let this dry for an additional 30 minutes.
Step 5: Seal the Paint
If you plan on using your flower pot outside, it’s crucial to seal it.
- Spray a thin layer of clear acrylic sealant over the paint. Follow the instructions on the can for best results.
- Wait for about an hour for this to dry completely.
Step 6: Add Drainage Stones
Now it’s time to get your pot ready for planting!
- Place about 1 cup of small drainage stones in the bottom of the pot. Then add your 2 cups of potting soil on top of the stones. Leave a little space at the top for your plants.
Step 7: Plant Your Flowers
It’s planting time! Whether you go for pretty flowers or leafy greens, make sure to plant them securely in the soil.
- Make holes with your fingers and gently place your plants in, ensuring they are spaced nicely so they have room to grow.
Step 8: Decorate
Here’s where you can truly personalize your flower pot!
- Using your hot glue gun, attach ribbons, buttons, or any embellishments around the neck of the bottle. Let your creativity shine!
Assembly & Finishing
After decorating, make sure everything is secured.
- Allow your flower pot to cure and dry for at least 1 hour before moving it.
- Take a step back and enjoy your new creation—maybe even do some touch-up painting if you wish!
Common Mistakes to Avoid
- Rushing the glue. If you put decorations on while the glue is still wet, they may not stick properly and can fall off.
- Not cleaning the bottle properly. Any residue can cause the paint to peel off later. Rinse thoroughly!
- Too crowded with plants. Make sure to give each plant enough space to grow, otherwise they might struggle.
- Not waiting for drying times. Skipping drying times can lead to smudged paint or messed-up decorations.
- Using too much paint at once. This can lead to drips and an uneven finish. Apply thin layers instead.
Make It Your Own: Variations and Ideas
- Color play: Use bold, contrasting colors for a vibrant look or go with pastels for something softer.
- Patterns: Explore different painting techniques like sponging or stippling for texture.
- Bottle shapes: Try using different bottle styles, like smaller water bottles for mini pots or larger bottles for a bigger planter.
- Seasonal decorations: Change up your decor seasonally—think autumn leaves or festive snowflakes in winter!
- Gift potential: Make a personalized flower pot for a friend by using their favorite colors and embellishments.
You’re ready to let your creativity shine with this easy DIY project! Don’t forget, there’s no wrong way to make it your own!
Before You Go
Pin this for the next rainy afternoon: Save this easy flower pot project for when you're ready to give new life to an old plastic bottle! Trust me, you’ll want those exact measurements and drying times handy when you tackle this fun craft. Come back and tell me how it went: I would love to hear about your experience, and no question is too basic! If something didn’t go to plan, I’d love to hear that too. Show off what you made: I can't wait to see your beautiful flower pot creations!