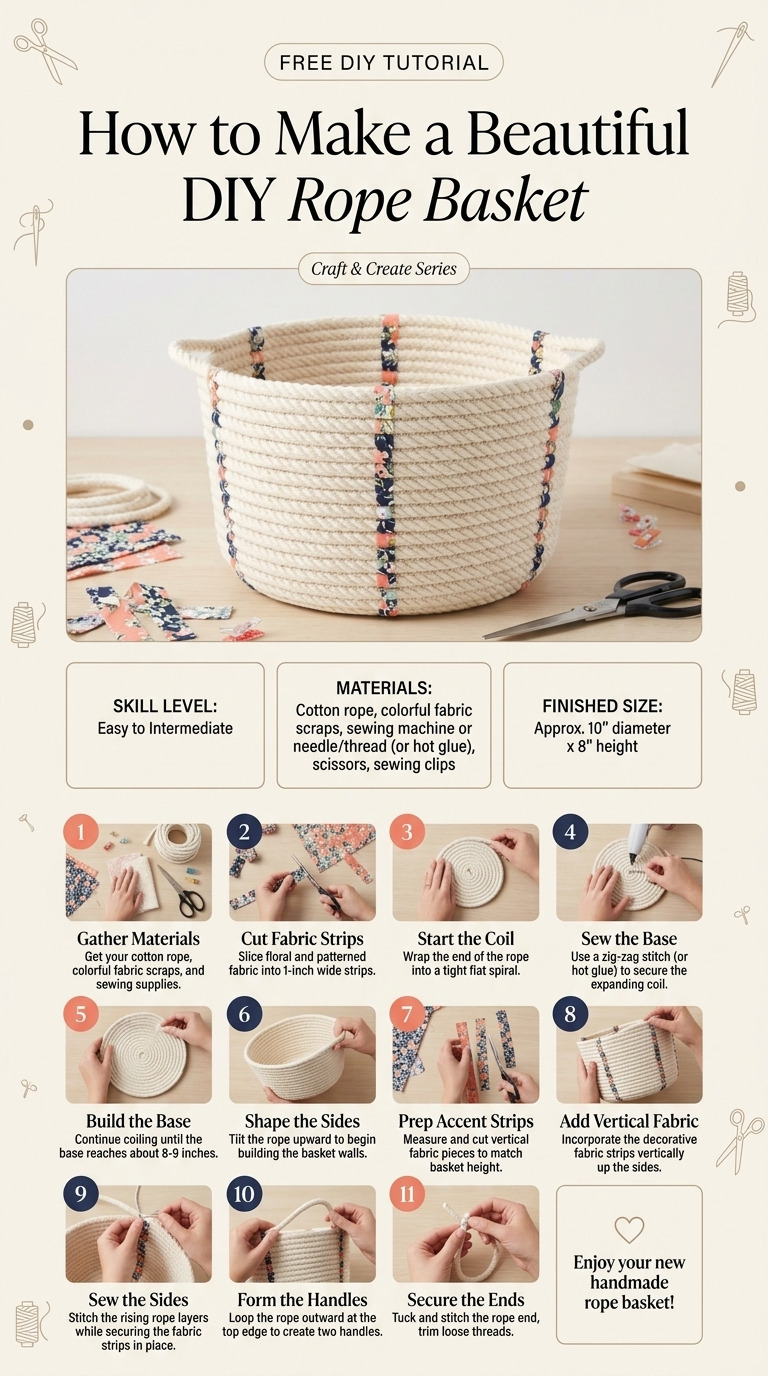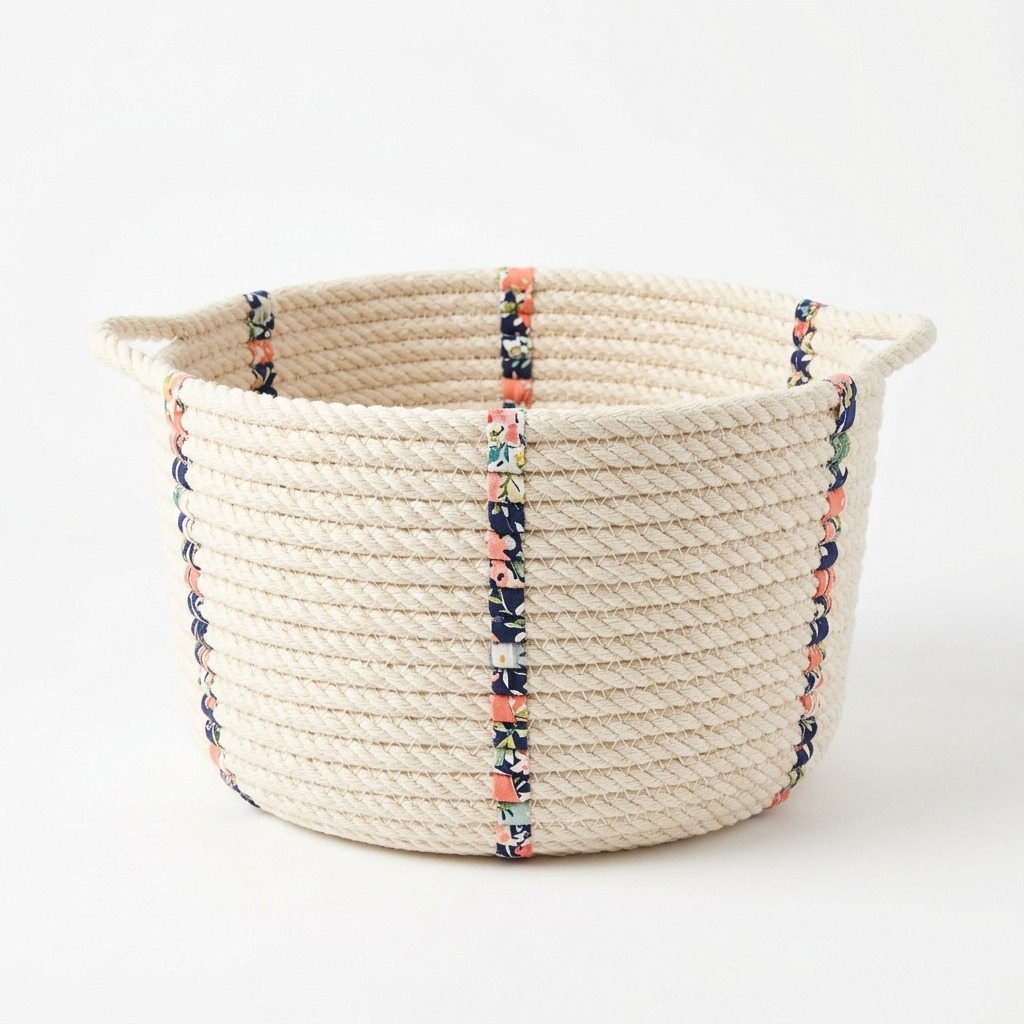
Sometimes, I find myself staring at the piles of things around my home—books, toys, and random items that seem to collect like dust bunnies. I wanted something that could help me wrangle all that clutter, but I didn't want to spend a fortune or buy something that didn’t fit my style. That’s when I decided to make a rope basket! Not only is it practical for organizing, but it's also quite pretty and adds a touch of warmth to my space.
This basket is super easy to make, with a lovely coiled design that’s unique to your own touch. You can use it anywhere in your home, whether in the living room to hold throws, in the bathroom for toiletries, or even in the kids' room for toys. I’ll walk you through each step, so don’t worry, even if you’re a complete beginner, you’ll have no problem making this charming basket!
[Descriptive image caption of the finished project]
What You'll Need
Materials:
- Cotton Rope: 100 feet of 3/8 inch diameter natural cotton rope. This is your main component, so choose a quality rope that feels good to the touch.
- Fabric or Decorative Ribbon: 1 yard (optional, for embellishment). You can use any fabric you like—think colors and patterns that suit your vibe!
- Fabric Hot Glue Sticks: 5 (for attaching decorative elements). These sticks melt in the glue gun and bond quickly!
- Acrylic Paint (optional): 1 small bottle of a color of your choice for additional patterns or decorations. This is great for a personalized touch.
- Sealer (optional): 1 small bottle of clear acrylic sealer, especially if you’re using paint to protect your artwork.
Tools:
- Hot Glue Gun: Standard size is perfect for this project.
- Scissors: Sharp scissors are a must for clean cuts.
- Ruler: A 12-inch ruler will help you measure your rope.
- Pencil: For marking if necessary.
- Clamps: 2 medium clamps can help hold the rope in place while you glue if needed.
- Cutting Mat: Use this for a safe cutting surface that won’t get damaged.
- Safety Equipment: Gloves, because hot glue can be a bit temperamental, and eye protection if you're particularly cautious.
How to Make It, Step by Step
Step 1: Base Coiling
- Start by taking the end of your cotton rope and coil it tightly to create a base that is about 3 inches in diameter.
- As you wind the rope into a coil, use your hot glue gun to apply glue between the layers every 1-2 inches. Be careful; the glue is hot! I often hold the coil for about 10 seconds until the glue starts to set, ensuring it stays put.
Step 2: Building the Side Walls
- Once your coil base is secure, continue coiling the rope upward from the outer edge of your base.
- Each time you complete a round, apply hot glue to the angled sides of the coils to secure them together. This helps them stay strong and creates a nice wall for your basket.
- Keep the tension tight as you go. You’ll usually need about 9-10 coils to reach your desired height of 8 inches. If yours starts looking a bit wobbly, don’t fret—it just adds character!
Step 3: Adding Embellishments (Optional)
- If you want to jazz up your basket, now is a great time! Take your decorative fabric or ribbon, cut pieces about 1 inch wide, and wrap them around the outside of the rope at regular intervals.
- Use hot glue to secure the fabric, allowing it about 10 minutes to dry.
- If you’re feeling creative, grab your acrylic paint and decorate the outer walls. Allow your paint to dry for 30 minutes before applying a clear sealer if you choose to protect your designs.
Step 4: Finishing Touches
- Once the basket has reached your desired height, trim any stray threads or excess rope at the top edge to achieve a clean look.
- If you’re using a sealer, give your newly painted basket a coat to safeguard those creative embellishments. Always follow the manufacturer's drying instructions for the best results!
Common Mistakes to Avoid
- Rushing the glue. If you don’t give enough time for the glue to set, your coils may come undone or not hold properly.
- Over-gluing. Applying too much glue can lead to a messy appearance. A little glue goes a long way!
- Inconsistent tension. If the coils aren't tightly wound, your basket can lose its shape. Keep an even pressure as you glue.
- Forgetting the base size. Make sure you start with a solid, even 3-inch base diameter. An uneven base can throw off the whole look.
- Skipping drying time. When painting or sealing, not giving the right drying time can ruin all your hard work. Be patient!
Make It Your Own: Variations and Ideas
- Different Rope Colors: You could use natural, dyed, or patterned rope for a completely different style.
- Seasonal Variations: Consider changing the fabric ribbon or paint to match the seasons—pastels for spring or warm tones for autumn!
- Scaling Up or Down: Adjust the dimensions for a mini basket for a desk or a larger one for a laundry room—perfect for your needs!
- Gifts and Personalization: Create a basket as a special gift! Fill it with goodies like candles or snacks for a lovely touch.
It’s all yours now—bring your personality into it! You really can’t go wrong with this simple and satisfying project.
Before You Go
Pin this for the next rainy afternoon: Save this project idea to Pinterest so you can find it again when you have your rope and glue gun ready to make your very own basket. I'm excited to see how your version turns out!
Come back and tell me how it went: Don’t hesitate to ask any questions—no question is too basic. If your project didn’t turn out as expected, that's okay! I want to hear about it—let’s troubleshoot together!
Show off what you made: I would love to see your finished basket. Remember, it's all about creativity and personal flair!