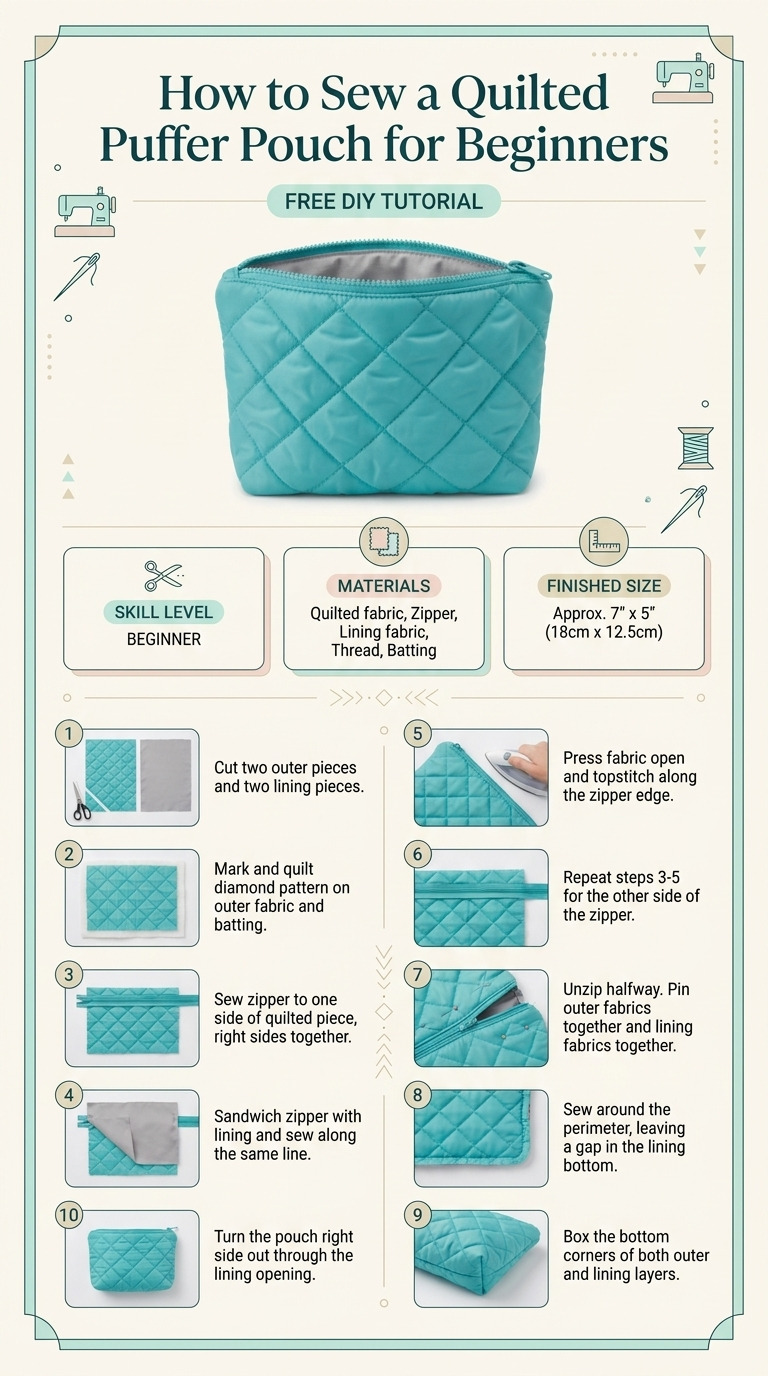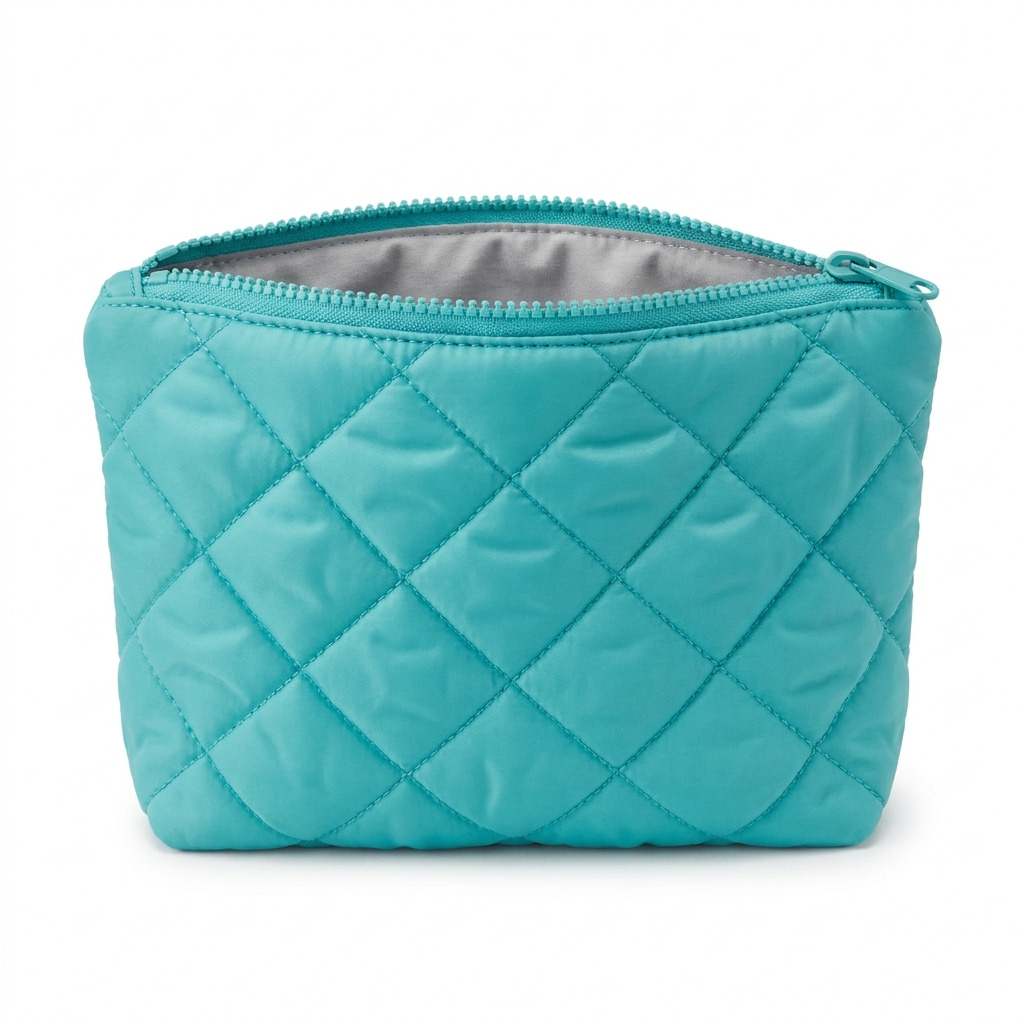
When I first started sewing, I found myself needing a small pouch for keeping my cosmetics and other little essentials organized. Searching through stores, I kept seeing quilted pouches that looked so cozy and stylish, but the price tags made me hesitate. So, I thought, why not try my hand at making one? That little idea turned into a fun project that I still love using! This quilted puffer pouch has a bouncy look due to the quilting and is perfect for tucking away all those odds and ends.
The great thing about sewing your own pouch is that you can pick fabrics that really match your style. I often switch mine out depending on my mood or the season. It hangs out on my vanity or slips into my bag when I’m on the go. Plus, I promise, it’s an easy project, and I’ll walk you through every step of the way!
[Descriptive image caption of the finished project]
What You'll Need
Materials:
- Outer Fabric: 1/2 yard of nylon or ripstop fabric (pick any fun color you love)
- Lining Fabric: 1/2 yard of cotton fabric (choose a pattern or color that complements the outer fabric)
- Batting: 1/2 yard of quilt batting (medium loft cotton or polyester will give that soft puff)
- Zipper: 1 piece, 10-inch nylon zipper (a matching color will really pull everything together)
- Thread: Polyester thread (matching the outer fabric is best)
- Sewer’s tape or fabric clips: About 10 to help hold everything steady while sewing
- Iron-on interfacing (optional): 1/4 yard for extra sturdiness (if you want that added durability)
- Basic sewing supplies: Scissors, pins, sewing machine, rotary cutter, cutting mat, ruler.
Tools:
- Sewing machine with a standard foot
- Rotary cutter or fabric scissors
- Straight ruler (at least 12 inches)
- Cutting mat
- Iron and ironing board
- Safety equipment: none required, but please be careful with the hot iron!
How to Make It, Step by Step
Step 1: Iron the Fabric
Begin by pressing each fabric piece with an iron to remove any wrinkles. This will make cutting and sewing much easier. Brush up on your ironing skills here; crumpled fabric can be tricky to work with!
Step 2: Prepare Quilting Layers
Now we’re ready to set up our layers for quilting. Lay one piece of outer fabric right side down (the side that will be seen when finished). On top of that, place one layer of batting, followed by the coordinating lining fabric piece right side up. This layering forms a “sandwich” and we’ll repeat this for the second set.
- Tip: If you're using interfacing, now is a good time to fuse it to the outer fabric before layering everything. It helps the pouch hold its shape better.
Step 3: Pin Layers
Secure your layers in place by using pins or sewer's tape—one pin for each corner and a couple in between should do the trick. This ensures nothing shifts when sewing.
Step 4: Quilt the Layers
Get your sewing machine ready and sew straight lines every 1 to 2 inches across the layers in a grid pattern. This holds the batting in place. Make sure to backstitch at the beginning and end of each line to secure your stitches. Repeat this for both sets of fabric.
- Tip: Set your sewing machine to a straight stitch and adjust the stitch length to around 2.5mm for best results.
Step 5: Join Outer Fabrics
Grab those quilted pieces! Place the two pieces of outer fabric right sides together (the side you want facing out). Pin along the side and bottom edges, leaving the top open for the zipper.
Step 6: Sew Sides
Using a straight stitch, sew along the pinned edges with a 1/4 inch seam allowance—make sure to backstitch at the start and end of your seams.
Step 7: Prepare Zipper
Take your 10-inch zipper and lay it face down along the top edge of the pouch, lining up the raw edges. Pin it in place to secure.
Step 8: Attach Zipper
Switch to your zipper foot on the sewing machine, which helps you get really close to the teeth of the zipper. Sew along the zipper's edge, ensuring the fabric is folded neatly under it. Don’t forget to backstitch at the ends!
Step 9: Add Lining
Now it’s time for the lining. Place the two lining pieces right sides together and pin the lining's top edge along the zipper right side down. Repeat the zipper sewing process you just did for the outer fabric.
Step 10: Sew Edges
Pin and sew the remaining open edges of the lining and outer fabric together using a 1/4 inch seam allowance. Remember to leave an opening in the lining for turning the pouch inside out later—backstitch as needed!
Step 11: Turn the Pouch
This is a fun part! Carefully pull the pouch through the opening in the lining to turn it right side out. You should see the lovely quilted design come together now!
Step 12: Close the Opening
Fold in the edges of the lining's opening, pin it, and then sew it closed with a straight stitch. Nice and neat!
Step 13: Push Lining into Pouch
Finally, tuck the lining inside the zipped outer pouch. Give the pouch a little gentle squeeze to help everything settle into place.
Common Mistakes to Avoid
- Rushing the quilting. This can lead to uneven stitching or batting shifting. Take your time and ensure your lines are straight before sewing them.
- Twisting the zipper while attaching. Always check the orientation before sewing to avoid a crooked zipper.
- Forgetting to backstitch. If you neglect this step, your seams may come apart, which can be frustrating! Just remember to reinforce your stitches at the start and end.
- Leaving the opening in the lining too small. If it’s too tight, it’ll make turning the pouch a real challenge!
- Not securing the layers well. This can lead to fabric slipping during quilting, causing uneven layers.
Make It Your Own: Variations and Ideas
- Color Play: Experiment with different outer and lining fabrics! Bright colors can make your pouch pop, while soft pastels can offer a more understated look.
- Waterproof Fabric: If you're making something for outdoor use, consider waterproof fabric for the outer layer. It'll keep your items dry!
- Tag It: Add a little tag or embellishment to personalize your pouch. Think of a fun name or a little charm!
- Size Adjustments: Want a bigger pouch? Just scale up your fabric cuts by a couple of inches, and enjoy the extra space!
- Gift Ready: Create a matching set in different sizes for a lovely gift, or make it themed—think holidays or favorite colors!
You’re now ready to dive into your sewing adventure! Remember, crafting is all about making it your own and having fun along the way. I can't wait to hear how yours turns out!
Before You Go
Pin this for the next rainy afternoon: Keep this guide handy, especially for all those specific measurements and steps you’ll want to refer back to when creating your quilted puffer pouch. Come back and tell me how it went: No question is too simple, so reach out if you hit a snag, or tell me how it turned out! Show off what you made: I would love to see your creations, so feel free to share what you whip up!
Happy sewing!