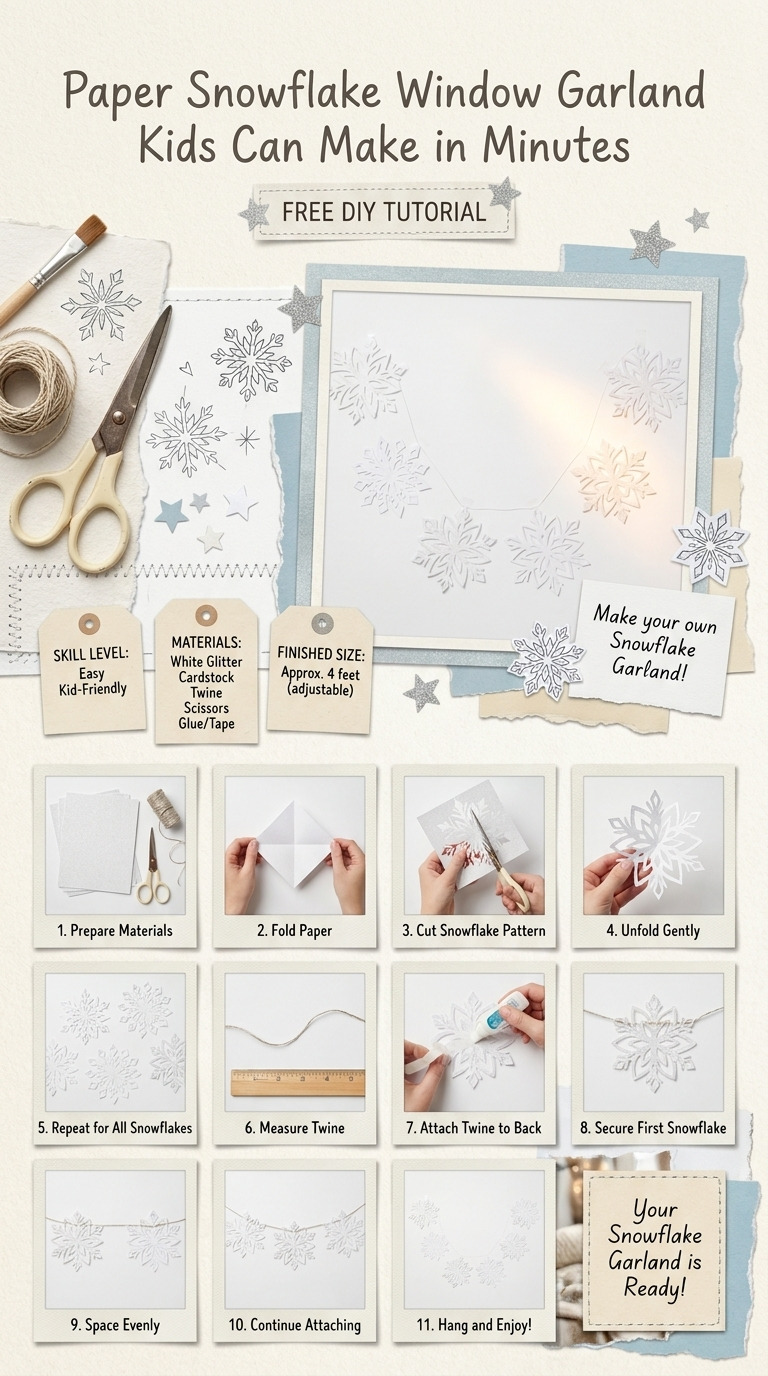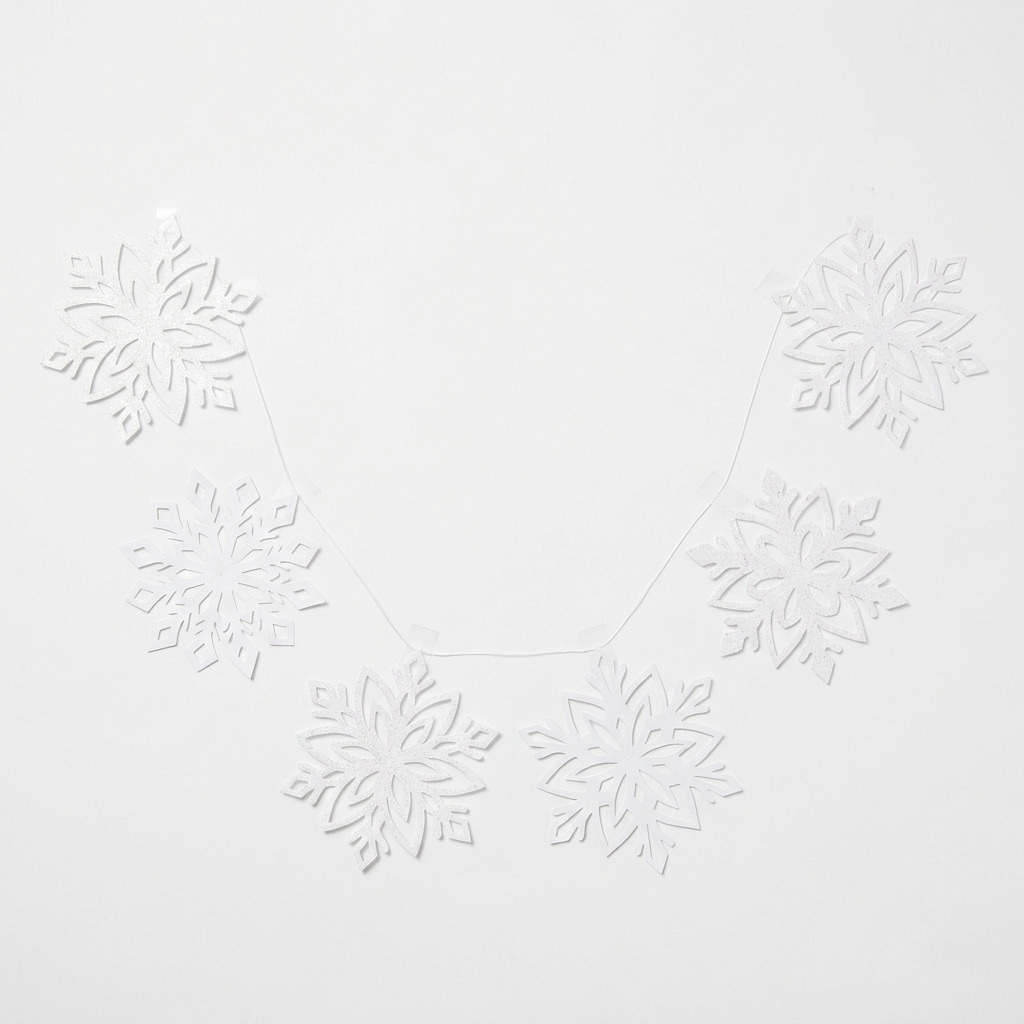
When winter rolls around, I always find myself longing for that cozy, festive feel that only snowflakes and twinkling lights can bring to my home. One year, I wanted to decorate my windows without spending a fortune on store-bought decorations. I stumbled upon making paper snowflakes, and I was hooked! They’re delicate, charming, and when strung together, they create a beautiful garland that dances softly in the light.
Making a garland of paper snowflakes is a fun and easy craft that kids can get involved with. Best of all, you can whip it up in no time! Each snowflake measures about six inches, and the garland can stretch up to six feet. It adds just the right touch of whimsy that can brighten up any space during the chilly months. I’ll walk you through every simple step to create your own lovely paper snowflake garland. Let’s dive in!
[Descriptive image caption of the finished project]
What You'll Need
Materials:
- Paper:
- White cardstock or construction paper, 8.5 x 11 inches — 6 sheets
- Optional: Glitter paper or colored paper for variety (adds a fun pop of color)
- String or ribbon:
- 1/4 inch wide, white or clear fishing line — 10 feet
- (You can also use yarn or any thin ribbon you have at home.)
- Scissors:
- Standard craft scissors (make sure they can cut through the paper easily)
- Glue or glue stick:
- Clear-drying liquid glue or a glue stick (helps the snowflakes stick together securely)
- Tape:
- Clear tape for securing the snowflakes to the string
- Marker:
- Fine-tipped black marker for drawing patterns (optional but fun for designs!)
Tools:
- Cutting Mat:
- (A soft surface to protect your table while cutting.)
- Ruler:
- 12 inches for measuring snowflake cuts
- Pencil:
- For marking cuts on the paper
- Hole Punch (optional):
- To create holes for stringing
- Safety Equipment:
- None required, though supervision for young kids is a good idea!
How to Make It, Step by Step
Step 1: Fold the Paper
- Take one sheet of your chosen paper and lay it flat in front of you, horizontally.
- Fold it in half from top to bottom, creating a rectangle. Make sure to crease it well so the fold holds.
- Now, take this rectangle and fold it in half again vertically. You should have a smaller square now! Crease it tightly.
Step 2: Create the Triangle
- With the folded edge facing up (the top), take the right corner of the square and fold it inward to meet the bottom crease. This creates a triangle shape.
- Depending on how big you want your snowflake, trim any excess paper at the bottom if needed, ensuring the triangle is about six inches tall. I remember the first time I did this and ended up with a tiny triangle that didn’t make a cute snowflake!
Step 3: Cut the Snowflake Pattern
- Hold the triangle steady and grab your scissors. Start cutting small shapes along the edges of the triangle. This can be curves, tiny triangles, or even fun little holes—whatever looks snazzy! Just be careful not to cut all the way through; you want the base to stay connected.
- When you unfold the triangle gently, a lovely snowflake design pops out—take your time so it unfolds nicely. If it rips a bit, don’t stress. Each snowflake has its unique charm.
Step 4: Repeat for Additional Snowflakes
- Repeat steps 1-3 with the other sheets of paper. Make six snowflakes in total, varying the designs for extra fun. Trust me, the more different designs, the better!
Step 5: Prepare the Garland
- Now, cut a piece of string or fishing line to about 10 feet. This will give your garland enough length to hang gracefully.
- If you have a hole punch, punch a hole in the top of each snowflake. If you don’t have one, you can simply use tape to attach the snowflakes to the string.
Step 6: Attach the Snowflakes
- Space each snowflake evenly along the string, about 12 inches apart, to maintain balance.
- Use tape to secure the snowflakes to the string if you’re not using holes. Press them down firmly to make sure they hold. If yours wobbles a bit, that’s okay, it adds to the homemade feel!
Assembly & Finishing
- Once everything is attached, give the garland a gentle shake to see if anything falls off. If it does, add another piece of tape!
- For a touch of sparkle, sprinkle some loose glitter on your snowflakes before hanging them. Just be careful where you do this unless you want a surprise glitter explosion!
- Now, proudly hang your garland in a window or across a room.
Common Mistakes to Avoid
- Cutting through the folded paper completely. Doing this can ruin the snowflake design. You're aiming for delicate cuts that don’t cut through; check your design as you go!
- Not creasing your folds well. If your folds are uneven, the snowflake might turn out misshapen. Make sure to press down well when you create those folds.
- Rushing the cutting. It’s tempting to hurry, but taking your time will help you create clean lines and better snowflakes!
- Hang it without checking spacing. If you don’t space the snowflakes evenly, the end product might look off balance. Stand back and assess how they look before securing them in place!
Make It Your Own: Variations and Ideas
- Different Colors: Use colored paper for a fun twist! Red and green for the holidays or blues and whites for a winter wonderland theme.
- Add Some Lights: String some fairy lights through your garland for a dazzling effect at night. It creates a magical ambiance!
- Use Different Sizes: Make some smaller or larger snowflakes for variety. They can create a layered effect when hung together.
- Gift Idea: This garland makes a cute homemade gift. Just roll it up nicely and tie it with a ribbon for a simple wrapping.
- Join Forces: Have the kids create their own snowflake designs and decorate their rooms. Everyone loves a personalized touch!
As you can see, the possibilities are endless. I hope you enjoy crafting your unique paper snowflake garland as much as I do!
Before You Go
Pin this for the next rainy afternoon: Save this straight-forward guide to making your Paper Snowflake Window Garland so you can revisit it when you gather your crafting supplies!
Come back and tell me how it went: Don’t hesitate to ask any questions or share your crafting adventures. Every craft, whether it went smoothly or had a few bumps, is a story worth telling.
Show off what you made: I can’t wait to see your beautiful snowflake garland masterpiece! Enjoy this creative experience!