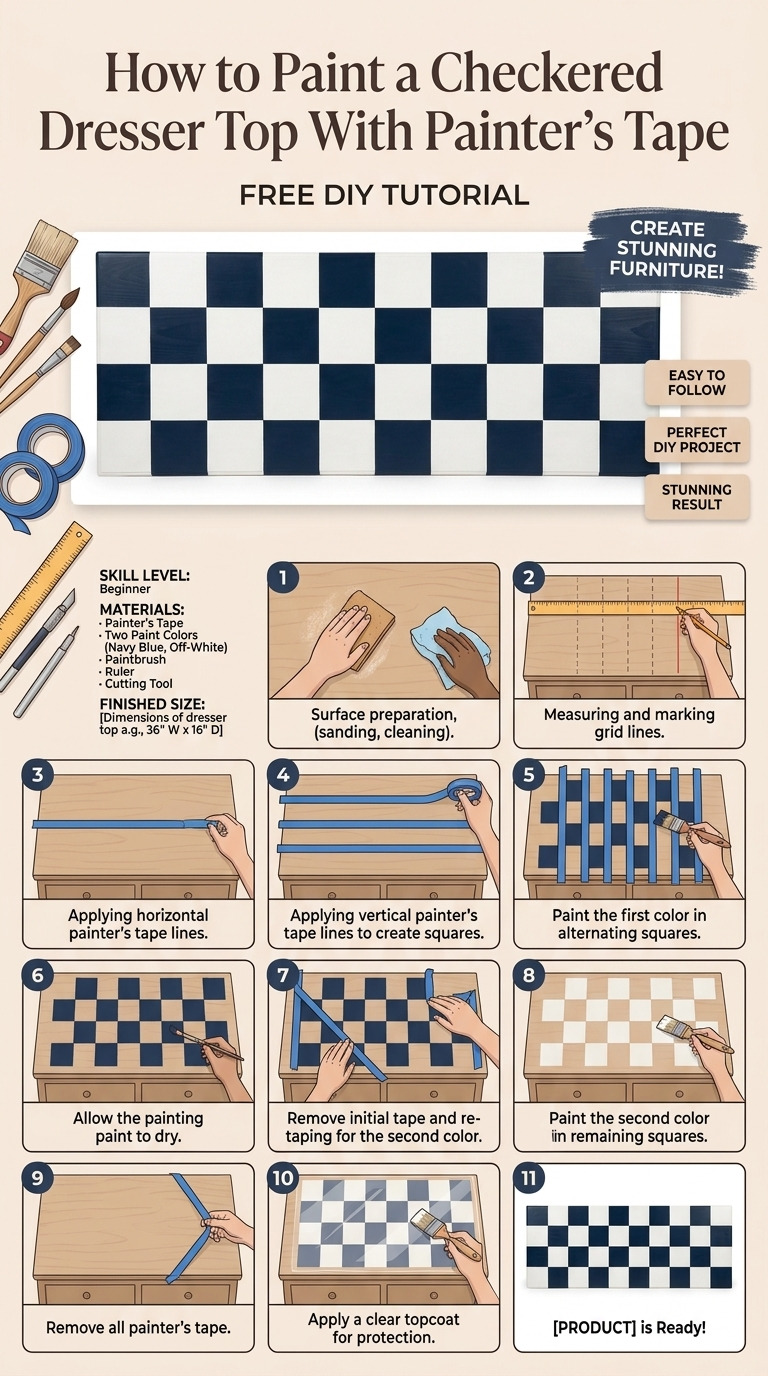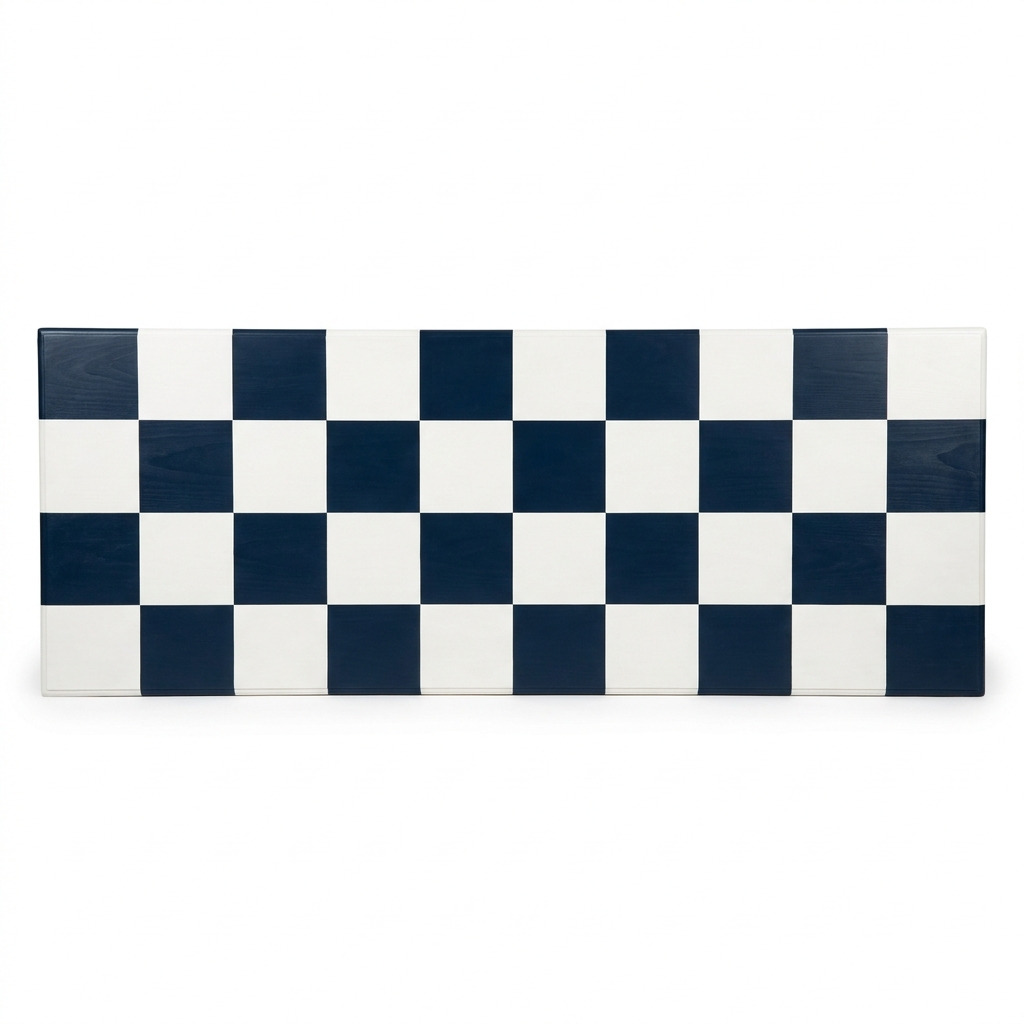
I’ve always loved the whimsical look of a checkered pattern, but I never thought I'd actually try it on furniture until I spotted an old dresser in my garage. It was a little worn, and honestly, it felt a bit sad sitting there, waiting for a makeover. I imagined how vibrant and cheerful my living room would look with a stylish checkered dresser top. I could picture it brightening up the space, attracting compliments, and giving that old piece of furniture a fresh lease on life.
So, I rolled up my sleeves, grabbed some painter's tape, and got to work. The process is easier than you might think, and I’m thrilled to share my journey with you. I promise, this is a fun project – even if you’re new to painting furniture. I'll walk you through every step, so by the end, you'll have a beautifully transformed dresser just like mine!
[Descriptive image caption of the finished project]
What You'll Need
Materials:
- Dresser: One standard wooden dresser (any size is fine, but this project is based on a typical one).
- Painter's tape: 1-inch wide (1 roll). This will help create clean lines for your checkered pattern.
- Paint:
- White satin latex paint: 1 quart. This will be one of your key colors.
- Midnight blue satin latex paint: 1 quart. A nice contrast for those checkered squares.
- Primer: Water-based primer (1 quart). This helps the paint adhere better to the surface.
- Sandpaper: Fine grit (220 grit, 1 sheet). This will prep your dresser for painting.
- Clear varnish: Water-based (1 quart, optional for finishing). This protects your design from scratches.
- Drop cloth: 1, to protect your workspace from paint spills.
- Rags or paper towels: For cleaning up any dust or spills.
Tools:
- Craft knife: For cutting painter's tape cleanly.
- Paintbrush: 2-inch flat brush. Great for corners and smaller areas.
- Paint roller: 4-inch roller and tray. This will make applying paint much easier.
- Ruler: At least 36 inches long, for measuring your squares accurately.
- Pencil: For marking guidelines on the dresser.
- Level or straight edge: To ensure your lines are perfectly straight.
- Safety equipment: Gloves and a mask for safety while sanding and painting.
How to Make It, Step by Step
Step 1: Prepare Your Workspace
First things first, you want to set up a clean, well-ventilated area to work in. Lay your drop cloth down under the dresser to protect your floors from any rogue drips. This will save you from a lot of cleanup later!
Step 2: Sand the Dresser
Lightly sand the top of the dresser to help the paint stick better. You don't have to sand too aggressively—just enough to remove any shine. After rubbing it down, wipe the surface with a rag to get rid of any dust left behind.
Tip: I learned the hard way that if you skip this step, the paint may not adhere well, which can lead to peeling later on.
Step 3: Mark Your Grid
Now the real fun begins! Measure out 6 inches on the length and width of the dresser with your ruler and pencil. Mark these intervals lightly so you can see where each square will go.
Step 4: Create a Reference Grid
Use a straightedge or level to connect your tick marks, creating a grid on your dresser top. Try to keep your lines as straight as possible to ensure your squares come out looking sharp.
Step 5: Tape It Off
Next, grab your painter's tape. Begin taping along the lines you've marked, making sure to press down firmly to avoid any paint sneaking under the tape.
Tip: For the best results, take your time during this step. I rushed it the first time and ended up with jagged edges!
Step 6: Prime the Surface
After taping, it’s time for primer. Using your paint roller, apply a coat of primer over the exposed wood surfaces. This should dry in about an hour. Don’t rush this; let it dry completely.
Step 7: Paint the First Color
Once the primer is dry, it’s time to get some color on there! Start with your chosen base color—let’s use white for this example. Carefully paint half of the squares using your brush for corners and a roller for the larger areas.
Step 8: Allow to Dry
Let the first coat of paint dry for 1-2 hours. This is super important! If you don’t let it dry completely, you risk smudging and ruining your hard work.
Step 9: Add a Second Coat
If needed, apply a second coat of paint to achieve an even color. Let this dry completely as well, which should take about 2-4 hours depending on your environment.
Step 10: Remove the Painter's Tape
Here comes an exciting part! Very carefully peel away the painter's tape. If your tape is pulling at the paint, use a craft knife to gently cut along the edge. This will give you clean, sharp lines.
Step 11: Apply Varnish (Optional)
If you want to protect your beautiful design, you can apply a coat of clear varnish. Follow the manufacturer’s instructions for application. This usually takes about 4-6 hours to dry, so be patient!
Common Mistakes to Avoid
- Rushing the glue. If you pull off the tape too early, you might smudge the paint. Make sure everything is 100% dry.
- Skipping the primer. The primer helps the paint stick better; without it, you might see inconsistencies in your colors.
- Not pressing tape down enough. If the edges aren't well-pressed, you can end up with paint seeping under. Trust me, you don’t want that!
- Ignoring drying times. Trying to rush through the painting or subsequent layers can lead to messy results.
- Neglecting the cleanup. After completing your project, clean your brushes and rollers right away to maximize their lifespan.
Make It Your Own: Variations and Ideas
- Different Colors: Experiment with other paint colors – like pastel or bright tones for a more whimsical look.
- Smaller Squares: Instead of 6-inch squares, try 4-inch ones for a more detailed pattern.
- Unique Patterns: Want to mix it up? Skip squares here and there to create a more abstract design.
- Seasonal Themes: Change your color palette with the seasons for a dresser that updates as often as you do!
Remember, this project is just a jumping-off point. Feel free to put your own spin on this checkered pattern!
Before You Go
Pin this for the next rainy afternoon: Save this tutorial so you can refer to it when you're ready to tackle your own checkered dresser top!
Come back and tell me how it went: I'm here for any questions, so don’t hesitate to ask—no question is too basic! I’d love to hear about your experiences, whether it turns out perfectly or takes a few tries.
Show off what you made: I can’t wait to see your beautiful dresser transformations! Share your creations and inspire others to get crafty too!