I’ve always found that creating something beautiful with my own hands gives me a sense of joy that store-bought items just can’t match. Last winter, I was inspired to create a notebook that would reflect the icy blues of the season. I wanted something that felt fresh and unique, yet simple enough for anyone to achieve.
After some experimenting, I discovered that marbling with shaving cream gives such a mesmerizing effect! The result is a stunning icy blue marbled paper that’s perfect for a notebook, whether you use it for journaling, sketching, or keeping track of your projects. Trust me, this project is manageable for beginners, and I’m here to guide you through every step.
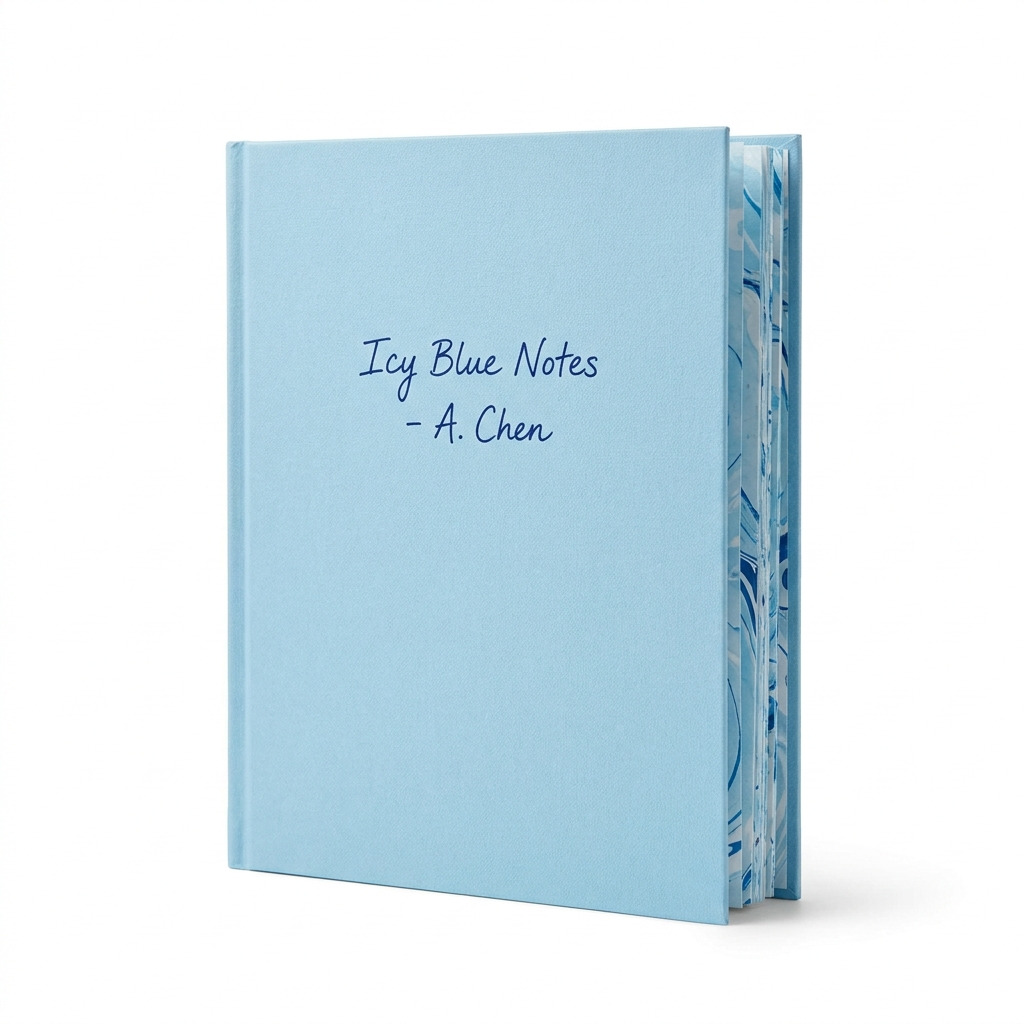
[Descriptive image caption of the finished project]
What You'll Need
Materials:
- Notebook:
- 1 pre-bound blank notebook (8.5" x 11") with a sturdy cover and at least 80 sheets. White or light blue paper works best for contrast.
- Marbling Medium:
- 1 can of shaving cream (13 oz, foam type recommended; unscented is nice if you’re sensitive to smells).
- Inks for Marbling:
- 3 fluid ounces total of acrylic paint or ink in these colors:
- Light blue (like Sky Blue)
- Dark blue (like Navy Blue)
- White (for brightness and contrast)
- Cleaning Supplies:
- Paper towels
- Baby wipes or a damp cloth for cleaning your hands and workspace.
Tools:
- Cutting & Measuring Tools:
- Scissors
- Ruler (12-inch)
- Marbling Tools:
- Craft sticks or toothpicks for swirling the colors.
- A shallow tray (approximately 12×16 inches) where you’ll pour the shaving cream.
- Finishing Tools:
- A paintbrush (1-inch wide for applying the acrylic paint).
- A large spoon or spatula for spreading everything.
- Safety Equipment:
- Gloves (optional, but they can help keep your hands clean).
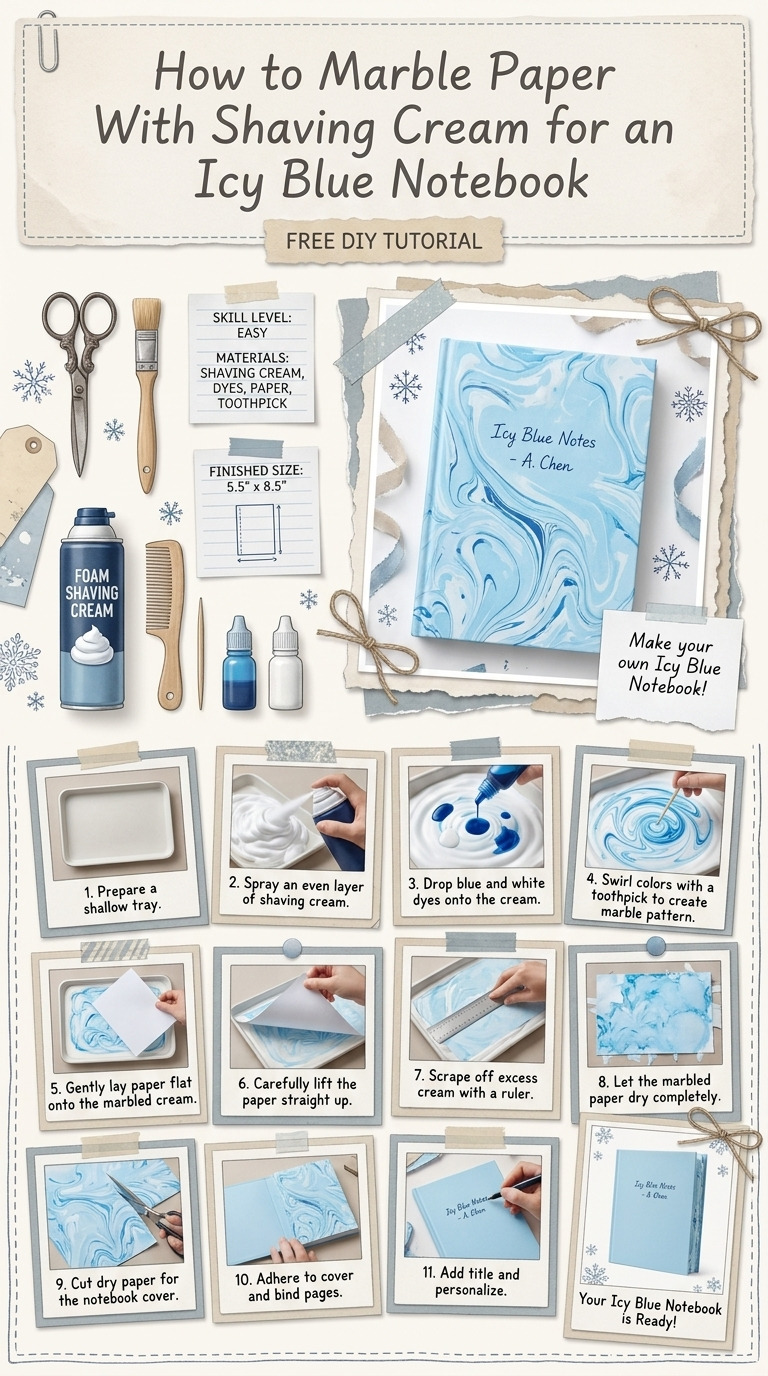
How to Make It, Step by Step
Step 1: Prepare Your Workspace
To kick things off, find a well-ventilated area where you can work comfortably. It’s a good idea to cover your table with a plastic table cover or a drop cloth to catch any mess. Once that's done, gather all your materials so everything is at arm's reach.
Step 2: Prepare the Shaving Cream Base
Grab your can of shaving cream and shake it well! This is super important to get the right texture. Dispense a thick layer—about 1 inch high—into your shallow tray. Use the spatula to spread it evenly across the bottom of the tray. It should cover the whole area without gaps.
Step 3: Add Your Colors
Now comes the fun part! Take your paintbrush and dab small amounts of light blue acrylic paint on top of the shaving cream. It’s great to use little spots rather than big blobs. Follow that with the dark blue and white, leaving some spaces in between each color. This way, when you swirl it, the colors will stay distinct.
Tip: If the colors mix too much, you won’t get those stunning marbled patterns, so try to keep your swirling gentle!
Step 4: Create Your Marble Effect
Next up, it’s time to marble! Grab a craft stick or toothpick and gently swirl the colors through the shaving cream. Move slowly; you don’t want to turn it all into a muddy mess. Just a few swirls should do the trick to create an enjoyable marbled effect.
Step 5: Transfer to Paper
Carefully lay one sheet of paper on top of the marbled shaving cream. Gently press down to help the design stick, but remember not to push too hard or you might lose the pattern. Let it sit there for about 30 seconds.
Step 6: Remove Excess Cream
Lift the paper straight up from the shaving cream, holding it by the edges. Use your spatula or fingers to scrape off any excess cream. A paper towel can help to wipe away the cream along the edges. Doing this gently will keep your design intact!
Step 7: Dry the Paper
Place your freshly marbled paper flat on a surface to dry completely. It needs about 30 minutes to dry, so be patient. I once rushed this part and ended up smudging the design—it was heartbreaking.
Step 8: Repeat for More Sheets
Go back to steps 3 through 7 to create more marbled paper sheets. You’ll want around 10 to 15 sheets for a good-sized notebook. Enjoy this part—it gets easier and more fun with practice!
Step 9: Assemble the Notebook
After all your sheets are dry, stack them neatly and place them inside your pre-bound notebook.
Step 10: Add Final Touches
If you like, take a light blue or dark blue gel pen and create a title or a design on the cover of your notebook to make it feel complete and personalized.
Common Mistakes to Avoid
- Rushing the drying time. If the paper isn’t completely dry, it can smudge when you add it to the notebook. Make sure you give it a full 30 minutes.
- Overmixing the colors. Swirling too much will turn your colors into a muddy mess. Be gentle and slow with your swirls.
- Using too much pressure when lifting the paper. This can flatten your design and ruin the marbling. Just lift it gently!
- Not letting the shaving cream sit long enough. If the paper doesn’t sit for 30 seconds, the design may not adhere properly. Patience is key here!
Make It Your Own: Variations and Ideas
- Different Color Schemes: Try mixing different shades of blue, or introduce a hint of silver or gold for some sparkle.
- Create Seasonal Versions: Think about using autumn colors or pastel shades for spring — the possibilities are endless!
- Mix Paper Sizes: Experiment with smaller or larger sheets to create different sizes of notebooks for various purposes.
- Add More Personalization: Use stickers, washi tape, or stamps to make your notebook even more unique!
Remember, the beauty of this project lies in the marbling process; if yours turns out a little different than mine, that’s perfectly fine. That uniqueness is part of its charm!
Before You Go
Pin this for the next rainy afternoon: Save this post so you can find the step-by-step guide when you’re ready to make your own icy blue marbled notebook.
Come back and tell me how it went: I’d love to hear your questions and stories—no question is too basic, and I welcome tales of ‘happy accidents’ as well!
Show off what you made: When you’re done, I can’t wait to see your finished product!
Happy crafting!