I remember the first time I received a letter sealed with wax. It felt special and exciting, like a little secret left just for me. It sparked a desire to create something equally charming for my own handwritten notes. So, I decided to make my own wax-sealed envelopes! This project allows you to infuse your letters with a touch of elegance, and it’s easier than you might think—perfect for beginners like us. I'm thrilled to share this delightful DIY with you, where we’ll create beautiful envelopes that carry handwritten messages adorned with unique wax seals. Ready to get started? Let’s jump in!
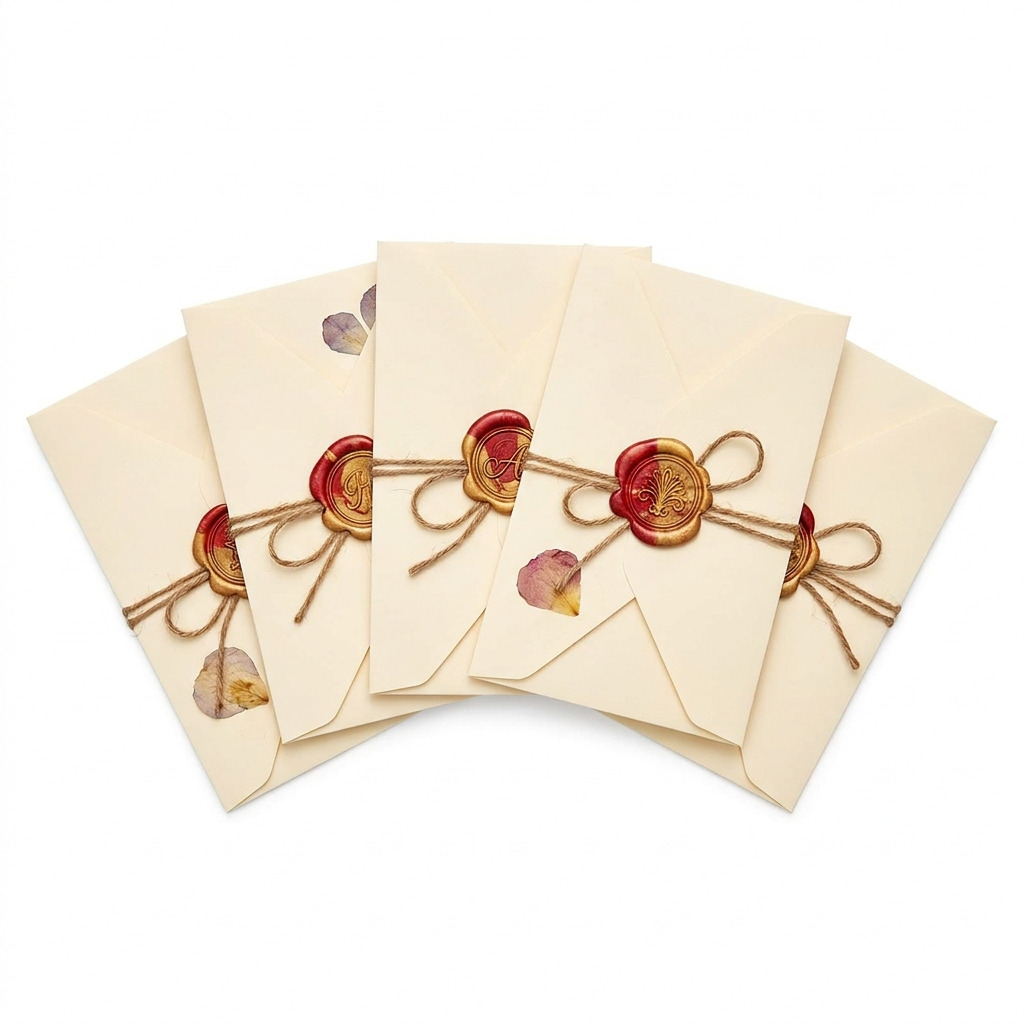
[Descriptive image caption of the finished project]
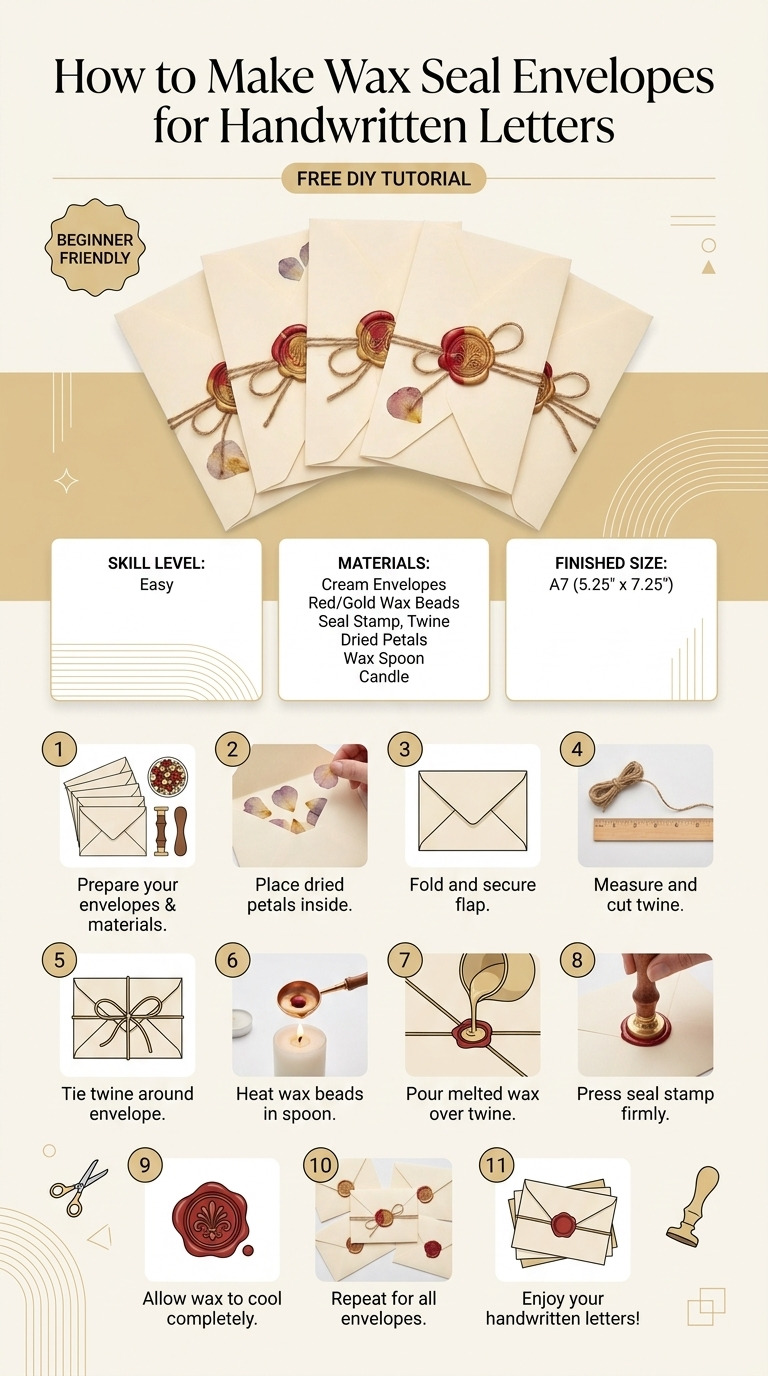
What You'll Need
Materials:
- Envelopes:
- Quantity: 5
- Size: A6 (4.5 x 6.25 inches)
- Color: Cream or any preferred pastel shades. You can also use standard colors like white or kraft if that suits your style.
- Wax beads:
- Quantity: 10-15 beads per seal
- Color: Red, gold, or any preferred colors. Choose colors that resonate with the occasion or your personal flair!
- Wax seal stamp:
- Quantity: 1
- Design: Initial or decorative symbol of choice. This gives a personal touch—think of your initials, a heart, or something seasonal.
- Double-sided tape:
- Quantity: 1 roll
- Size: 1/2 inch wide. This will help with securing twine or embellishments without being messy.
- Optional materials:
- Decorative twine: 2-3 yards. A lovely addition for wrapping the envelopes.
- Embellishments like dried flowers or leaves: These add a lovely, rustic touch.
Tools:
- Hot glue gun: This is fantastic for a quick, secure application.
- Craft knife or scissors: Use whichever you feel comfortable with—both will work well for trimming.
- Ruler: For measuring straight lines if you need.
- Cutting mat: Protects your workspace and keeps everything safe.
- Wax sealing spoon: This helps you melt the wax easily—if you don’t have one, a teaspoon will do just fine.
- Lighter or candle: We’ll use this to melt the wax beads.
- Tweezers (optional): Handy if you want to be extra careful with the stamp.
- Safety equipment: No special safety gear needed, but make sure your workspace is ventilated while melting wax.
How to Make It, Step by Step
Step 1: Set Up Your Workspace
First things first, let’s create a comfy crafting atmosphere. Find a clean, flat surface to work on and cover it with the cutting mat. This will save your table from any wax spills or cuts. Lay out all the materials and tools before you so everything is handy. If you plan to use decorative twine, pre-cut some lengths—about 12 inches each. It makes wrapping easier later!
Step 2: Prepare the Envelopes
Take one envelope out of your pile, open it up fully, and lay it flat. Give it a good look to ensure there are no folds or creases that could interfere with sealing. I’ve opted for cream envelopes, but feel free to pick any pastel shade that inspires you. You can use decorative tape to seal the envelope flaps after placing your letter inside for extra flair later!
Step 3: Melt the Wax Beads
Grab your wax beads and the wax sealing spoon. Using the spoon, scoop up 5-7 beads. This will depend on how big you want your seal. Hold the spoon over the flame of your lighter or candle. It usually takes about 3-5 minutes for the beads to melt. Be sure to keep the spoon steady and don’t let it touch the flame directly!
Step 4: Pour the Melted Wax
Once the beads have melted into a smooth puddle, carefully pour the melted wax onto the envelope flap. You can choose where to place it; typically, the center works best. Don’t worry if it's not perfect—the rich, warm character of handmade is all part of the charm!
Step 5: Stamp the Seals
Immediately after pouring the wax, take your wax seal stamp and press it gently into the melted wax. Make sure it’s centered! Hold the stamp in place for about 5-10 seconds. This allows the wax to set slightly, creating that lovely seal. When you lift the stamp, you should see the design come out beautifully. If some wax spills over, don’t fret—it's all part of the handmade charm!
Step 6: Repeat for Each Envelope
Continue making your seals on the remaining envelopes, adjusting the number of wax beads as needed. You might want larger seals for more dramatic effect or smaller ones for a subtle touch. If you're using different colors or designs, mix and match for fun!
Step 7: Let the Wax Set
Set each envelope aside and let the wax seals cool completely. The magic happens here! It typically takes you about 5 minutes. If you’re feeling impatient, just be warned—rushing this makes it more likely for the seals to break or smudge.
Step 8: Assemble and Finish
If you’re using twine, grab it now! Wrap it around the envelope, just below the wax seal, and tie it in a bow. Use a dot of double-sided tape to hold it in place. If you have dried flowers or leaves to embellish, place them under the twine or directly on the envelope, secured with the tape.
Common Mistakes to Avoid
- Skipping the cooling time. Not letting the wax set properly can lead to fingerprints or smudged designs.
- Overheating the wax. This can cause an uneven surface that looks messy. Keep an eye on the melting process; it should melt smoothly and not bubble.
- Pressing the stamp too hard. This can distort the design. Gentle but firm pressure works best to make a clean seal.
- Using too many wax beads. This can lead to a seal that's too thick and heavy. Start with a smaller amount and increase as needed.
- Forgetting to use protective surfaces. To avoid any sticky situations, always work on a protected area!
Make It Your Own: Variations and Ideas
- Different colors: Explore metallic wax beads for a modern twist, or use colored envelopes for a funky look.
- Customize your stamp: Use a seasonal design for holidays, or a monogram for a personal touch—it's fun to switch it up!
- Add fragrance: Sprinkle a tiny bit of essential oil in the melted wax for lightly scented envelopes.
- Create themed sets: Craft envelopes to match birthday parties or holidays—imagine Valentine’s Day hearts or festive reds and greens!
Now that you have all the tools and inspiration, it’s time to unleash your creativity! Each envelope tells a story, and I can't wait to see what you'll create!
Before You Go
Pin this for the next rainy afternoon: Be sure to save this so you can find it when you’re ready to make these elegant wax seal envelopes. The detailed steps and timings are all right here for you to revisit!
Come back and tell me how it went: Don’t hesitate to reach out with any questions or if something didn’t go as planned. Every experience is a step toward mastering this charming art!
Show off what you made: I would love to hear about your wax-sealed creations! Feel free to share your masterpieces and celebrate your crafting journey. Happy crafting!