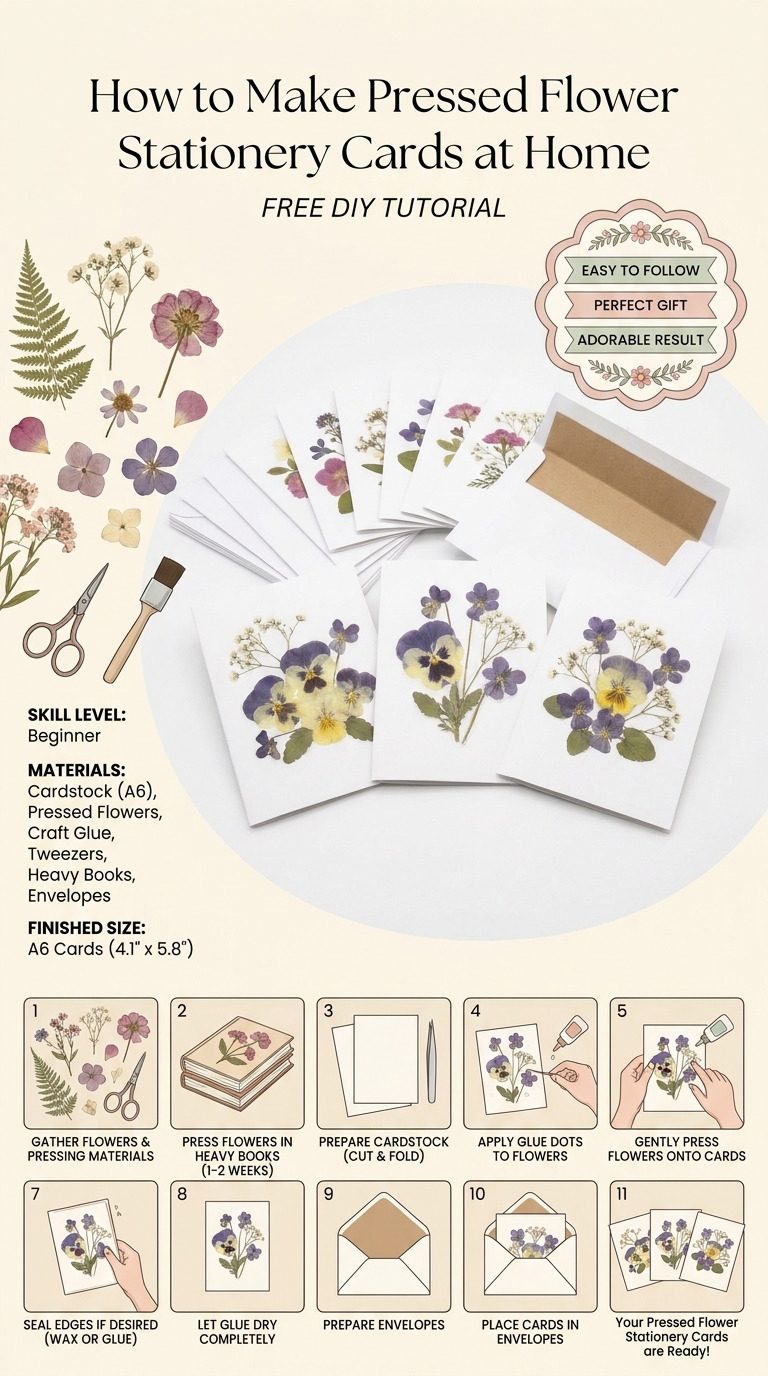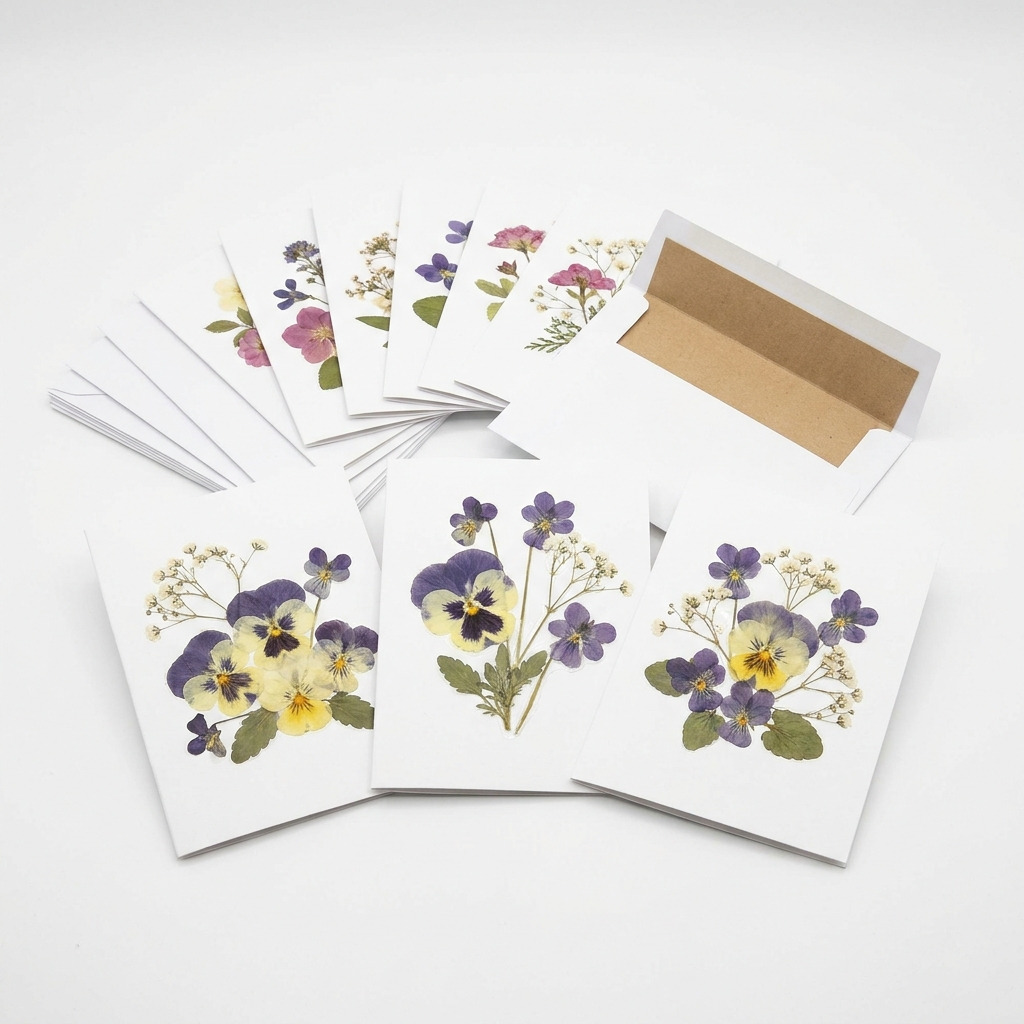
Last year, I found myself overflowing with dried flowers from my garden and thought, "What can I do with all these beautiful blossoms?" I wanted something special that I could gift to friends or use for my own handwritten notes. That’s when the idea of pressed flower stationery cards came to me! They add a unique touch to any message or invitation, and they’re a lovely way to share nature’s beauty with others. Plus, making them is a simple and satisfying process.
These cards are truly versatile — I love using them for thank-you notes, birthday invitations, and even as little surprises in gifts. They give me joy every time I send one out or tuck one away for my own use. And the best part? Creating these pressed flower cards is an easy project, and I’m here to guide you through each step.
[Descriptive image caption of the finished project]
What You'll Need
Materials:
- Cardstock (white or cream): 10 sheets, 8.5" x 11" (You'll use these as the base for your cards. Choose a light color to let the flowers shine.)
- Dried flowers: assorted small flowers like pansies, violets, or baby’s breath (about 20-30 flowers total) (Make sure they are small enough to fit nicely on your cards without overwhelming them.)
- Floral adhesive: 1 small tube (This works well because it holds flowers securely without soaking through.)
- Clear craft sealant (optional): 1 can, glossy finish (This gives a glossy look and protects your flowers; it’s not essential but adds a nice touch.)
- Envelopes: 10 matching envelopes, 5" x 7" (Find envelopes that snugly fit your cards for a polished presentation.)
- Craft paper (optional for backing): 1 sheet, 8.5" x 11" (Using this can give your cards a more professional finish and extra sturdiness.)
Tools:
- Iron: standard household iron (This is used to help flatten fresh flowers if you choose to use them instead of dried.)
- Parchment paper: 1 roll, for pressing flowers (This protects your flowers and your iron during the pressing process.)
- Scissors: medium-sized (For cutting your cardstock and possibly your dried flowers if needed.)
- Paintbrush: 1, for applying adhesive (A clean paintbrush helps to spread the adhesive more evenly.)
- Ruler: 1, to measure cardstock (This ensures you cut your cardstock accurately.)
- Cutting mat: optional, for cutting (This can protect your work surface when you’re cutting.)
- Heavy books: (like a textbook) to press flowers (Choose some that are heavy enough to compress the flowers completely.)
- Gloves: for handling flowers (optional) (Wearing gloves can protect your hands, especially if you have allergies.)
- Eye protection: if using any spray sealant (Safety first! Protect your eyes while working with any sprays.)
How to Make It, Step by Step
Step 1: Press Flowers
If you're starting with fresh flowers, cut the stems down to about 1-2 inches. Choose a variety of colors and shapes for a beautiful mix. Place them between two pieces of parchment paper, and put them inside a heavy book. You’ll need to leave them for about 1-2 weeks until they are fully dried and pressed.
Tip: If you're feeling impatient like I sometimes do, just remember: rushing the pressing leads to limp flowers that don't hold their shape!
Step 2: Cut Cardstock
Once the flowers are all dry, grab your cardstock and scissors. Use a ruler to measure and mark each sheet in half to create ten 5" x 7" cards. Carefully cut along your markings. This is what your cards will be made from!
Tip: Make sure your cuts are straight—using a cutting mat can help prevent damaging your workspace.
Step 3: Arrange Flowers
Once your flowers are all pressed and ready, lay them out on each card to find a pleasing arrangement. Mix different colors and flower shapes to add visual interest. Don’t overcrowd the card; you’ll want some room for writing your notes.
Tip: Before you glue anything down, take a photo of your arrangements. If you like a design, you’ll easily remember it!
Step 4: Adhere Flowers
Time to secure those flowers! Using your paintbrush, apply a thin layer of floral adhesive to the back of each flower. Press each flower onto the card where you’ve arranged them. I like to press firmly but gently to avoid crushing them too much.
Tip: If anything spills out, don’t panic! Just wipe it away quickly with a damp cloth before it dries.
Step 5: Seal the Flowers (optional)
Once you’re happy with the arrangement, allow the adhesive to dry for about 30 minutes. If you decide to use a clear craft sealant, do this outside or in a well-ventilated area. Hold the can about 6-12 inches away and spray lightly over the flowers. Let this dry for at least an hour.
Warning: Don’t skip this step if you want your cards to last longer—moisture can ruin the pressed flowers!
Step 6: Embellishment
For an extra touch, you can cut a piece of craft paper to 4.5" x 6.5" for backing. Glue it to the inside of the card for a finished look. Not only does it sturdify the card, but also makes it look really polished!
Assembly & Finishing
At this stage, ensure that your flowers are securely attached. If you added backing paper, glue or tape it into place. Now, you’re ready! Write personal notes on the blank surfaces of your cards and slip them into your matching envelopes.
Common Mistakes to Avoid
- Overlooking flower drying time. If you use fresh flowers without allowing enough time to dry and press, they might wilt—ensure you give them the full 1-2 weeks.
- Using too much adhesive. Excess glue can ooze out, create a mess, or warp the flowers. A little goes a long way!
- Rushing the sealant drying time. If you skip letting the sealant dry properly, it can smudge everything. Trust me, it's worth the wait!
- Crowding the card with flowers. Too many flowers can make the card feel bulky and less elegant. Choose a few key pieces to highlight.
- Forgetting to clean your workspace. Crafting can get messy! A clean surface helps you stay focused and makes the project more enjoyable.
Make It Your Own: Variations and Ideas
- Color Pop: Experiment with bright and bold flowers for a lively card or stick to monochrome for a chic twist.
- Seasonal Hues: Customize the designs based on seasons: think autumn leaves in fall or pastel flowers in spring.
- Size Adjustments: You might want to create even smaller cards (4" x 6") for quick notes or gifts.
- Personalized Messages: Consider adding hand-lettered quotes or wording on the cover for a personal touch before the flowers.
- Gift Sets: Package several cards together as a gift for friends or family—they’re lovely for anyone who enjoys writing notes.
I can’t wait to see what you create! These pressed flower stationery cards are delightful to make and even more rewarding to share.
Before You Go
Pin this for the next rainy afternoon: Save this project to find all the details again when you're ready to make beautiful pressed flower cards. You’ll appreciate having the steps at your fingertips when gathering your materials!
Come back and tell me how it went: I love hearing about your projects, no matter what stage you’re in! If anything didn’t go as planned, or if you have any questions, don’t hesitate to drop a comment.
Show off what you made: I’d love to see your finished cards, so feel free to share your creations! Each one is special in its own way, just like you. Happy crafting!