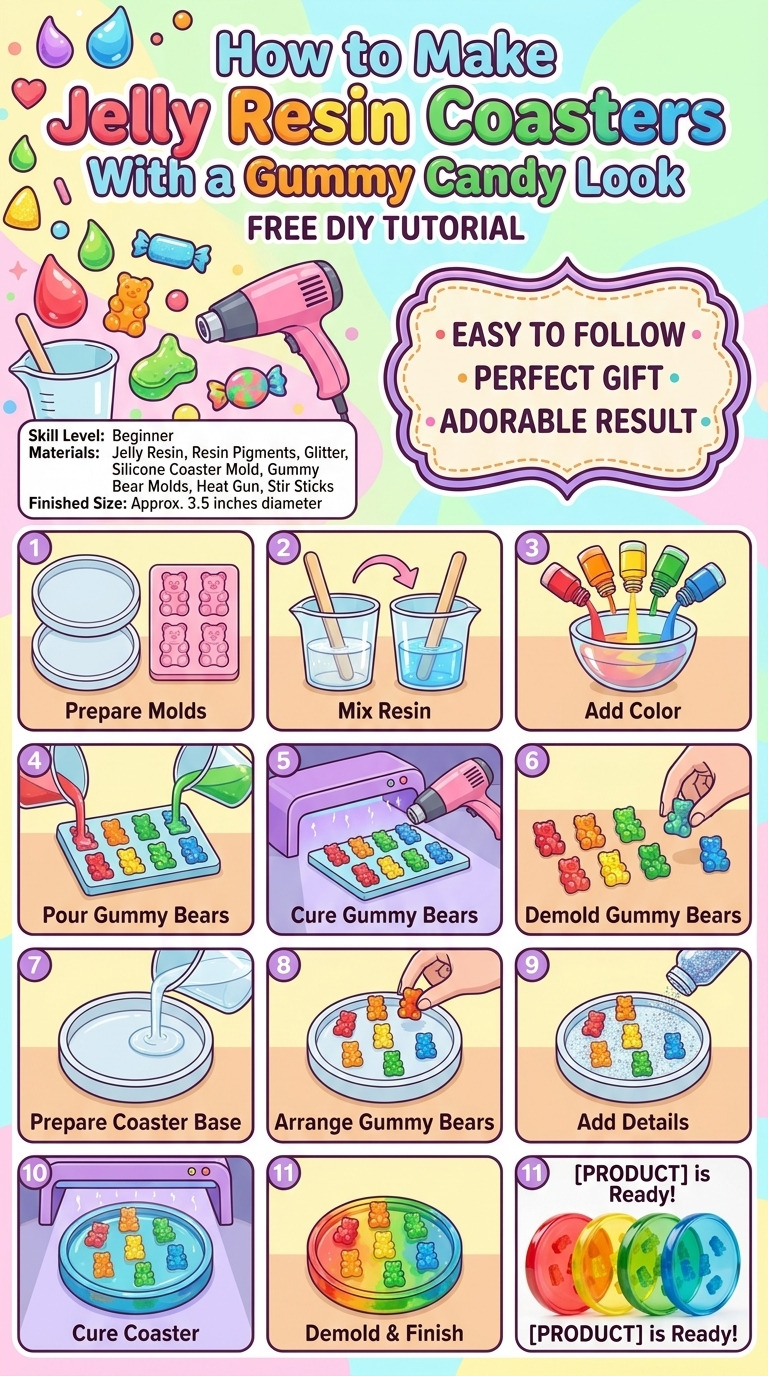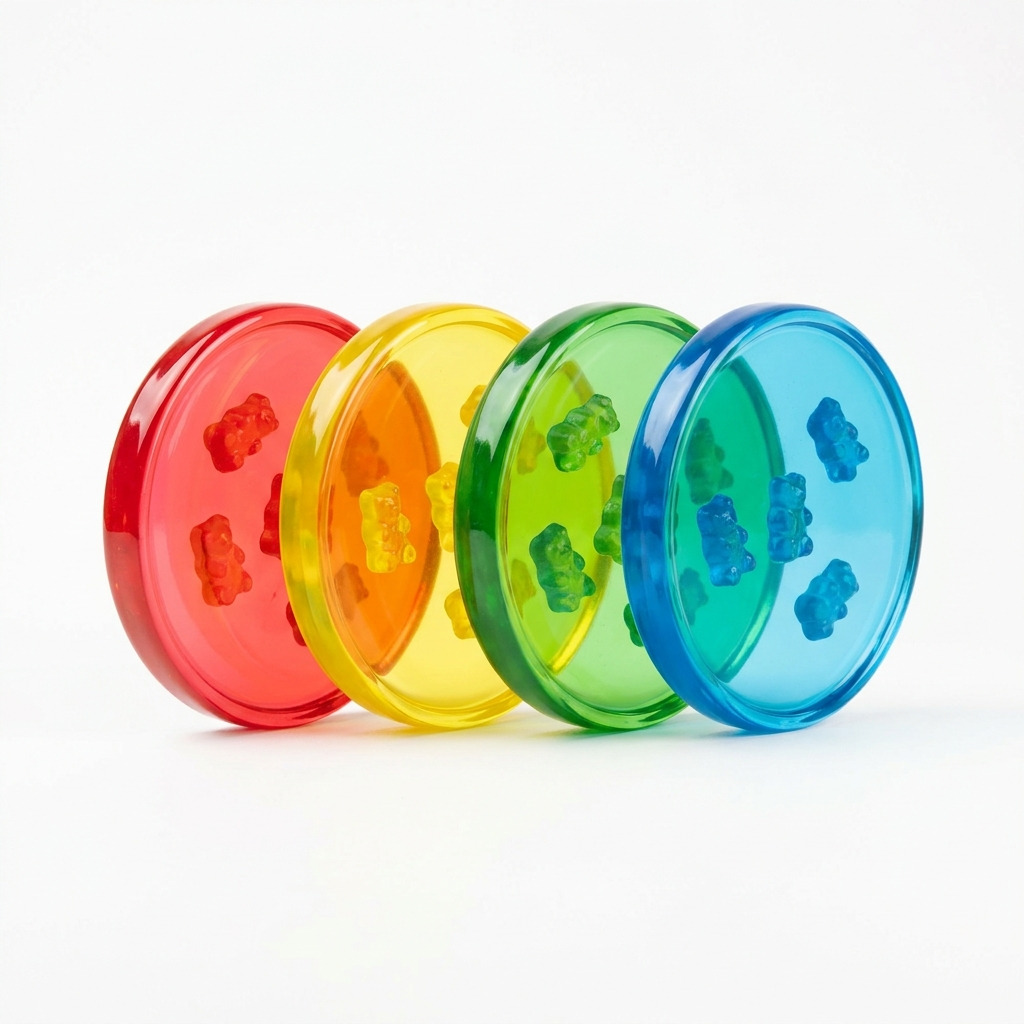
I’ve always had a soft spot for colorful, chewy gummy candies. Last summer, while reminiscing about childhood sweets, I thought, “Why not bring that playful vibe into my home?” This inspired me to create some jelly resin coasters that mimic the glossy, vibrant look of gummy candies. They instantly brighten up my coffee table and make for a fun conversation piece whenever friends come over. Once you see how easy these are to make, you’ll want to try it yourself, too. I’m here to walk you through every single step, simple enough for anyone to follow.
Let’s dive right in!
!Finished jelly resin coasters with a gummy candy look
What You'll Need
Materials:
- Epoxy resin kit: 1 pound (This includes both resin and hardener; make sure to choose a clear type.)
- Silicone coaster molds: 4-inch round (You can use 2-4 molds depending on how many coasters you want to make.)
- Color pigments: Red, yellow, green, and blue (1 oz each; these are specifically made for resin use.)
- Glitter: Fine, iridescent glitter (1 oz; this is optional but adds a lovely sparkle.)
- Gummy candies: Assorted shapes (Completely optional and fun for decoration within the coasters.)
- Rubbing alcohol: For bubbles and cleaning (1 small bottle; essential for cleaning your workspace.)
Tools:
- Mixing cups: 2-4 clear plastic cups (8 oz; use these to mix your resin.)
- Stirring sticks: Wooden or silicone (3-5; you’ll need these for mixing the resin.)
- Heat gun or torch: For reducing bubbles in resin; a simple handheld torch works great.
- Protective gloves: Always recommended during resin handling to keep your skin safe.
- Safety goggles: Protect your eyes while you work, especially if using a heat gun.
- Scale: To measure resin and hardener accurately, particularly important for getting the right mixture.
- Heat-resistant surface: For curing your resin safely.
How to Make It, Step by Step
Step 1: Prepare the Epoxy
Start by putting on your protective gloves and goggles. In a clean mixing cup, measure equal parts of the epoxy resin and the hardener. If you're using a larger batch of 1 pound, pour out 8 oz of resin and 8 oz of hardener. Mix well! You need to stir it for about 3-5 minutes until it’s perfectly combined. Make sure to scrape the sides and the bottom of the cup as you go.
Step 2: Add Color
Once your resin is mixed, divide it into separate cups. You should allocate about 3 oz for each color you plan to use. If you’d like a clear top layer, reserve some resin for that too. Add about 5-10 drops of each color pigment into their respective cups. As you stir, watch the colors blend; you want them to be vibrant and evenly mixed.
Step 3: Pouring the First Layer
Grab your silicone mold and pour in the first color of resin, filling it about ⅓ (or 1 inch high). It’s okay if it seems a bit wobbly at this stage. Now, let it sit for 20-30 minutes until it starts to set but is still somewhat tacky to the touch. You want it to create a good base without being fully cured.
Tip: If at any point you think your mixture looks a little too thick, don’t worry; this just means you're letting it set a little longer.
Step 4: Adding the Next Color
When the first layer is tacky, you’ll pour in the second color right on top. Try to blend the edges a little as you pour to create a pretty marbled effect. This should fill the mold another ⅓ of the way. Let it sit for a few more minutes just to stabilize before the next step.
Step 5: Gummy Candy Addition (Optional)
If you’re like me and want to add a fun surprise inside, now’s the time! Gently press a few gummy candies into the second layer of resin. They’ll float a bit as the resin sets, giving that delightful candy look.
Step 6: The Final Layer
Pour the remaining third of your mold with either a different color or with clear resin. This will give you that glossy top layer. Now, here is the trick: gently run a heat gun or a torch over the surface to pop any bubbles that may have formed. It’s totally normal to see a few; just be careful not to overheat anywhere.
Step 7: Curing Your Coasters
Allow your coasters to cure for at least 24 hours at room temperature. Check the specific instructions on your resin packaging, as some types may vary slightly in curing time.
Step 8: Demolding the Coasters
After 24 hours, flex the silicone mold gently to remove your coaster. It should pop out easily. However, the resin is not fully cured yet; let it sit for another 5-7 days to reach full hardness.
Common Mistakes to Avoid
- Rushing the glue. If you jump the gun and try to add layers too soon, your colors will blend in a way you didn’t intend. Wait until the previous layer is tacky!
- Using too much heat. Overheating with the heat gun can cause your resin to warp or develop unsightly bubbles. Keep the heat source moving and at a distance.
- Not measuring accurately. With resin, it's super important to measure the resin and hardener correctly. If you get this wrong, it won't cure properly. Use a scale!
- Skipping the cleaning step. Always wipe the molds with rubbing alcohol before you start. Any dust or residue can mess with the finish.
- Ignoring the curing times. This is huge! If you try to demold too early, you risk ruining the whole coaster. Set a timer to remind you.
Make It Your Own: Variations and Ideas
- Add more colors! Try creating a rainbow effect for your coasters, layering each segment with different hues.
- Use seasonal colors. How about making orange and black ones for Halloween? Or maybe holiday-themed red and green?
- Different shaped molds would add extra charm! Think hearts or stars for a unique twist.
- Try natural additives. Dried flowers or herbs can create a lovely botanical look if you want more than just colors.
- Experiment with textures. Using coarse glitter or rolling the edges in salt can create a fun, tactile element.
Don’t be afraid to take this project and run with it! There are so many possibilities.
Before You Go
Pin this for the next rainy afternoon: Save this project so you can come back to it when you’re ready to brighten your home with these fun coasters! You’ll want to remember the steps for mixing and the timings just right.
Come back and tell me how it went: I would love to hear any questions you have or stories about your own coaster-making adventures. No question is too simple, and even if things didn't go exactly as planned, I want to know!
Show off what you made: Feel free to share your gorgeous coasters once they're done. I can't wait to see how your own gummy candy creations turn out!