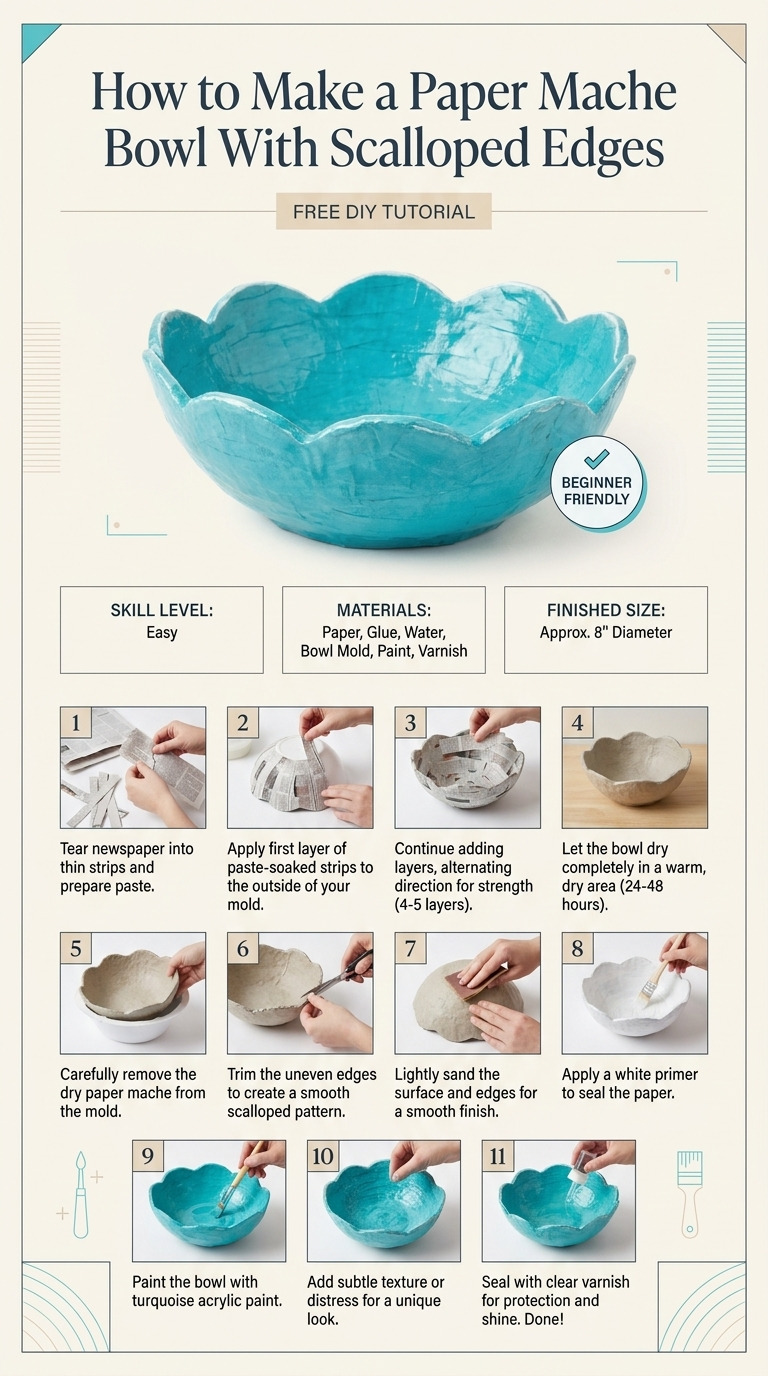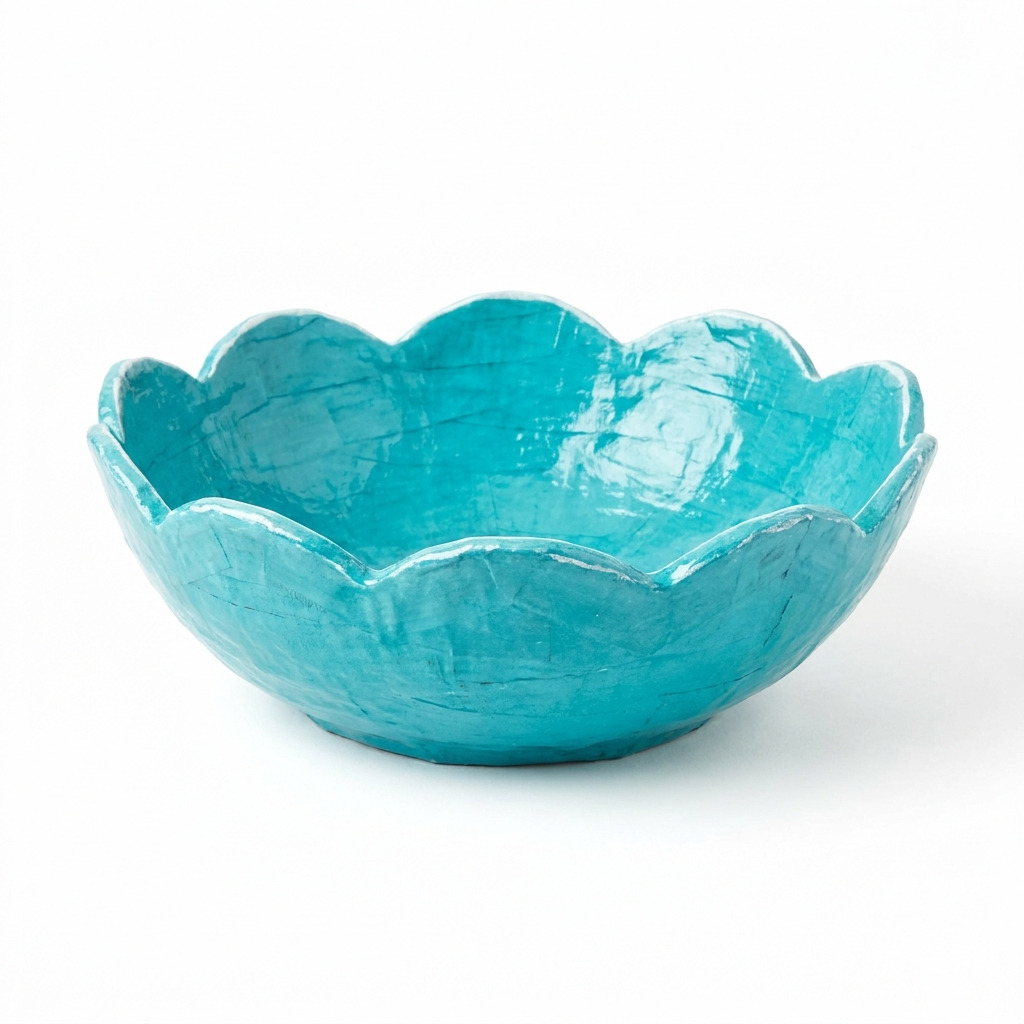
Sometimes, I find myself looking at my decor and thinking something is missing. Last winter, I got the idea to make a paper mache bowl with scalloped edges. I wanted something not only functional but also charming — a lovely piece to hold my keys, catch-all for my little trinkets, or just a unique decoration in my home. Scallops, with their gentle curves, add a sweet touch that makes the bowl feel playful and inviting.
This project is super easy, and I promise you can do it even if you've never tackled any crafts before. I’ll walk you through every step so you can create your lovely bowl. Let’s get started!
[Descriptive image caption of the finished project]
What You'll Need
Materials:
- Newspaper: 1/2 of a standard-sized newspaper – this will become your paper strips.
- Flour: 1 cup – for the paper mache paste.
- Water: 1 cup – also for the paste.
- Balloon (round): 1 large balloon (about 12 inches in diameter) – this will form the base shape.
- Craft paint: Acrylic paint in colors of your choice (like turquoise and white) – used for decorating your bowl.
- Clear acrylic sealer: Spray sealant for finishing – makes your bowl durable and glossy.
- Scissors: A good pair will help you cut your newspaper smoothly.
- Masking tape: 1 roll – handy for securing edges if you need extra support.
- Embroidery floss or yarn: Optional for embellishments to dress up your bowl.
- Decorative paper or washi tape: Optional for extra flair and decoration.
Tools:
- Bowl: For mixing the paste – any bowl will do!
- Paintbrush: 1 medium size (about 1 inch wide) – for applying both the paint and paste.
- Plastic tablecloth or old newspaper: To protect your workspace.
- Cling film or plastic wrap: For covering the balloon to prevent sticking – this makes everything easier.
- Ruler: For measuring newspaper strips and maintaining consistency.
- Cutting mat: This will help keep things safe while you cut your newspaper.
- Safety gloves: Optional if you want to keep your hands clean while handling the paste.
How to Make It, Step by Step
Step 1: Make the Paper Mache Paste
- Gather your bowl and mix 1 cup of flour and 1 cup of water until smooth.
- The paste should have a consistency similar to pancake batter. If it’s too thick, add a bit more water; if it’s too runny, just mix in a bit more flour.
Step 2: Workspace Setup
- Lay down a plastic tablecloth or old newspaper on your working surface to catch any drips of glue or paint. This keeps things tidy (and your family will thank you!).
Step 3: Prepare the Balloon Base
- Inflate your balloon to about 12 inches in diameter. Tie it securely and cover it lightly with cling film to stop the paper mache from sticking.
- Place the balloon in a bowl or cup to give it stability while you’re working. This will make it easier for you to apply the strips.
Step 4: Cut Newspaper Strips
- Use your scissors to cut strips of newspaper that measure about 1 inch wide by 6 inches long. I usually find about 20 strips is good for the bowl, but feel free to cut a few extra just in case.
Step 5: Apply the Paper Mache Strips
- Dip one strip of newspaper into the paste, making sure it’s fully saturated but not dripping. You can use your fingers to wipe off any excess paste.
- Start from the bottom of the balloon and apply the first strip straight down. Smooth it down with your fingers to remove any air bubbles. This part is key – you want it to adhere well.
- Continue adding your strips over the entire balloon until it’s fully covered. You'll need about 10 to 15 strips for a good base layer.
Step 6: Create Scalloped Edges
- Once the base layer is dry (it usually takes about 24 hours), you can carefully cut small semicircles along the edge of the balloon to create your scallops. Each semicircle should be about 1-2 inches wide.
- After creating the scallops, reinforce those edges by adding another layer of strips along the top, making sure to blend them into the design.
Step 7: Let it Dry
- Allow the bowl to dry thoroughly for another 24 hours. This step is crucial because if you skip it, your bowl might not hold its shape later.
- Once completely dry, gently pop the balloon and remove it.
Step 8: Trim and Shape the Edges
- Use your scissors to trim the scalloped edges, making them even and more defined. The edges should feel smooth enough that you would run a bare hand along it.
Step 9: Painting the Bowl
- Now it’s time to bring your bowl to life with color! Use your paintbrush to apply one or two coats of your chosen acrylic paint. Wait about an hour for each coat to dry before adding another.
- If you want, you can also use decorative paper or washi tape along the edges for that little extra charm.
Step 10: Spraying for Protection
- Once your paint is completely dry, take your clear acrylic sealer and spray the bowl. This will protect your beautiful work and give it a nice shine.
- Let it cure for about 30 minutes before handling it again. Trust me, skipping this step will lead to a less durable bowl!
Common Mistakes to Avoid
- Rushing the glue. Don’t be tempted to skip drying time between layers. This can cause bubbling and a weak structure.
- Ignoring the cling film. If you don’t cover the balloon, it might be stuck to your bowl, and that’s a hassle.
- Not reinforcing scallops. Make sure to layer paper along the scallops; otherwise, they might become flimsy.
- Applying too much paste at once. If the strips are too wet, they might slide down. Use just enough to cover, not saturate.
Make It Your Own: Variations and Ideas
- Color Customization: Explore different color combinations for your bowl's paint or even use patterns like stripes or polka dots.
- Different Shapes: Instead of a round balloon, try a heart-shaped balloon for a unique bowl shape.
- Embellishments: Use beads or shells along the scalloped edge for some extra flair.
- Size Scaling: Scale the design down for smaller bowls that can fit in tighter spaces like a bathroom or office.
- Seasonal Themes: Make bowls that reflect the seasons by using autumn colors like oranges and browns, or festive colors for holidays.
That’s the beauty of crafting – you can really make it your own! I can't wait to see where your creativity takes you.
Before You Go
Pin this for the next rainy afternoon: Save this tutorial so you can come back to it when you're ready to create your own paper mache bowl with scalloped edges. I trust that you'll have a great time making it!
Come back and tell me how it went: I’m excited to hear your experiences. No question is too basic, and I would love to hear about any triumphs or hiccups you faced along the way!
Show off what you made: When your beautiful bowl is finished, feel free to let me know how it turned out. Your hard work deserves to be celebrated! Happy crafting!