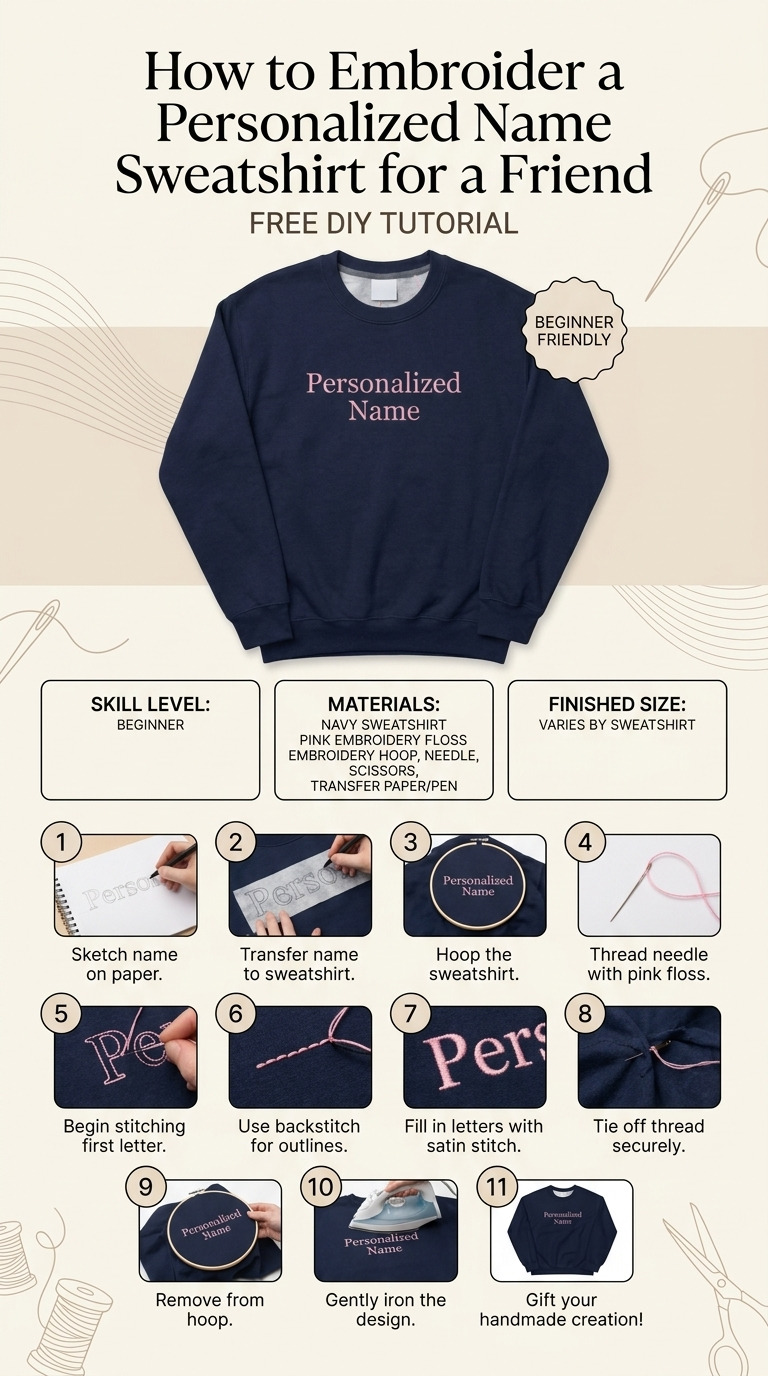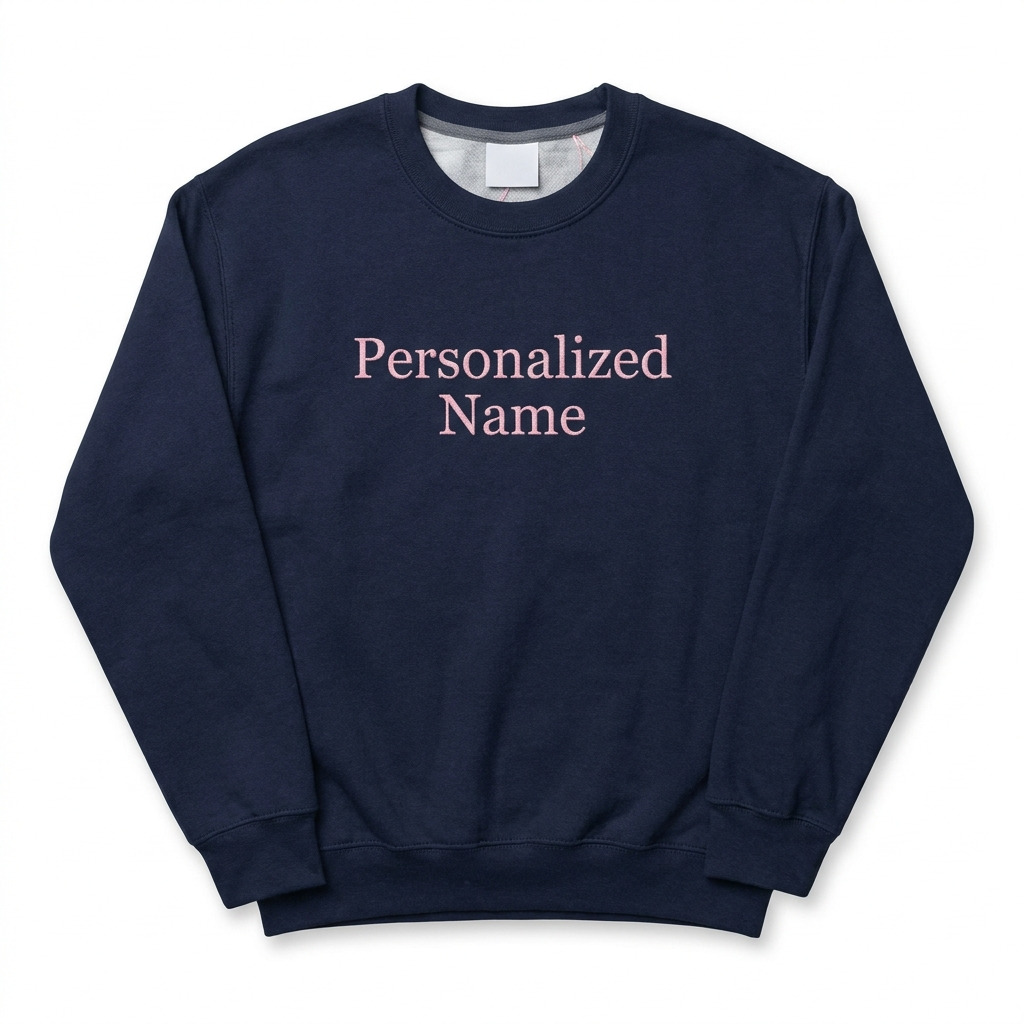
I have always loved giving thoughtful gifts that show I really care. A few winters ago, I wanted to make something special for my friend who's always there for me. She loves cozy clothes, so I decided to make her a personalized name sweatshirt. It was a beautifully simple way to add a personal touch to something warm and comfy.
I vividly remember the smile on her face when she opened it; she still wears it regularly and tells everyone I made it for her! This project is quick enough to sew up in one afternoon and gives you plenty of opportunities to express your own creativity. Don’t worry if you’re new to embroidery; I’ll walk you through every step so you can create a unique treasure for someone special.
[Descriptive image caption of the finished project]
What You'll Need
Here's what you'll need for this cozy, personalized sweatshirt project!
Materials:
- Sweatshirt: 1 standard-sized crewneck sweatshirt (choose S-XL) made of cotton or a cotton-blend in a color of your choice (like light gray or navy blue).
- Embroidery Floss: 3 skeins of embroidery floss (the colors are all yours to pick, but I suggest light pink, white, and dark blue for a lovely contrast).
- Water-Soluble Fabric Marker: 1 (this is key for marking where your name will go).
- Embroidery Needle: 1 medium-sized needle (size 7 or 8 works well).
- Embroidery Hoop: 1 medium-sized (6-8 inches); this keeps your fabric tight while you stitch.
- Scissors: A pair of fabric scissors for trimming threads.
- Fabric Stabilizer: 1 piece of tear-away stabilizer (about 12 x 12 inches) to support the fabric while you stitch.
- Iron-on Interfacing: Optional but recommended for extra stability; cut it to match your embroidery area.
- Embroidery Pattern: You can print out a name design or create your own on the computer.
Tools:
- Workspace Setup: A flat, clean area to arrange your materials; a cutting mat or a fabric-covered table works perfectly.
- Protective Surface: An old cloth or newspaper to protect your table from any fabric markers.
- Sewing Machine: Optional, for tidying up any edges if you wish.
- Iron: For pressing the fabric both before and after you embroider.
- Safety Equipment: No special gear is needed, just take care when handling scissors and needles!
How to Make It, Step by Step
Step 1: Prepare Your Workspace
Lay all your materials out on a clean, flat surface where you can work comfortably. Good lighting helps a lot here, so I usually do this during the day.
Step 2: Iron the Sweatshirt
Take a moment to iron the sweatshirt to get rid of any wrinkles. This step is crucial because it gives you a smooth surface, making embroidery much easier. You want to start with a flat canvas!
Step 3: Choose Your Name Design
Decide what name to embroider. I suggest using a font that will stand out and print it out to your preferred size, aiming for about 6 inches wide. This way, it'll be easy to see and fun to stitch.
Step 4: Mark the Sweatshirt
Using your water-soluble fabric marker, lightly draw where you would like the name to go on the sweatshirt. I usually center it about 3 inches below the neckline—this gives it a nice balance.
Step 5: Cut the Stabilizer
Cut the tear-away stabilizer to fit behind the area you’ve marked for the name. This will help keep the fabric from puckering while you stitch.
Step 6: Attach the Stabilizer
Place the stabilizer behind the marked area on the sweatshirt. If you're using iron-on interfacing for stability, now's the time to apply it according to the instructions on the package.
Step 7: Hoop the Fabric
Place the marked part of the sweatshirt into the embroidery hoop. Make sure it’s taut but not stretched—this makes a big difference in how the final stitches will look.
Step 8: Get Your Needle Ready
Cut about 18 inches of embroidery floss, using your preferred colors. You can separate the floss into strands; two strands make a bolder line, while one gives a delicate look. Thread your needle and tie a knot at the end; it’s that easy!
Step 9: Start Embroidering
Begin at the start of the name. Use a backstitch technique to outline:
- Insert the needle from the back to the front, about 1/4 inch from your marked line.
- Move to the next marking along the line, push the needle down, then bring it back up about 1/4 inch ahead.
- Keep going until the entire name is stitched, using nice, even tension on the thread.
Tip: I once tried to rush this part, and the stitches ended up uneven. Taking your time will pay off here!
Step 10: Add Extra Flair (Optional)
For a little extra design fun, consider adding small embellishments like stars or hearts around the name. This can personalize it even more!
Step 11: Finish Embroidery
Once you have completed the name, secure the thread at the back with a small knot and trim off any excess. Gently remove the fabric from the hoop and tear away the stabilizer.
Step 12: Final Touches
Inspect the sweatshirt for any loose threads and snip them if needed. Use an iron to carefully press the embroidered area—avoid direct heat on the stitches to prevent damage.
Common Mistakes to Avoid
- Rushing the glue. If you’re using interfacing or stabilizer, skipping dry times can result in slack stitches.
- Embroidery hoop too loose. If the fabric isn’t taut enough in the hoop, your stitches will look uneven, so check it often.
- Too tight stitches. Pulling the thread too tight can cause puckering, so keep an eye on the movement of your fabric as you stitch!
- Marker lines left on the fabric. If any lines from the fabric marker show after stitching, wipe them away gently with a damp cloth to ensure a clean look.
Make It Your Own: Variations and Ideas
- Different Colors: Change up the colors of the sweatshirt and embroidery floss to match your friend's favorite hues.
- Font Styles: Experiment with various font styles for the name—maybe a cursive or block print?
- Size Choices: Smaller designs suit children's sweatshirts perfectly if they are a gift for a younger friend or relative.
- Adding Quotes: Instead of just a name, consider embroidering a favorite quote or phrase for an extra personal touch!
- Seasonal Themes: You can adapt the embroidery designs to fit holiday themes, with festive colors and embellishments.
Now it’s your turn! Enjoy the process, and don’t stress over perfection. Every stitch brings your own unique flair to this cozy gift!
Before You Go
Pin this for the next rainy afternoon: If you found this project helpful, please save it to your Pinterest board so you can easily refer back to the instructions when you're ready to begin your sweatshirts.
Come back and tell me how it went: I can’t wait to hear about your personalizations and any questions you may have, no matter how basic!
Show off what you made: I would love to see your finished pieces and how you made this project uniquely yours. Happy stitching!