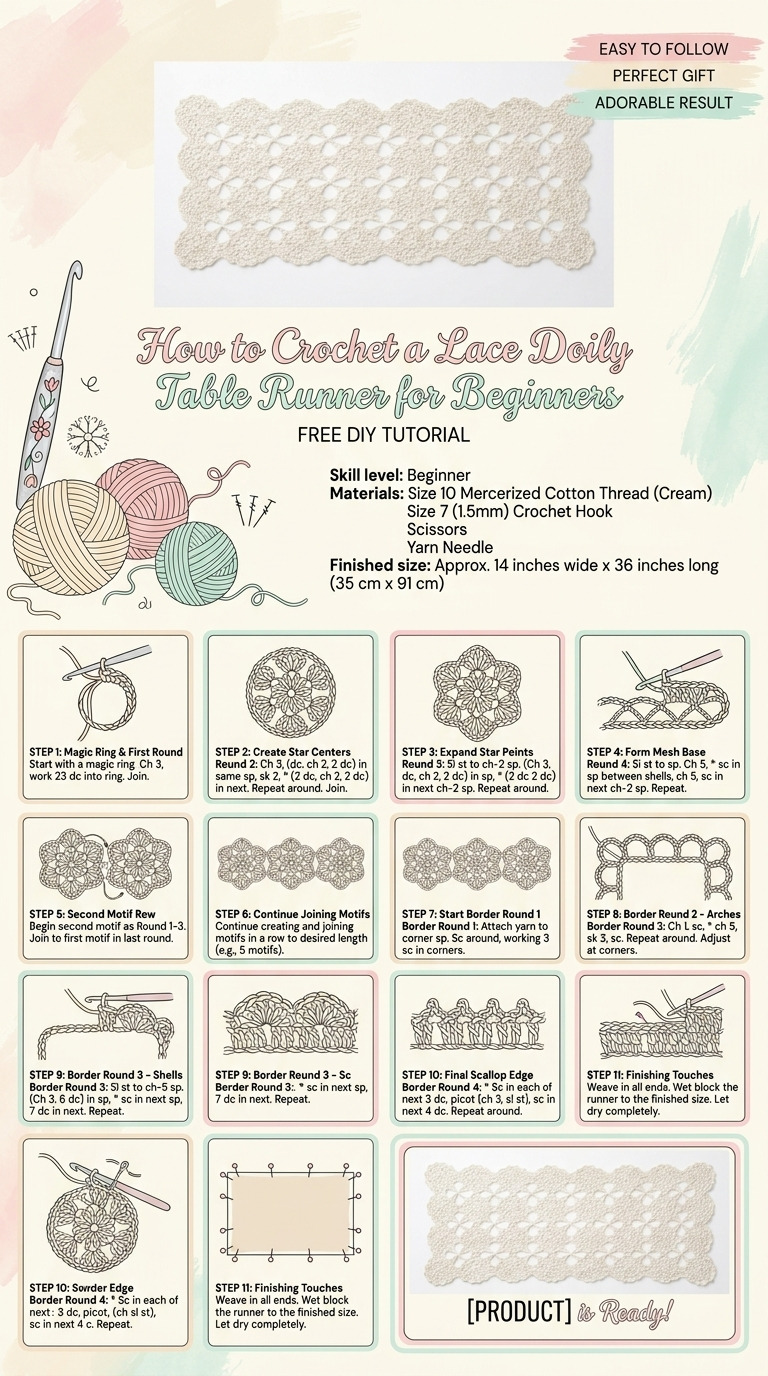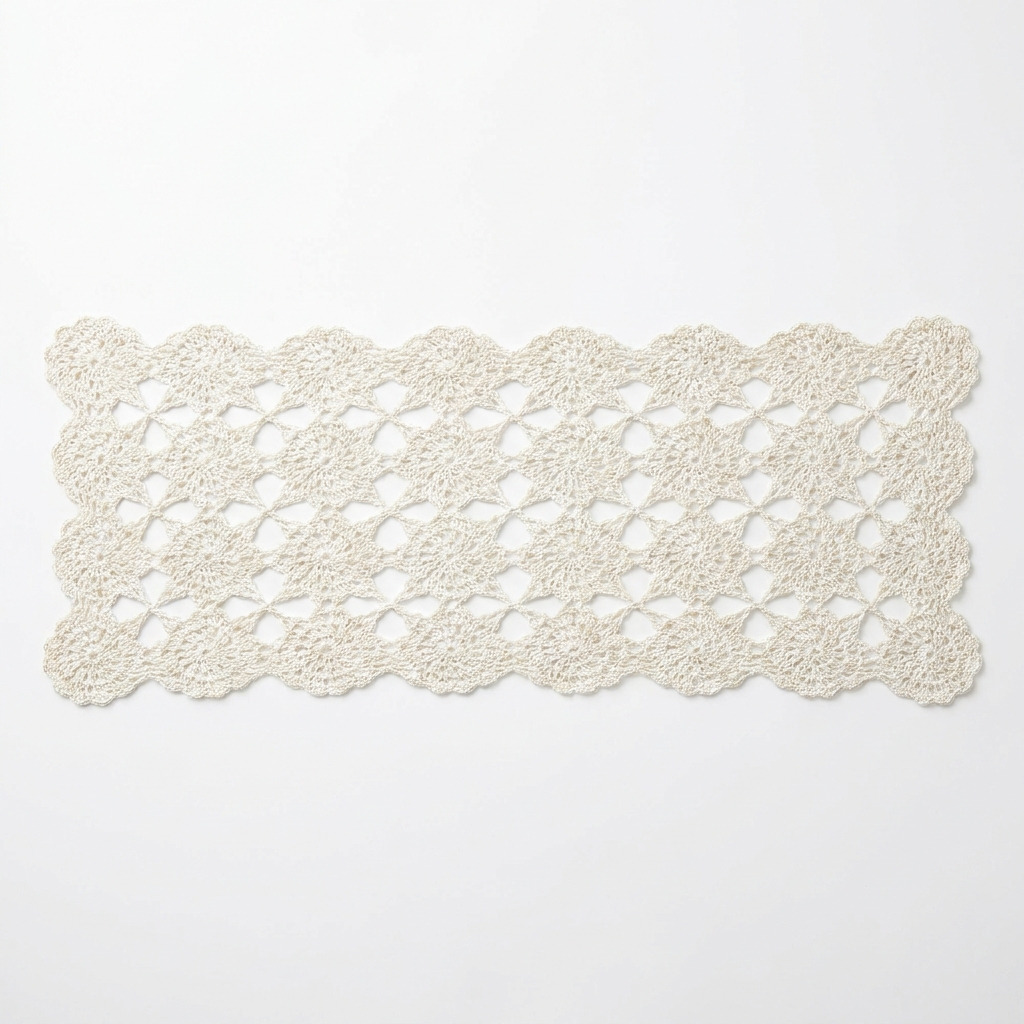
I remember the first time I decided to add a personal touch to my dining room. I was at a friend's house and saw a beautiful lace doily table runner that just tied the whole space together. I thought, "I can totally make something like that!" It was delicate yet had a rustic charm that instantly drew me in. So I set out on a mission to learn how to crochet a lace doily table runner of my own. Fast forward to today, and I have a stunning one gracing my own dining table, and it feels wonderfully satisfying every time I see it.
This table runner not only serves as decoration but also protects my table surface from scratches and spills. It’s such an easy project that even if you’re just starting your crochet journey, I promise you can make this beautiful piece. I’m going to walk you through each step so you can create your very own lace doily table runner!
[Descriptive image caption of the finished project]
What You'll Need
Materials:
- Yarn:
- 1 skein of cotton yarn, size 10 crochet thread (color: Natural White). You can also use any color you love! Cotton is great because it holds its shape and is easy to wash.
- Crochet Hook:
- Size 1.5 mm (or a size that matches your yarn). If you don’t have a 1.5 mm hook, a hook that’s slightly larger or smaller will work, but keep an eye on your tension.
- Scissors:
- Standard fabric scissors for cutting your yarn.
- Tapestry Needle:
- For weaving in the ends once you’re done. Any blunt, large-eye needle will do.
- Measuring Tape:
- To measure your work and ensure you achieve the right size.
- Stitch Markers: (optional)
- These are handy for marking stitches and rows to keep track of your pattern.
Tools:
- Workspace Setup: A clean, flat surface for crocheting, a comfortable chair, and good lighting.
- Safety Equipment: None required for this project, just your yarn and hook!
Step-by-Step Instructions
Step 1: Start with a Slip Knot
- Begin by creating a slip knot with your yarn. This will be your starting stitch. To make a slip knot, wrap the yarn around your fingers and pull a loop through. Place this loop onto your crochet hook.
Step 2: Chain Stitch Foundation
- Now, let’s make the foundation. Chain 90 stitches. This creates the length of your table runner. Just in case you’re wondering, chaining means pulling a loop of yarn through your slip knot without adding extra stitches.
Step 3: First Row – Double Crochet
- In the fourth chain from the hook, make a double crochet stitch (dc). It feels a bit tricky at first, but you’ll get it! To do a dc, yarn over first, pull through that chain (you should have three loops on your hook), yarn over again and pull through the first two loops (two loops remain), then yarn over once more and pull through those last two loops. Continue making a dc into each of the following chains until you reach the end (total of 88 dc). Once you’ve done that, turn your work.
Step 4: Second Row – Lace Pattern Begin
- Let’s get into the lace pattern! Chain 3 (this counts as your first dc), then skip the next stitch, and in the following stitch, make 2 dc with a chain 1 (creating a cluster pattern). Repeat from the to the until you reach the end of the row, which means making a total of 44 clusters. It sounds more complicated than it is, so don’t stress. You’ll end this row by making 1 dc in the last stitch. Then, turn your work.
Step 5: Third Row – Continue Lace Pattern
- This row continues with our lovely lace. Chain 3 (this counts as your first dc), then chain 1, skip the next cluster, and in the next chain space, make 2 dc followed by another chain 1. Repeat from to until you reach the end (again, you’ll have 44 clusters). Finish with 1 dc in the last stitch before turning your work again.
Step 6: Repeat Rows
- Keep repeating Steps 4 and 5 until your piece measures approximately 48 inches long. This might take about 14-16 rows depending on how tight or loose your stitches are — no worries if it’s not exactly, it’s meant to be handmade!
Step 7: Finishing Off
- Once you reach your desired length, cut the yarn, leaving a 6-inch tail. Pull that tail through the last stitch to secure it. It has to be secure, or your work might unravel. Then, use your tapestry needle to weave in any loose ends.
Assembly & Finishing
- The magic of this project is that everything is done in one continuous piece, so there’s no assembly required! To finish it off beautifully, lightly block the doily runner by wetting it, shaping it gently to your desired dimensions, and letting it dry flat. This step defines those lovely lace patterns. If you like, you can also use fabric stiffener on it once it’s dry to hold the shape a bit more.
Common Mistakes to Avoid
- Skipping stitches inadvertently. Make sure to watch where you put your hook, as it’s easy to miss a stitch! Just pull out the last few stitches back to the last correct stitch.
- Not chaining enough at the beginning. Chaining fewer than 90 may make your runner shorter than planned. Go for the full count – it really makes a difference!
- Pulling your yarn too tightly. This can distort your stitches and make them hard to work with. Keep an even tension while crocheting; it’ll look prettier in the end.
- Not blocking the finished piece. If you skip blocking, your beautiful lace pattern won’t show up as nicely. Take the time to do this; it’s worth it!
Make It Your Own: Variations and Ideas
- Different Yarn Colors: Try using colored yarn for a bold, modern look. A soft pastels palette can also add a whimsical charm to your table.
- Multiple Colors: Incorporate a few different colors to create stripes or other patterns. Just switch the yarn during your crocheting.
- Adding Borders: Once you finish, think about adding a scalloped or fringed border for extra flair.
- Adjusting Sizes: Feel free to make it longer or shorter based on your table size. Simply add or subtract stitches from your foundation chain to change the dimensions.
I’m so excited for you to try this! Crocheting a lace doily table runner is really a delightful way to spruce up your home while enjoying a bit of relaxation.
Before You Go
Pin this for the next rainy afternoon: Save this post so you can easily find the measurements and steps when you’re ready to dive into your crochet lace doily project. Come back and tell me how it went: Seriously, I’d love to hear about your experience! No question is too basic, and if you have a project that didn’t go as planned, I want to know that too. Show off what you made: I can't wait to see how your stunning lace doily table runner turns out!