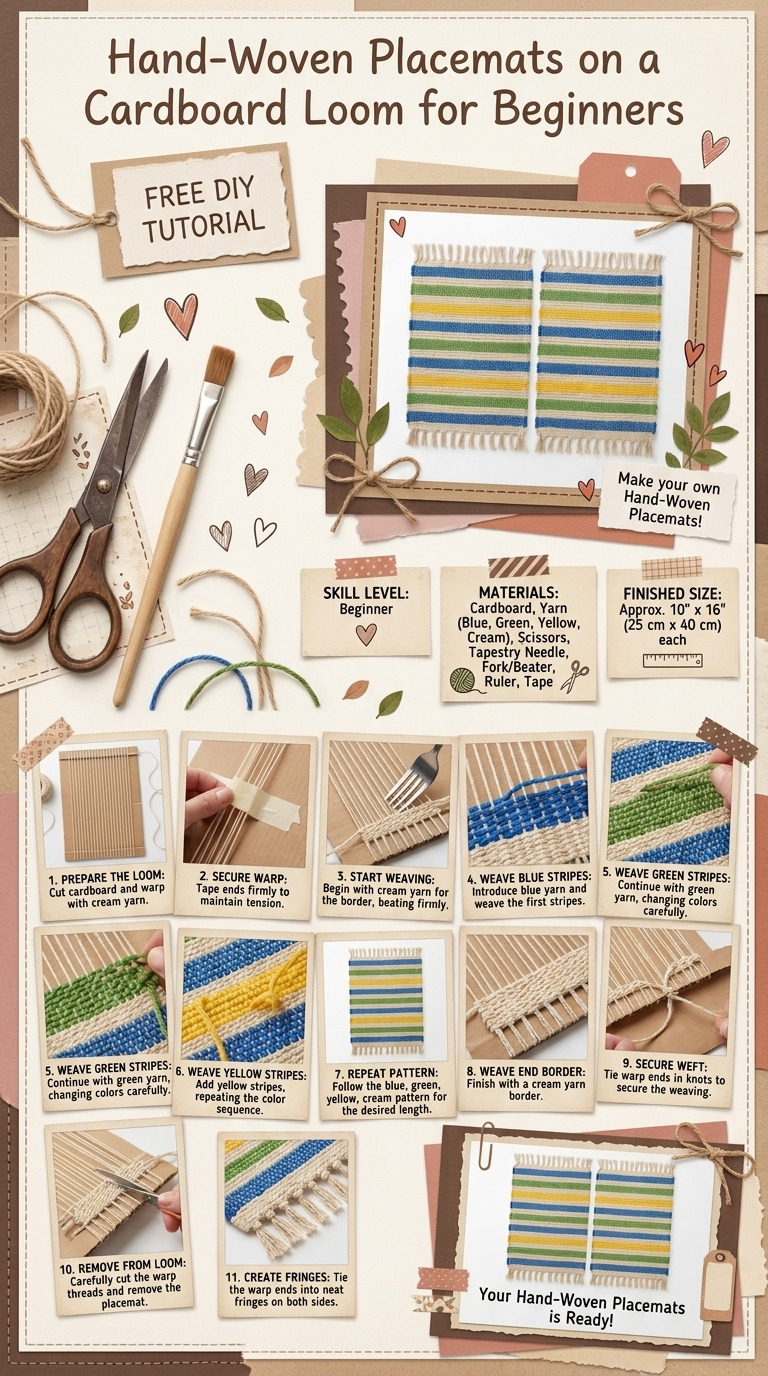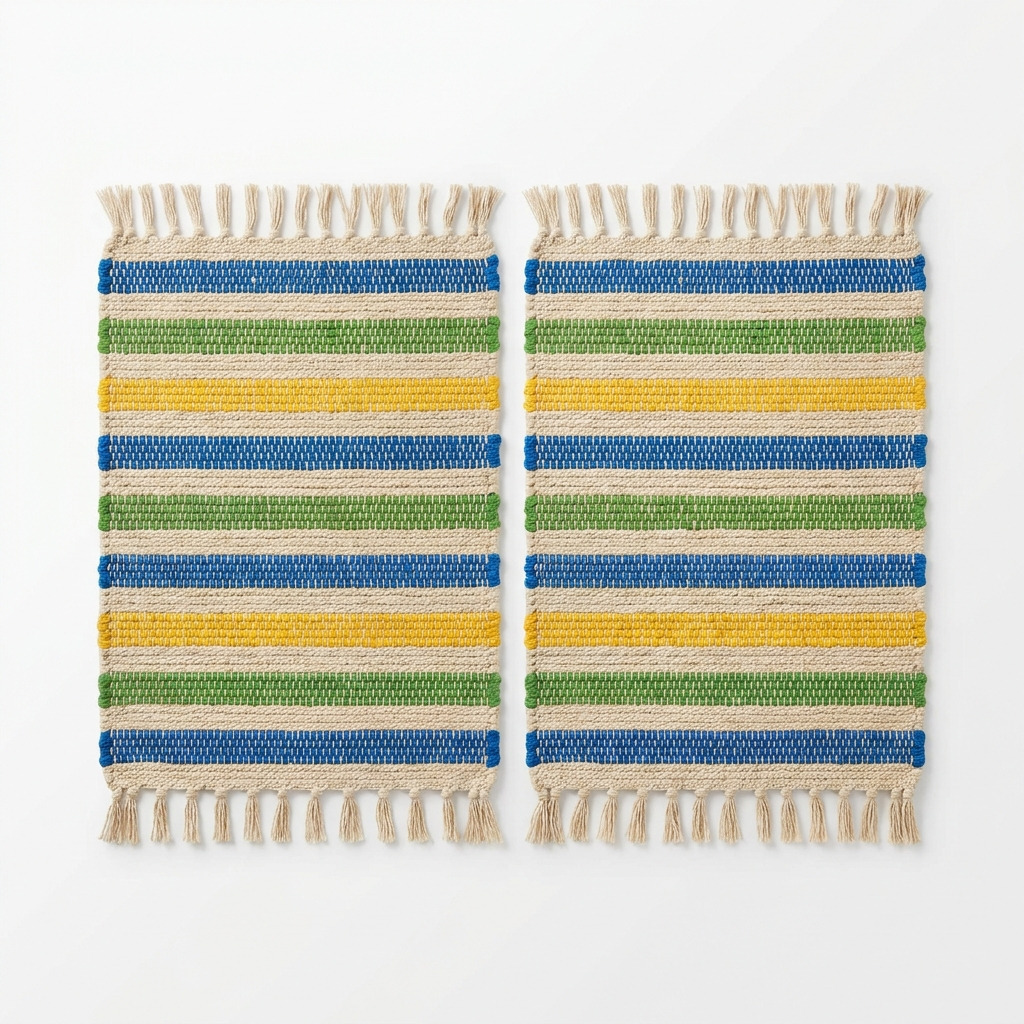
Last spring, I found myself in need of some cute yet functional placemats. While browsing online, I stumbled upon beautiful woven designs that were so inviting, and I thought, “I can totally do this!” However, when I saw the prices, my crafty heart sank — who could afford that?
That’s when I had an idea: why not create my own hand-woven placemats using a simple cardboard loom? I had some left-over cardboard and yarn from previous projects, so it felt like the perfect way to reuse what I had, while learning something new. These placemats brighten up my dining table, sparking joy and conversation at every meal. Best of all, this project is an easy one, and I’m excited to walk you through every step!
[Descriptive image caption of the finished project]
What You'll Need
Materials:
- Cardboard: 1 large piece (36 inches by 24 inches) for the weaving loom
- Yarn:
- 1 skein of cotton yarn in a base color (like natural beige)
- 3 additional skeins in assorted colors (think blue, green, and yellow)
- Yarn weight: Worsted (Category 4)
- Scissors: A standard pair of craft scissors
- Tape: 1 roll of painter's tape or washi tape—this helps secure things down
- Ruler: A 12-inch ruler for accurate measurements
- Marker: A permanent marker for marking on cardboard
- Packing Tape (optional): 1 roll for extra security of the loom
- Embellishments (optional): Beads, tassels, or ribbons for a decorative touch
Tools:
- Cutting Tool: Box cutter or utility knife for cutting cardboard
- Craft Knife: For more detailed cuts in the loom, if needed
- Weaving Needle: A large tapestry needle to assist with threading the yarn
- Safety Equipment: Safety goggles for cutting cardboard and work gloves (when necessary)
How to Make It, Step by Step
Stage 1: Make the Cardboard Loom
Step 1: Cut the Cardboard
- Grab your box cutter and carefully cut a 36 inches by 24 inches piece of cardboard. It's okay if it feels tricky at first; just take your time and use a straight edge to guide your cuts.
Step 2: Mark the Slits
- On both of the shorter (36-inch) sides, use your ruler to mark a line every 1 inch from the top down. You want these lines to be precise so your weaving will be even later on.
Step 3: Cut the Slits
- Using your craft knife, carefully cut along each marked line, making a straight slit that is 1 inch deep. You should have 20 slits in total. Take your time; this is crucial for a successful loom!
Step 4: Secure the Loom (optional)
- To make sure your loom holds up, apply some packing tape along the edges. It gives you a bit more stability, especially if you're tugging on it while weaving.
Stage 2: Prepare the Yarn
Step 5: Cut Yarn Pieces
- Cut 20 pieces of your base yarn, each measuring 30 inches long. These will become the warp threads (the vertical part of the weave). You’ll also need to cut additional pieces of the colorful yarn for the weft (the horizontal part), each about 36 inches long.
Stage 3: Setting Up the Loom
Step 6: Set the Warp Threads
- Now it’s time to set the base! Thread one piece of the base yarn through the first slit, starting from the back and pulling it through to the front, allowing for a 6-inch tail hanging at the back.
- Continue this for all 20 slits. Make sure to alternate the yarn going front-to-back and back-to-front so they fill the loom evenly. The warp threads should be taut but not so tight that they bend the loom.
Stage 4: Weaving the Placemats
Step 7: Start Weaving
- Grab your first piece of colorful yarn and insert it into the weaving needle. Begin weaving at the bottom, following a simple over-and-under pattern with the warp threads. Go over one, under the next, until you reach the end of the row.
- Pull until the end of the yarn is reached, letting a 6-inch tail hang off — trust me, this makes a big difference later!
Step 8: Continue Weaving
- Keep adding new colored yarns as you go, mixing the colors to create a striped look. Each row should be about 1 inch high to maintain a nice, even finish. Remember, keeping the tension even is key to making sure your placemat lays flat and looks professional.
Step 9: Finish Weaving
- Once you reach your desired length of 18 inches, tie off the yarn securely at the back of the loom, ensuring it's nice and tight. Don’t forget to push the woven section down towards the bottom for a neat finish.
Stage 5: Remove the Placemat and Finish
Step 10: Remove the Weaving
- To take off the placemat, carefully cut the warp threads at the top of the loom. Gently slide the woven piece off, being careful not to unravel your hard work!
Step 11: Finishing Edges
- Tie off any loose ends or trim them with scissors. You can also add embellishments like tassels or beads if you want to jazz things up a bit.
Common Mistakes to Avoid
- Cutting slits too deep. If you cut them more than 1 inch deep, your warp threads won't hold properly. Keep them even and shallow for best results.
- Rushing the weaving. If you pull your weft threads too tight, it can warp your placemat; check for a smooth overall look as you do this.
- Not alternating the warp threads. If you weave all front-to-back or all back-to-front, you will end up with an uneven finish. Always alternate for best results.
- Forgetting to secure tails. Loose ends can unravel; tuck or tie them neatly to ensure everything stays in place.
- Not taking breaks. Weaving can be fun but can also strain your hands. Take your time, and let yourself rest to avoid frustration.
Make It Your Own: Variations and Ideas
- Play with colors. Use seasonal colors or patterns; you can even make themed placemats for holidays.
- Change the size. The dimensions are flexible; if you want smaller coasters or larger table runners, just adjust your cuts and weaving lengths.
- Experiment with textures. Try using different types of yarn, like fuzzy or sparkly yarn for a unique touch.
- Customize with decorations. Adding fringe or layering in beads can make your placemats truly one-of-a-kind.
- Gift-ready versions. These make charming gifts! Just wrap them up with a ribbon, and you're good to go!
Before you dive into your own project, remember: it’s all about having fun and expressing your creativity! Each placemat you make will be uniquely yours.
Before You Go
Pin this for the next rainy afternoon: Save this guide so you can grab the measurements and techniques when you're ready to create your hand-woven placemats! Come back and tell me how it went: I love hearing from you. No question is too basic, and I’m here for all your crafting adventures—successes and mishaps alike! Show off what you made: I can’t wait to see your finished creations. Happy weaving!