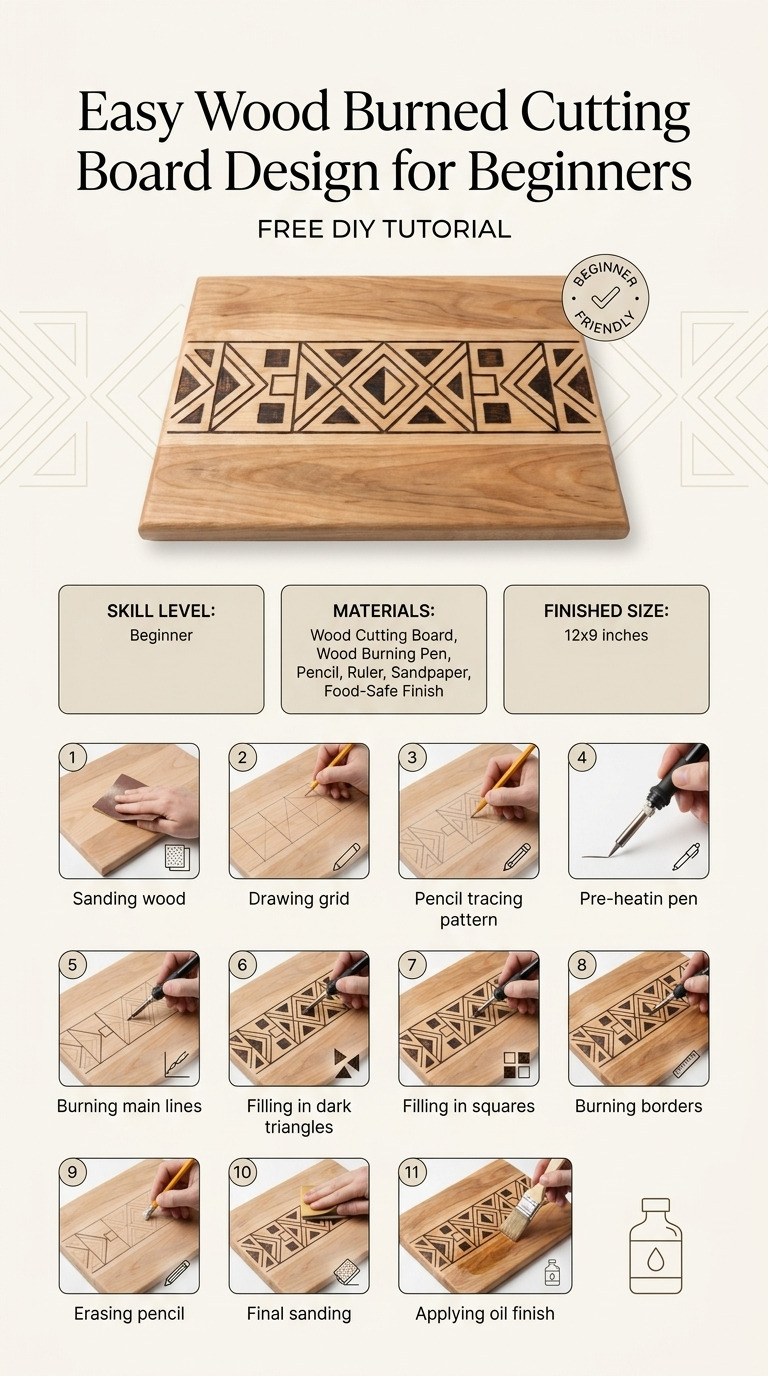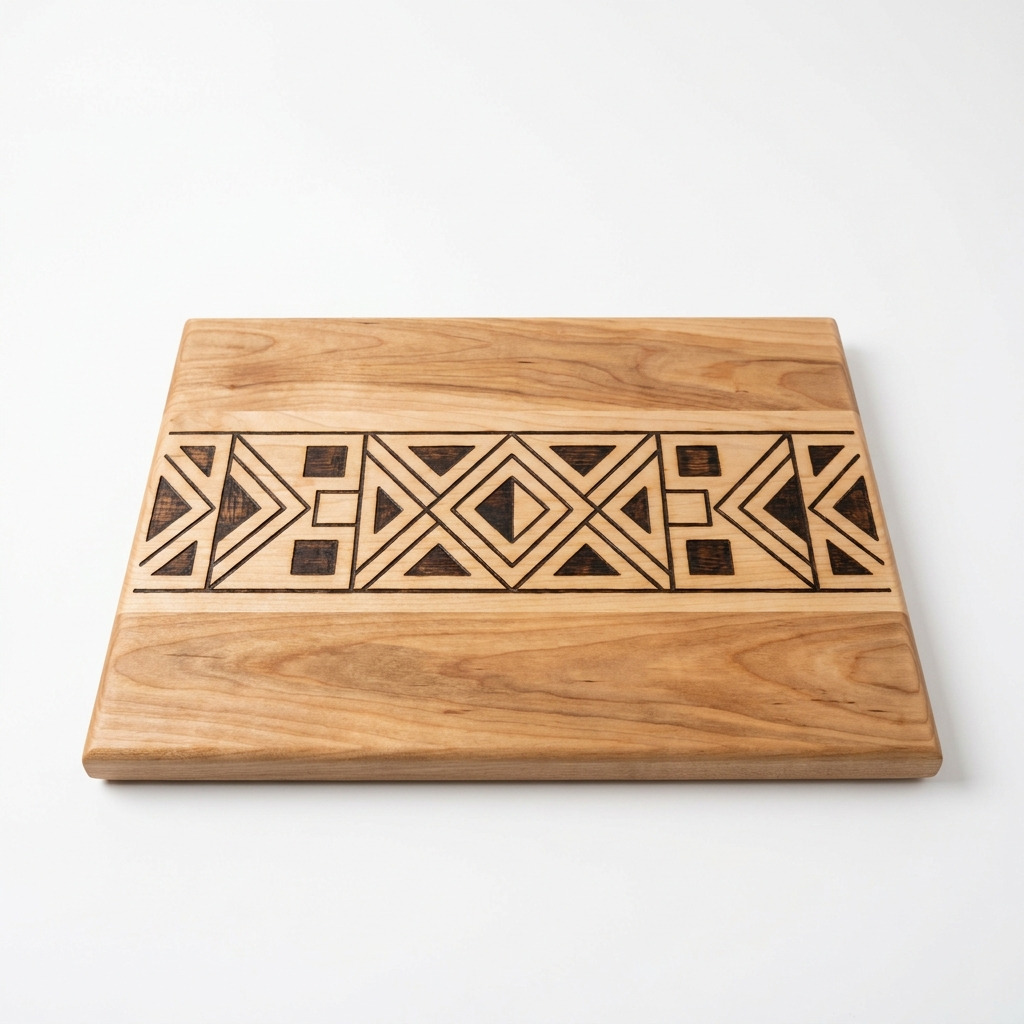
Last summer, I was looking for a unique gift for my friend who loves to cook. I wanted something personal but didn’t want to spend a fortune. That’s when I discovered wood burning! It’s an enticing combination of creativity and practicality, and let me tell you, I was hooked! I decided to create a wood burned cutting board featuring a simple design with some cute geometric shapes and my friend's initials. Now, that cutting board proudly sits in her kitchen, bringing a personal touch to her culinary adventures.
This project is a perfect way to get started with wood burning. It’s straightforward and requires no prior experience. I’ll walk you through every step, so you can make your very own beautiful cutting board that’s both functional and decorative.
[Descriptive image caption of the finished project]
What You'll Need
Materials:
- Cutting Board:
- 1 piece of untreated hardwood (maple, oak, or birch), about 18 inches long x 12 inches wide x 1 inch thick. You can use any untreated hardwood; avoid treated woods as they may contain chemicals harmful for food.
- Wood Burning Tool:
- 1 basic wood burning pen with a fine tip for detailed work. If you don’t have one, a soldering iron can also work in a pinch—just be cautious as it might not have interchangeable tips.
- Wood Finish (optional):
- Food-safe mineral oil or beeswax, used to protect the wood. This step is optional, but it makes your board look nicer and helps preserve it.
- Pencil:
- Just a standard HB pencil for sketching your designs.
- Paper:
- Standard printer paper for creating design templates.
- Transfer Paper (optional):
- Carbon paper for transferring your design accurately if you want to make it easier on yourself.
Tools:
- Cutting Tools:
- A miter saw or a hand saw may be needed to trim your cutting board if it isn't already the right size.
- Sandpaper:
- 220-grit sandpaper for smoothing the edges and surface of the board.
- Clamps (optional):
- These will keep your cutting board still while you're working on it.
- Linen cloth:
- For applying your wood finish, if you're using it.
- Safety Equipment:
- Safety glasses to protect your eyes while sanding; a dust mask while you're sanding will help prevent inhaling wood dust.
How to Make It, Step by Step
Step 1: Choose Your Design
Pick a simple design you love. I started with geometric shapes and then added my initials. Keep your design relatively small so it fits nicely on the cutting board without overcrowding it. Grab a pencil and sketch it out on paper to get a feel for how it will look.
Step 2: Transfer the Design (optional)
If you want to use transfer paper, place it beneath your design and trace lightly with the pencil onto the board. This little trick will help ensure your design is perfectly placed and saves you time!
Tip: If you don’t have transfer paper, you can simply draw your design directly on the board with your pencil. Just take your time and go slowly.
Step 3: Secure the Cutting Board
To keep your cutting board from moving while you work, clamp it down to your table or workbench. This makes it easier to focus on the wood burning without any interruptions!
Step 4: Test the Wood Burning Tool
Plug in your wood burning tool and let it heat up for about 5-10 minutes. Before you start on your board, test it on a scrap piece of wood. This way, you’ll see how the tip burns and get comfortable with the pressure needed.
Step 5: Start Wood Burning
This is where the fun begins! Carefully trace your design using the wood burning tool. Use light pressure initially to create shallow grooves. To make deeper burns, press a bit harder, but be cautious! Taking breaks helps avoid burning too much, so it’s okay to step back and reassess.
Tip: If you notice the wood is smoking or burning too dark, reduce the pressure or adjust the temperature of your burning tool.
Step 6: Finishing Touches
After you’ve completed your design, look over it closely. If some areas look jagged or need a bit of refining, do those touches now. Let the cutting board cool completely before you move on to the next step. Trust me, you don’t want to burn your fingers!
Step 7: Apply Food-Safe Finish (optional)
If you decide to finish your board, now’s the time! Using a clean linen cloth, apply a coat of food-safe mineral oil or beeswax. Work with the wood grain, applying an even layer. Let it soak in for at least one hour before buffing it with a dry cloth.
Common Mistakes to Avoid
- Rushing the design. If you try to wood burn too quickly, you might make mistakes or unintentionally burn the wood too deep. Take your time and enjoy the process.
- Not testing the burning tool. Jumping straight into the project without testing can lead to a less-than-smooth result. Always test first!
- Burning too deep. If you press too hard, it can create unwanted grooves. Stay light until you’re confident in your pressure.
- Skipping the finish. Leaving the wood unsealed can result in drying and cracking over time. Protect your masterpiece!
Make It Your Own: Variations and Ideas
- Experiment with Designs: Try incorporating quotes, small images like leaves, or even abstract designs for a completely unique look.
- Different Shapes: If you want to challenge yourself, make a round cutting board instead of a rectangular one.
- Color Options: Consider applying a food-safe wood stain before burning to add an interesting contrast to your design.
- Gift It: Personalize it even more by adding a family name or special date if you’re making it as a gift!
- Create a Set: If you're feeling ambitious, why not create a matching set of smaller boards for serving or cheese?
I can’t wait to see how your project turns out! You’ll find that there’s a certain joy in creating something with your own two hands. Enjoy the process, and make it your own!
Before You Go
Pin this for your next rainy afternoon: Save this project so you have all the measurements and steps handy when you’re ready to start your wood burned cutting board.
Come back and tell me how it went: Whether your project turned out as planned or had a little hiccup along the way, I’d love to hear all about it! No question is too basic, so feel free to ask away.
Show off what you made: Once you’ve completed your beautiful cutting board, I’d love to see it! Enjoy crafting, and happy burning!