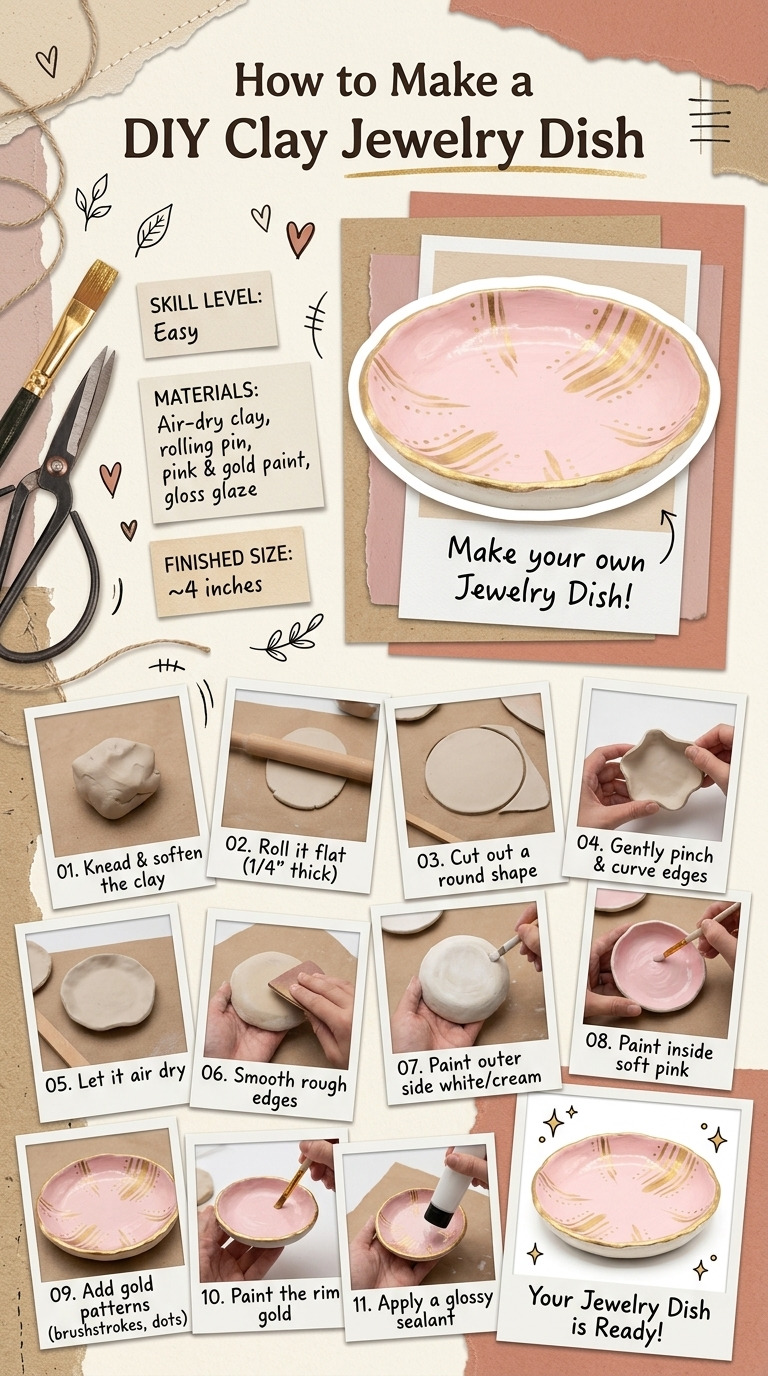
Last winter, I found myself frustrated with all my little trinkets piling up around the house. Earrings on the nightstand, rings scattered on the kitchen counter — it was starting to feel like a small jewelry explosion! I wanted something pretty to collect these bits and bobs but didn't want to spend a fortune on a dish that I could easily make myself. That's when I decided to create a DIY clay jewelry dish using air-dry clay. It turned out to be not only a practical solution, but also a fun and creative project! Plus, I love how customizing it with colors made it truly mine.
This project is simple enough for anyone to tackle, and I'm excited to walk you through every step to make your very own charming dish for all your jewelry.
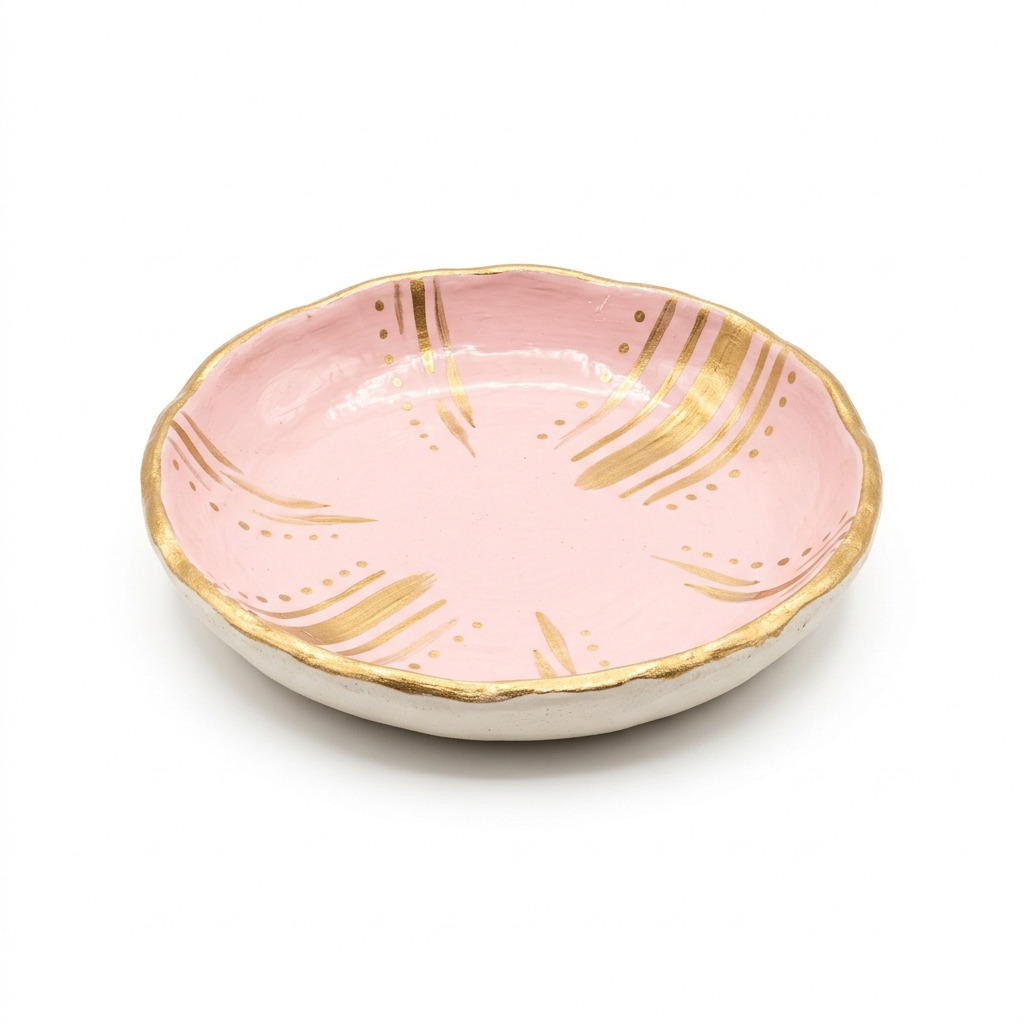
[Image: A finished DIY clay jewelry dish in pastel pink with gold accents.]
What You'll Need
Materials:
- Air-dry clay: 1 package (approximately 1 pound, white color) — You can find this at most craft stores. If you don’t have any, you could also use homemade salt dough instead!
- Acrylic paint: 2 colors (pastel pink and gold metallic) — Choose whatever colors you love! I really enjoyed the soft pastels, but feel free to go bold.
- Clear acrylic sealer spray: 1 can (matte finish) — This will protect your paint. A glossy option is fine too if you prefer a shiny finish.
- Craft varnish: 1 small bottle (optional for a glossy finish) — Using this also adds durability. If you're okay without it, you can skip this.
- Optional embellishments: Decorative stones or beads (for added decoration) — These can add a delightful touch if you feel inspired!
Tools:
- Rolling pin: 1 (standard size, about 12 inches long) — If you don’t have a rolling pin, a smooth bottle will work fine!
- Sharp craft knife: 1 — Be careful with this while cutting!
- Circular template or bowl: 1 (approximately 6 inches in diameter) — Something round helps with cutting clean edges.
- Smooth surface for working: Non-stick baking mat or a cutting mat — It just makes cleanup easier!
- Paintbrush: 1 (size 1/2 inch, flat) — You can use any paintbrush you have; just make sure it’s easy to control.
- Small bowl of water: For smoothing the clay — You’ll be getting your fingers a bit wet for this!
- Safety equipment: Gloves (to protect hands when painting or working with clay) — These are optional, but your hands will thank you if you’re sensitive to paint.
How to Make It, Step by Step
Step 1: Roll the Clay
Start by grabbing your air-dry clay. Cut a chunk and roll it into a ball. Using your rolling pin, flatten the ball into a disc that’s about 1/4 inch thick. Try to roll it to a diameter of roughly 8 inches. This extra size allows you to trim it down later.
Step 2: Cut the Shape
Now it’s time to shape your dish! Place your circular template or bowl upside down onto the rolled clay. With your craft knife, carefully cut around the edge. You should end up with a neat 6-inch round piece of clay. Don’t worry if it isn’t perfect; it adds character!
Step 3: Shape the Dish
Next up, gently lift the clay circle and place it over a bowl that’s smaller than 6 inches in diameter. This will help form the dish shape. Use your hands to press down the edges, making it fit nicely.
Step 4: Smooth the Edges
Now it’s time to make your dish look nice and clean. Moisten your fingers with water and smooth out the edges of the clay and the surface. This removes any fingerprints or cutting marks. It should feel nice and smooth when you're done!
Step 5: Drying
Set your dish in a well-ventilated area to dry. This will take about 24 to 48 hours. You want it to be completely dry and hard to the touch. Skipping this step is a big no-no; it could lead to cracks!
Step 6: Painting the Dish
Once your dish is dry, it’s time to bring some color! Use your paintbrush to apply a base coat of pastel pink paint onto the entire surface of the dish. Let it dry for about 30 minutes; you might be tempted to touch it, but try to resist!
Step 7: Adding Gold Accents
After the pink paint has dried, take your brush again and use the gold metallic paint to add accents along the dish's edge or create fun patterns like dots or stripes. Allow this layer to dry for at least 30 minutes.
Step 8: Sealing the Paint
When the paint is completely dry, grab your clear acrylic sealer spray. Hold the can about 12 inches away from your dish and lightly spray it. This will protect your artwork and give it longevity. Let it dry for about an hour.
Step 9: Final Touches
If you want an even glossier look, apply a coat of craft varnish. Let it dry according to the instructions, usually around 30 minutes. If you’re feeling adventurous, now’s a great time to glue on any decorative stones or beads for a little extra flair!
Common Mistakes to Avoid
- Rushing the glue. If you don’t let your dish dry properly, it may crack later. Make sure to give it at least 24 hours!
- Not enough water for smoothing. If you don’t dampen your fingers when smoothing, the edges might stay rough. Just a bit of water helps a lot!
- Skipping the sealer. Sealing your paint is crucial for longevity. Without it, your colors might chip or fade.
- Overworking the clay. This can make the clay tough to shape. Just get in there, mold it, and let it be!
- Ignoring the instructions on drying times. Keeping an eye on these ensures your dish turns out perfectly.
Make It Your Own: Variations and Ideas
- Color combinations: Experiment with different colors! A soft blue or lavender can look stunning.
- Different shapes: Go for a heart or star shape! Just change the template shape and you're good to go.
- Patterns with stamps: Before drying, use stamps to press fun patterns into the clay for an added texture.
- Seasonal designs: Paint your dish in festive colors for holidays or seasons.
- Gift it: Customize your dish for a friend’s birthday or special occasion.
You are truly the creator of this project, so feel free to make it yours!
Before You Go
Pin this for the next rainy afternoon: Save or pin this project so you can easily find the steps when you’re ready to create your own beautiful clay jewelry dish. You’ll want the measurements and drying times right at your fingertips!
Come back and tell me how it went: I would love to hear from you! No question is too basic, and I’m just as eager to hear about your successes as I am to learn about any bumps along the way.
Show off what you made: If you feel like sharing, I’d love to see how your dish turned out. Have fun crafting!