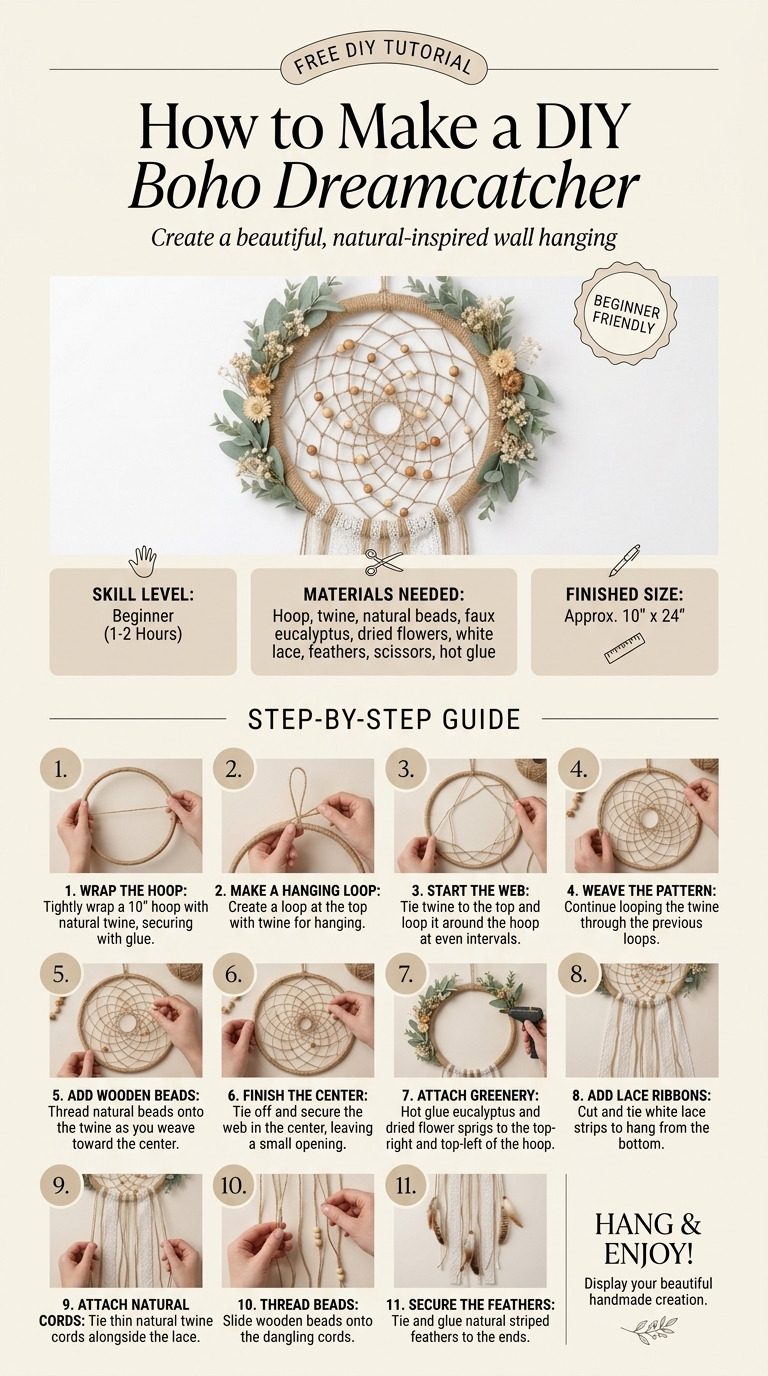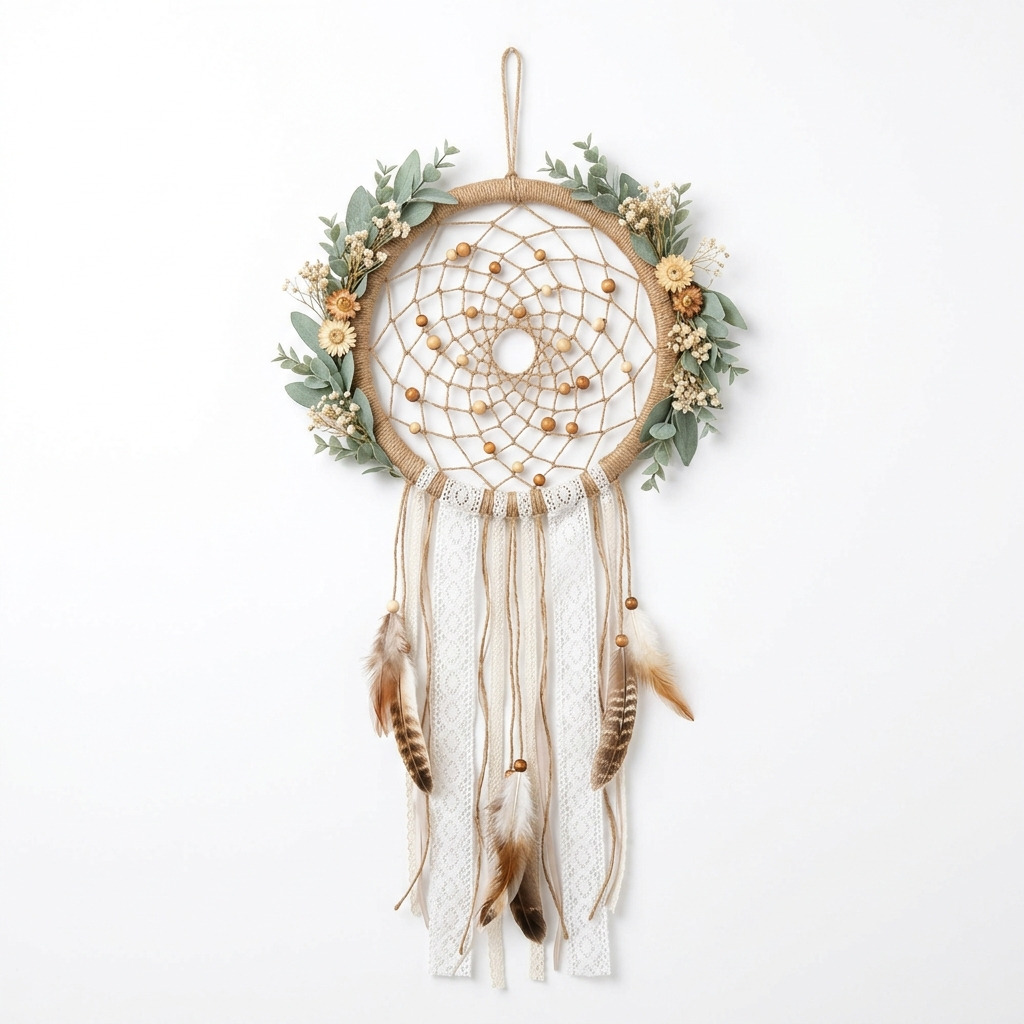
When I was looking for something special to hang above my bed, I stumbled upon the beautiful world of dreamcatchers. I loved how they could add a personal touch to a space while carrying a rich history and meaning of catching bad dreams. So, I decided to make my own DIY Boho Dreamcatcher, and let me tell you, it was a joyful journey! I gathered some natural materials and a few embellishments, and soon enough, I had a stunning piece that brought a cozy vibe to my bedroom.
This dreamcatcher incorporates twine, delicate lace, and lovely feathers, all coming together in a rustic style that I adore. If you're looking to create something meaningful for your home, or even as a thoughtful gift, this project is perfect for you. Trust me, this is an easy project, and I’m here to walk you through every single step!
[Descriptive image caption of the finished project]
What You'll Need
Materials:
- Wooden hoop: 14 inches in diameter (1 piece) The main structure, helping to define the shape of your dreamcatcher.
- Natural twine: 50 feet (1 spool, preferably in a light brown color) This will wrap around the hoop and create the web.
- Cotton lace trim: 1 yard (white or off-white) Adds a delicate boho touch at the bottom.
- Feathers: 5-7 pieces (various colors such as brown, white, and tan) These will dangle beautifully to enhance the visual appeal.
- Beads: 15-20 pieces (wooden or wooden-like beads, assorted sizes) Beads add texture and interest to the woven web.
- Artificial foliage: 1 small bunch (choose muted tones like sage green and dried flowers) Foliage helps frame the dreamcatcher and brings some earthy vibes.
- Glue: Hot glue gun and hot glue sticks To attach all your elements securely together.
- Scissors: Standard craft scissors Essential for cutting twine and lace as needed.
Tools:
- Hot glue gun This is important for attaching elements together.
- Ruler: At least 12 inches long For measuring and ensuring even spacing.
- Pencil: For marking It helps with precise placement of where you’d like to tie knots.
- Safety goggles: If using a hot glue gun, to protect eyes from accidental splashes Always better to be safe than sorry!
How to Make It, Step by Step
Step 1: Creating the Dreamcatcher Base
- Start by taking your wooden hoop. This will be the base of your dreamcatcher.
- Begin wrapping the hoop with natural twine. I like to start at any point on the hoop and secure the twine with a tiny dab of hot glue.
- Keep wrapping the twine tightly around the hoop until the entire wood surface is covered. Make sure to apply glue every few inches to keep everything in place. It should feel snug and secure.
- Once you reach the starting point, trim the excess twine and secure it again with hot glue. (Make sure to let the glue set for about 10 minutes before moving on.)
Step 2: Weaving the Web
- Cut a 6-foot length of twine and tie one end to the top of the hoop, creating a loop for hanging.
- Begin crafting the web by making a knot around the hoop about 1 inch from the top.
- Move down the hoop and repeat the knot, spacing them about 2 inches apart. You can guide the twine using your ruler for nice, even gaps.
- After you’ve gone around the entire hoop, tie additional knots towards the center, working down to form that web-like pattern. It's okay if everything isn't perfectly spaced; that adds to the charm.
- Ensure you leave a few openings for a lovely airy effect. Tie off the twine securely at the center. (This weaving process should take around 20-30 minutes.)
Step 3: Adding Embellishments
- Now, let’s jazz up that web! Start by incorporating beads at intervals in the web. It can be really fun to play with different sizes and colors!
- Simply thread a bead onto the twine before tightening the knot at each intersection.
- Once your beads are in place, take the cotton lace trim. Attach one end to the bottom of the hoop with hot glue. Lay it down so it hangs elegantly. Repeat this with the second piece, spacing them slightly apart to create a cascading effect. (Allow these to set for another 10 minutes.)
Step 4: Attaching Feathers and Foliage
- Choose 3-5 feathers that complement your color scheme, and get ready to attach them!
- Use your hot glue to secure the tips of the feathers where the lace meets the hoop. This will give them a lovely, hanging effect.
- Finally, grab your artificial foliage. Glue small bunches onto the top or sides of the hoop to frame the dreamcatcher beautifully. (Let the glue set for an additional 10 minutes so everything stays in place.)
Common Mistakes to Avoid
- Rushing the glue. This can lead to pieces falling off. Always allow enough time for all glued sections to set before moving on.
- Overcrowding the web with beads. If you use too many, the design can feel heavy. Aim for a few strategically placed beads to keep it airy.
- Not securing knots tightly. If the knots are loose, your web may unravel. Give each knot a gentle tug to ensure they’re tight.
- Skipping the protective sealant. If you choose to spray a sealant, skipping this can lead to dust build-up or damage over time. It’s a small step that can make a big difference!
- Ignoring the measurements for twine lengths. If you cut the twine too short, you might find yourself in a fix halfway through the project. Measure carefully!
Make It Your Own: Variations and Ideas
- Color Palette Swap: Pick dyed twine or colorful feathers to match your room decor or mood. You can really personalize your dreamcatcher!
- Mixed Materials: Consider incorporating different textures—like leather or jute rope—in addition to twine for more depth.
- Seasonal Themes: Change your dreamcatcher with the seasons. Use silk flowers in spring, autumn leaves in fall, or snowy whites in winter for a cozy touch.
- Beads Overload: Experiment with an abundance of beads or add charms that reflect your personal interests or travels.
- Gift Options: Mini versions make delightful gifts! Just scale down the hoop size and reduce material quantities.
- Sharing with Friends: Who doesn’t love a crafty gathering? Invite some friends over for a DIY night making these together!
Now that you know how to create your very own dreamy piece, the sky's the limit with this lovely project. Remember, crafting is all about expressing your creativity—have fun with it!
Before You Go
Pin this for the next rainy afternoon: Don’t forget to save this dreamcatcher project for when you want to gather your supplies. You’ll want this handy when you need a little crafting joy at home!
Come back and tell me how it went: I absolutely love hearing from you, so don't hesitate to drop a comment or ask any questions you might have. Remember, no question is too small or silly!
Show off what you made: I’d be thrilled to see your beautiful creations, so feel free to share your finished dreamcatchers! Happy crafting!