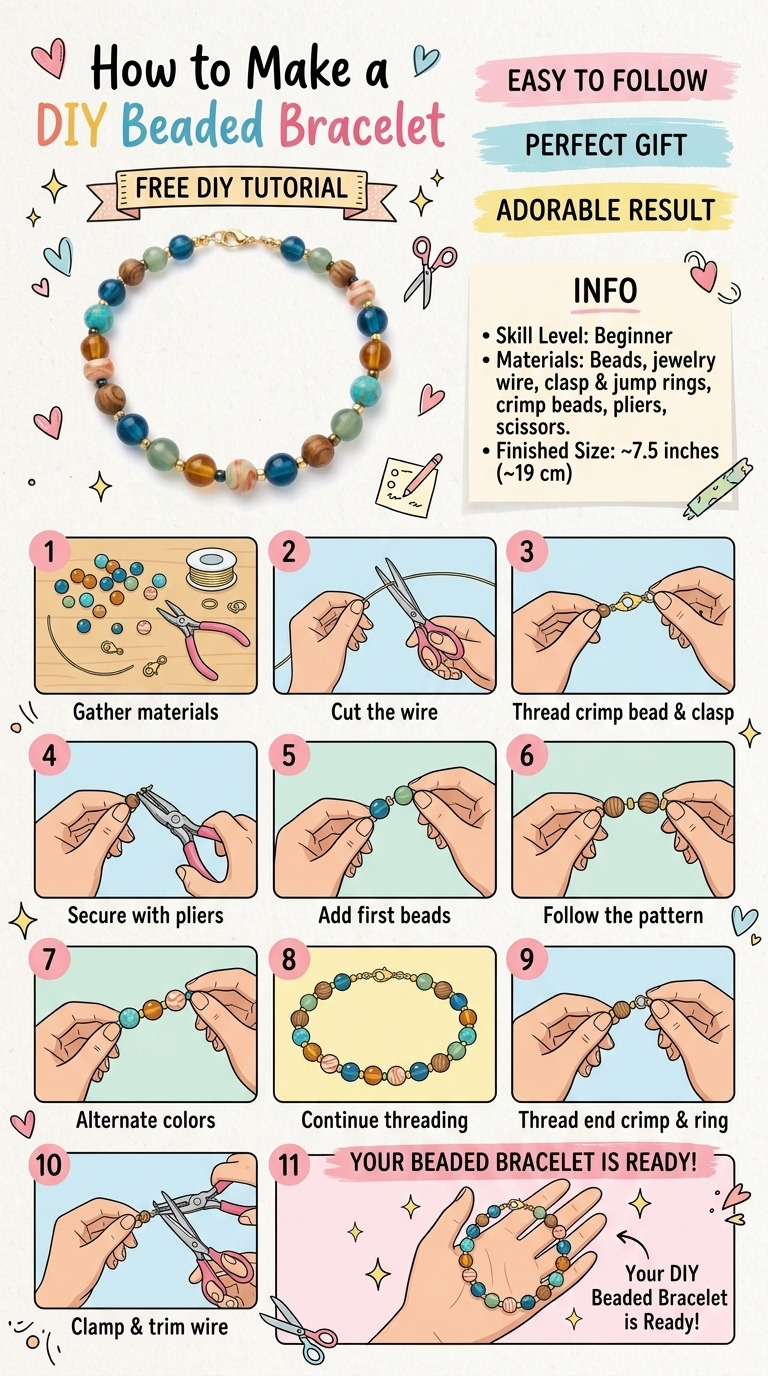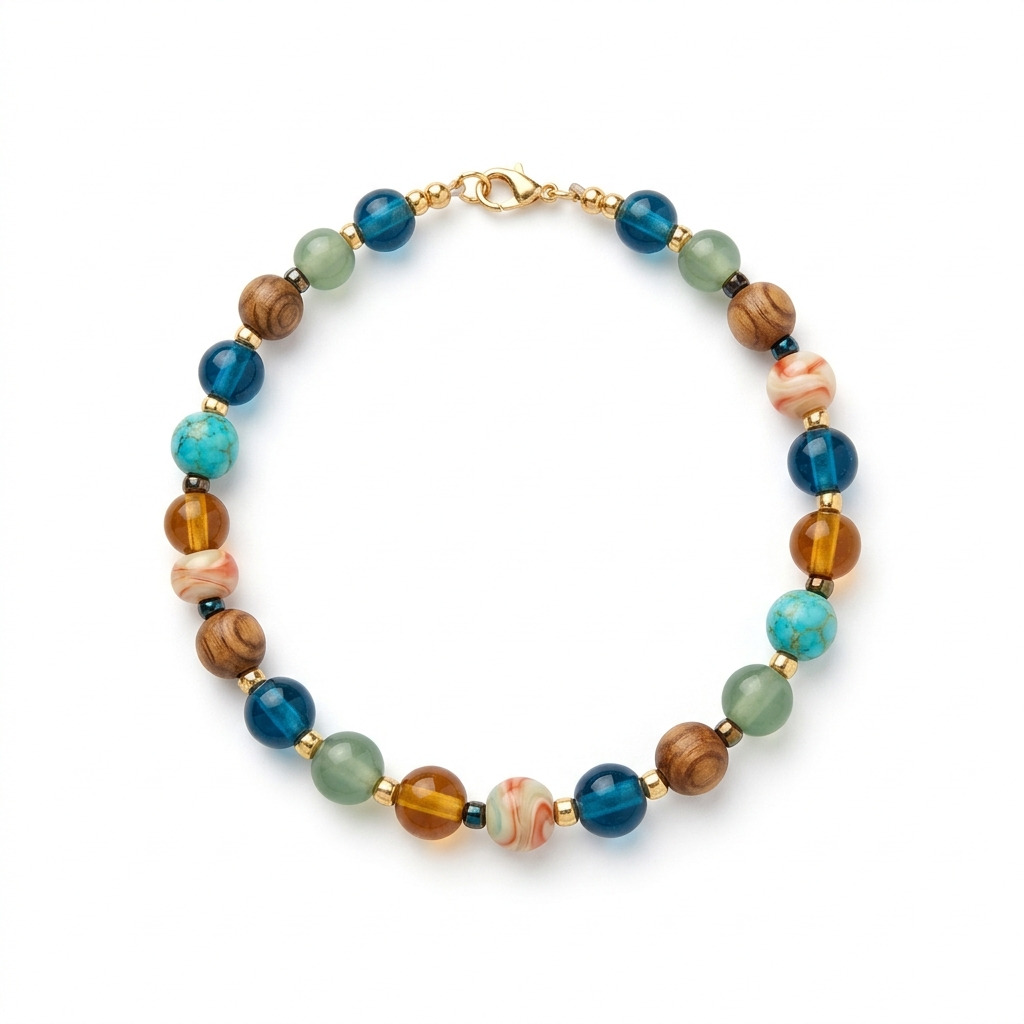
I love creating bracelets, and there’s something about making them yourself that's just so satisfying! Last summer, I had a bunch of colorful beads lying around from various craft projects, and I decided to make my own beaded bracelet. With a mix of glass and wooden beads, I was able to create a beautiful piece I wear all the time. It’s perfect for adding a splash of color to any outfit!
This DIY beaded bracelet can be custom-made with any beads and colors you fancy, and it features an adjustable design to ensure a comfy fit on your wrist. It's really a straightforward project, and I’m here to guide you through every step!
[Image of a finished DIY beaded bracelet]
What You'll Need
Materials:
- Beads:
- About 50 assorted beads (a mix of glass, wooden, or acrylic) — choose colors you love!
- Suggested bead sizes: 8mm for main beads and 4mm for spacer beads to add variety.
- Cord:
- 1mm elastic cord, about 1 meter long. This gives you enough length to work with and to create knots.
- Clasp:
- (optional) 1 lobster clasp (gold or silver finish). This can add a nice touch if you want a more polished finish.
- Crimp beads:
- 2 small crimp beads (gold or silver finish, 2mm) to secure your knots if you're adding a clasp.
Tools:
- Scissors:
- 1 pair of sharp scissors to cut your cord.
- Tape:
- 1 small piece of masking tape or washi tape. This will help keep one end of the cord secure as you work.
- Beading needle:
- (optional) 1 size 10 or 12 beading needle, which makes it easier to thread smaller beads onto the cord.
Safety Equipment:
- Safety glasses: Not strictly necessary unless you’re working with very tiny beads, but they can offer peace of mind.
How to Make It, Step by Step
Step 1: Design Your Bracelet
Start by laying out your beads on a bead mat or a tray. This helps keep them from rolling away while you work. Decide on a pattern that makes you happy — maybe you want to alternate colors or create a specific motif.
Tip: Play around with different arrangements until you find one that feels right!
Step 2: Prepare the Elastic Cord
Cut your elastic cord to about 12 inches. This length allows room for tying knots and adjusting the fit once you’ve strung all your beads.
Next, tie one end of the cord with a simple knot. This will keep your first beads from slipping off as you work.
Step 3: String the Beads
Now it's time to get those beads onto the cord! Starting from the knotted end, begin threading your beads onto the elastic in the order you previously designed.
If you’re dealing with smaller beads and find it’s a bit tricky, using a beading needle can make threading a breeze. Keep going until you have about 1 inch of cord left (that’s around 4-5 beads left to string).
Step 4: Test the Fit
Here’s the fun part! Gently stretch the bracelet around your wrist to check the size. If it feels a bit snug or loose, you can easily add or remove a few beads to make it fit just right.
Step 5: Secure the Ends
Once you’re happy with the length, leave around 1 inch of space and tie another knot with the free end of the elastic cord. Make sure both ends of the cord are brought together and that all the beads are snug between your knots.
Tip: Double knotting here will help keep everything secure for wear!
Step 6: Finishing the Bracelet
If you're using crimp beads, now is the time to slide one over one of the knots before securing it. With flat-nosed pliers, crimp down tightly on the crimp bead to hold the knot in place.
Step 7: Trim Excess Cord
Grab your scissors and carefully trim the excess elastic cord close to the knot. It's smart to leave a tiny bit of cord hanging to ensure the knot doesn’t slip out.
Step 8: Optional Clasp Addition
If you want to add a lobster clasp for a more finished look, thread the cord through the clasp and secure with another knot and crimp bead. Again, make sure it’s tightly fastened before cutting any remaining excess cord.
Common Mistakes to Avoid
- Rushing the knot tying. If you don’t tie your knots securely, they may come undone with wear! Always double knot to be safe.
- Stringing too tightly. If you pull the beads too tightly while stringing, the bracelet may not fit comfortably on your wrist. Leave a little wiggle room.
- Not testing the size. Make it a point to check the fit before finalizing your knots. Adjust as needed for the perfect fit.
- Forgetting to crimp. If you want to use crimp beads and forget to add them, your knots may unravel over time. Remember to incorporate them if you're adding a clasp!
- Using the wrong size beads. If your beads are too small for the elastic cord, they might fall off or get stuck. Ensure you get the right sizes.
Make It Your Own: Variations and Ideas
- Add Charms: To make your bracelet even more special, consider adding charms or pendants that reflect your personality or interests.
- Vary Bead Sizes: Mix in different bead sizes or shapes – think about making a chunky statement piece!
- Color Themes: Create bracelets for different seasons or holidays, like pastel colors for spring or rich, deep tones for winter.
- Gift It: Make a bracelet as a gift! Personalizing it with the recipient’s favorite colors or symbols can make it even more special.
- Make a Set: If you’re feeling creative, why not make a matching necklace or pair of earrings to go with your bracelet?
Creating a DIY beaded bracelet is truly a wonderful way to express your style and creativity. Don’t be afraid to play around and make it uniquely yours!
Before You Go
Pin this for the next rainy afternoon: Save this DIY beaded bracelet project so you can refer to the materials and steps when you have your colors and beads ready to go.
Come back and tell me how it went: I love hearing from you, so please feel free to leave comments or questions! No question is too basic, and I'd love to hear about your projects, whether they went as planned or had a few hiccups along the way.
Show off what you made: I can't wait to see your beautiful creations! Enjoy crafting your unique beaded bracelets!