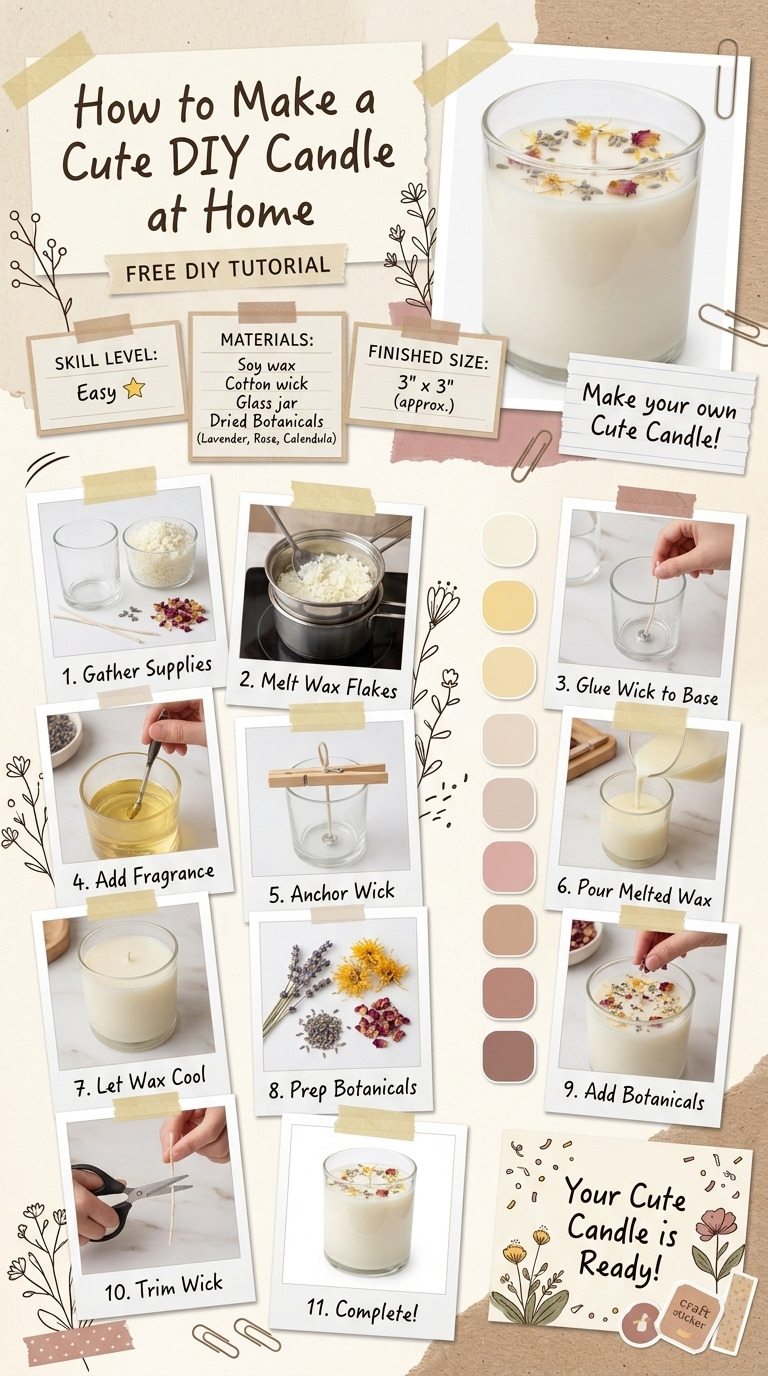
I’ll never forget the first time I decided to dabble in candle-making. I had a cozy evening planned, and I wanted a beautiful scent wafting through the room. But when I looked at those fancy store-bought candles, the price tags made me cringe! So, I thought, “Why not make my own?” That’s when I discovered how simple and satisfying it could be to create a personalized candle right in my own kitchen.
This project combines natural soy wax, your favorite essential oils, and maybe some decorative elements for flair to create a candle that not only smells delightful but also looks adorable. I usually keep my finished candles on my coffee table, where they add a lovely touch of warmth and charm. And the best part? You don’t need any fancy equipment or previous crafting experience to make it! I promise to walk you through every step of the process.
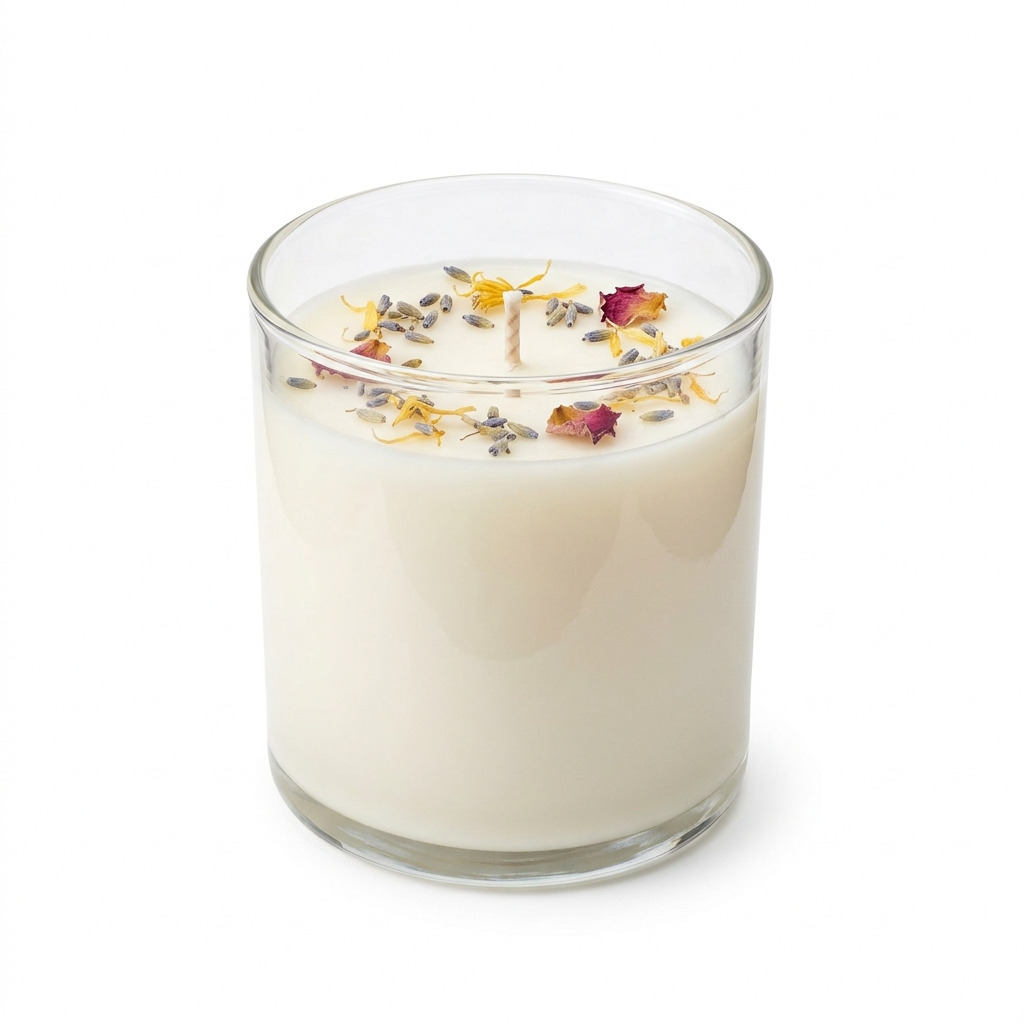
[Descriptive image caption of the finished project]
What You'll Need
Materials:
- Soy wax flakes: 1 pound (This is the main component for the candle. You can sometimes find it at craft stores or online, but you might also spot it in natural food stores.)
- Candle wicks: 1 (6-inch length, cotton core, pre-waxed. These wicks help to create the flame you want.)
- Essential oils: 1 ounce (Pick your favorite scent! Lavender is calming, while citrus is refreshing. A little goes a long way.)
- Dye chips (optional): 1-2 chips in your desired color (These give your candle a pop of color; you can skip them if you prefer a natural look.)
- Candle container: 1 (A glass jar or metal tin that’s about 4 inches wide; make sure it's heat-safe.)
- Adhesive wick stickers: 1 piece (These are used to secure the wick in place while you pour in the wax.)
- Natural embellishments (optional): Dried flowers, herbs, or glitter for decoration (I love using dried lavender on top for a little extra charm!)
Tools:
- Double boiler: A means to melt the wax gently (You can also make one by placing a heat-safe bowl over a pot of simmering water.)
- Thermometer: A kitchen thermometer that reads up to 180°F (This ensures your wax is at the right temperature before adding oils.)
- Spoon or spatula: For stirring (Any spoon will do! Just make sure it’s something you don’t mind getting a bit waxy.)
- Pouring pitcher (optional): For transferring melted wax (Not required, but it makes pouring easier and tidier.)
- Scissors: To trim the wick to the right length.
- Pen and paper: For jotting down notes if needed (It’s helpful to keep track of ideas, especially if you're trying different scents.)
- Workspace protection: Newspapers or a disposable tablecloth (This keeps your work area clean—trust me, you don’t want to deal with wax spills!)
How to Make It, Step by Step
Step 1: Prepare Your Workspace
Start by finding a stable, flat surface to work on. Lay down newspapers or a disposable tablecloth underneath your materials to protect the surface from any wax spills.
Step 2: Prepare Your Container
Make sure your candle container is clean and free from dust. That way, the wax can adhere to it well, and you won’t have any unwanted particles in your candle.
Step 3: Secure the Wick
Using an adhesive wick sticker, press the wick down to the bottom center of your container. This might feel a bit sticky at first! If you don’t have stickers, you can use a bit of melted wax to hold the wick in place while you pour.
Step 4: Cut the Wick
If your wick is too long, use scissors to trim it to about 1 inch taller than the container. This way, it won’t get in the way when you’re pouring wax.
Step 5: Melt the Wax
Fill the bottom pot of your double boiler with water and bring it to a gentle simmer.
- Add the soy wax flakes to the top bowl (or heat-safe bowl) of the double boiler.
- Stir occasionally, letting it melt for about 10-15 minutes until completely liquid. This is my favorite part; the flakes transform into something beautiful!
Step 6: Add Dye Chips (Optional)
If you want a colorful candle, add 1-2 dye chips to the melted wax. Stir gently until they dissolve completely! If you don’t see the color you want right away, don’t worry—keep stirring.
Step 7: Check the Temperature
Use your thermometer to keep an eye on the wax temperature. When it reaches 180°F, you're ready for the next step.
Step 8: Add Essential Oils
Remove the melted wax from heat, and quickly stir in 1 ounce of essential oils. Mix it well for about a minute, so the scent is evenly distributed. The aroma should start wafting up—so lovely!
Step 9: Cool Down
Let your wax cool to around 140°F before pouring it. This helps prevent cracking when the candle sets. Skipping this step can lead to an uneven surface!
Step 10: Pour into the Container
Carefully pour the warm wax into your prepared container, being cautious not to disturb the wick. Leave about half an inch from the top to allow space for decorations or air.
Step 11: Center the Wick
To keep your wick centered, place a pencil or skewer across the top of the container and rest the wick on it. This step truly helps ensure your candle burns evenly!
Step 12: Set the Candle
Let the candle set undisturbed at room temperature for about 2-3 hours or until completely hardened. The candle should feel firm to the touch.
Step 13: Finish the Wick
Once your candle is set, trim the wick to about 1/4 inch above the wax surface. This length is perfect for a clean, even burn.
Step 14: Decorate the Candle
If you're using decorative elements, sprinkle your dried flowers, herbs, or glitter on top while the wax is still soft. Give it a gentle press so they adhere nicely!
Common Mistakes to Avoid
- Rushing the wax cooling. If you pour too hot, the wax can crack. Always check the temperature!
- Wick not centered. If the wick sways while setting, it can create an uneven burn. Use the skewer method to keep it in place.
- Pouring too quickly. If you pour too fast and cause splashes, your candle might not look perfect. Take your time!
- Ignoring scents and dyes. Remember, these should be added while the wax is still warm. Waiting too long can cause them to settle at the bottom or not mix well.
- Using old essential oils. Refresh your stock! Old oils might not give the fragrance you’re expecting.
Make It Your Own: Variations and Ideas
- Color variations: Use festive color combinations—reds and greens for the holidays or soft pastels for spring!
- Scent variations: Mix and match different essential oils for a signature candle blend. How about a citrus-lavender combo?
- Decorative themes: Try different natural embellishments like cinnamon sticks for an autumn feel or dried rosemary for a fresh touch.
- Container alternatives: Use teacups, small tins, or even seashells for themed decorations.
- Giftable ideas: Make a set of candles in different sizes and scents for gifts! Nothing says "I care" like a handmade candle.
I can’t wait for you to try this DIY project! Candles bring warmth and personality into any space, and making your own is simply wonderful.
Before You Go
Pin this for the next rainy afternoon: Save this tutorial to your Pinterest board to revisit when you're ready to make your next DIY candle! You’ll want to remember the steps, especially for the melting time and wick placement.
Come back and tell me how it went: No question is too small, so feel free to ask if you get stuck! I’d love to hear about any bumps along the way or how yours turned out.
Show off what you made: I’d be thrilled to see your creations, so don’t be shy! Happy candle-making!